
Introduction
The main overall goal of the 3D Printing Automation team has been to create a process for continuous printing without the need for human intervention. The project was inspired by a request from Michigan Technological University to create hundreds of copies of a husky statue using a 3D printer. Our design was implemented on the LulzBot Taz 6 3D printer. The automation of a 3D printer opens up possibilities of overnight printing and printing of a large number of objects without the need for a human operator to remove the completed prints or start new prints. This project also works to implement remote operation of the device, allowing for the ability to create multiple projects on a 3D printer in a work-from-home setting.
Functional Requirements
The functional requirements are the goals that were set to be achieved at the beginning of the semester. These goals all support the main goal of fully autonomous 3D printing.
- The device will be created from fully open-source hardware and software.
- This goal was part of the inception of the project. It was achieved after converting the 3D modeled parts of the printer from Fusion360, a paid 3D modeling service, to FreeCAD, an open-source software.
- The device will be physically implemented into the design of the 3D printer.
- Meeting this goal is self-evident.
- The device will be able to remove completed prints from the build plate without the intervention of a human operator.
- A test print with a surface area of 10cm2 was successfully removed from the print bed without the need for human intervention, so this goal was met.
- The device will be fully detachable from the 3D printer with the use of simple hand tools.
- The device can be removed from the 3D printer using an allen wrench and screwdriver.
- Queuing of prints will be possible while the device is running.
- This is possible by using the Octoprint user interface to upload and add another gcode file to the queue.
- Webcam for time-lapses will be mounted to the printer with a fully 3D printable mount.
- A 3D printed webcam mount was implemented onto the device to meet this goal.
- The implementation of the device will be well documented.
- The steps taken to realize this project can be seen documented below in the “Implementation” section of this document. Further documentation may be made available on the OSHE website in the future.
Value Added Goals
The value added goals are secondary to the functional requirements. Value added goals are not requirements for the completion of the project, but the implementation of any one of them demonstrates skill and the polish level of the project.
- The documentation of the device will be available on the OSHE website.
- This document will be available on the OSHE website with the steps needed to replicate our design. CAD models of 3D printed parts are also available on the OSHE website.
- A video will be recorded of the device removing a test print from the build plate.
- Many timelapses have been recorded of test prints, however most printing was done off camera. Although this goal was not fully met, the device does remove completed test prints from the bed without human intervention.
- Print queuing will be possible both locally and remotely.
- Prints can be queued locally by accessing the Octoprint UI on the same network as the raspberry pi. Remote access is possible by using port forwarding or by using a remote access Octoprint plugin, like OctoEverywhere.
- An alert system may be implemented in order to remotely alert the user of failed print jobs or failed removal of prints from the build plate.
- An open-source alert software for 3D printers was used to meet this goal. This software, named Obico, can be found for free online. Implementation of this software satisfies this value added goal and also supports the open source nature of the project.
Implementation
Please find below a list of steps taken to create this project in its current state. These steps may be replicated to reproduce this project by anyone, supporting its open-source nature. These steps assume purchase of the optional raspberry pi. If one is not purchased, the user will have to combine gcode files manually with the scrape script in between each to create a queue of prints.
- Buy the Raspberry Pi, stepper motors, lead screws, and flex couplers from the bill of materials.
- Use a 3d printer to print the motor mounts, hinges, carriage clips, shaft mounts, carriage mounts, and the scraper support with 100% infill (link to files).
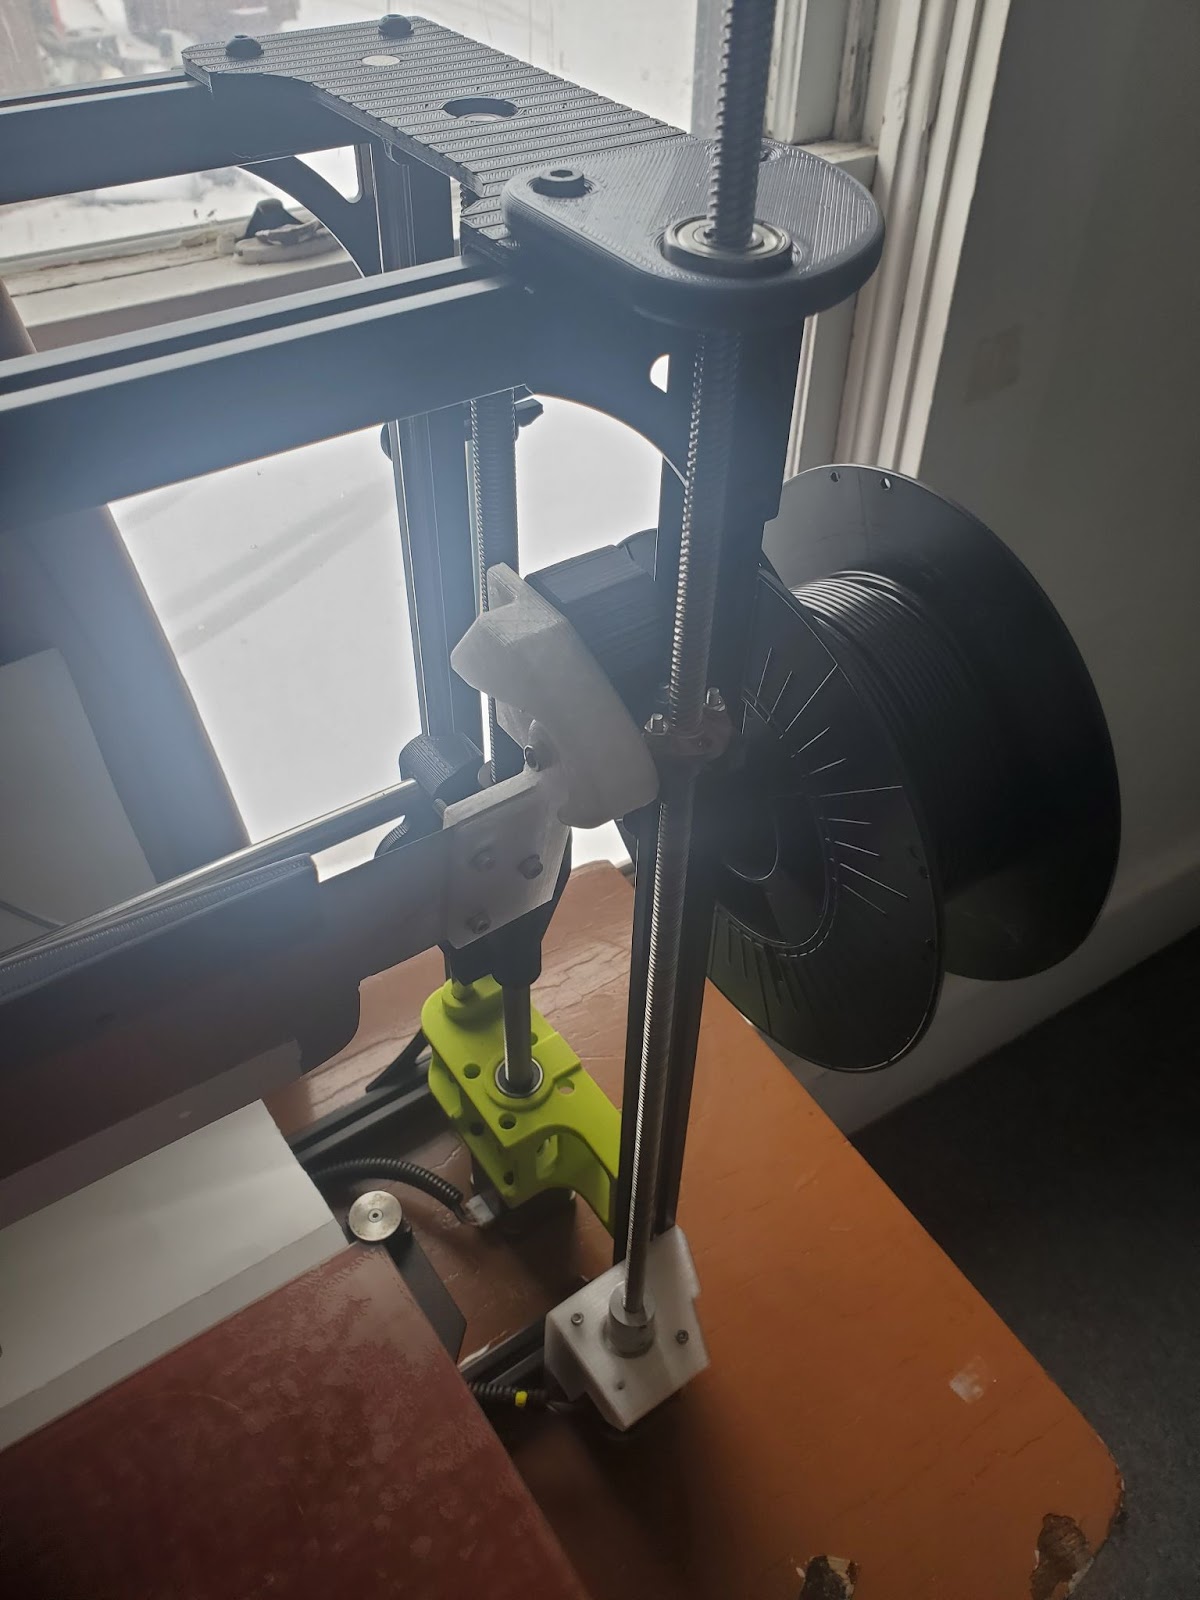
- Assemble and attach parts to the Lulzbot Taz 6 according to the photo and mirror on the other side.
- Compile and install modified firmware to allow the use of the extruder 2 motor controller without a temperature sensor connected.
- Wire both stepper motors to the extruder 2 output on the back of the printer, taking care that they both turn in the same direction when given the same input.
- Connect the raspberry pi to wifi.
- Install Octoprint on the raspberry pi and install the Continuous Print plugin from within Octoprint.
- Connect the raspberry pi to the printer over USB.
- Paste the print scraping script into both the “Clearing script” and “Finished script” sections of the continuous print plugin settings, see picture.

- Download the Lulzbot Taz 6 printer profiles and import them into PrusaSlicer
- Slice your model and upload it to Octoprint.
- Add upload to queue and print. Note: make sure the scraper is 100mm from the bed before starting the first print.
Resources
Please find below in Table A a list of links to the open-source software that was used for this project. The sites from which the software was taken are hyperlinked below in the “Software Used” column.
| Software Used | Purpose |
| OctoPrint | 3D Printer Interfacing |
| PrusaSlicer | Slicing 3d Models to be Printed |
| FreeCAD | 3D Modeling |
| Obico | Alert System and Monitoring |
Bill of Materials
Please see below in Table B the bill of materials for the implementation of the project. This bill of materials assumes that the LulzBot Taz 6 3D printer has already been purchased before implementing our device.
| Part | Quantity | Price |
| Raspberry Pi 3 Model B (optional) | 1 | $35.00 |
| NEMA 17 Stepper Motor | 2 | $12.98 x 2 = $25.98 |
| 500mm T8 Lead Screw | 2 | $18.99 x 2 = $37.98 |
| 5mm to 8mm Flex Coupler | 2 | $3.49 x 2 = $6.98 |
| Motor Mounts | 2 | (0.0347kg x 2) x $25/kg = $1.74 |
| Hinges | 2 | (0.0329kg x 2) x $25/kg = $1.65 |
| Carriage Clips | 2 | (0.0178kg x 2) x $25/kg = $0.89 |
| Shaft Mounts | 2 | (0.0292kg x 2) x $25/kg = $1.46 |
| Carriage Mounts | 2 | (0.0535kg x 2) x $25/kg = $2.67 |
| Scraper Support | 1 | 0.0443kg x $25/kg = $1.11 |
| Total (With Raspberry Pi) | — | $115.46 |
| Total (Without Raspberry Pi) | — | $80.46 |
Prices were calculated using PrusaSlicer’s weight measurements for a PLA object and multiplying by the standard price of filament of $25 per kilogram.
Next Steps
To continue working on this project, there are many areas for improvement. The most obvious path forwards would be to devise and implement different designs for the scraper. The current design of the scraper can struggle with objects that are too wide or tall; this could be remedied with a sawtooth design or a multi-pronged scraper, but testing is yet to confirm this. The scraper is detachable from the device, so swapping it out for other scraper attachments should also be made easier. Currently, there are 6 screws holding the scraper in place. A design that is more easily detachable from the device is an obvious step forward for the project.
Another area of improvement is the method in which the print is removed from the print bed. Currently, the print bed must be heated to 110℃ before the bottom of the print is heated enough to be safely removed by the scraper. This heating cycle can take a long time, depending on the print. A temporary solution to this has been found; coating the print bed in beeswax allows the scraper to remove the print with little error at a lower temperature. Still, this is only a short-term fix. A possible solution would be to begin reheating the bed while the print is still being finished. This will reduce the time the printer spends idling while heating the bed. Further modification of the bed may also improve performance. A textured glass bed like Anycubics “Ultrabase” allows for good adhesion when the bed is hot, but is less adhesive when cold. Using this print bed could possibly allow for more seamless printing of multiple print jobs.
Since many parts of the device are 3D printed, they can be reproduced by any individual with a 3D printer at a low cost. This is reflected in the bill of materials. The 500mm T8 Lead Screw which is used to move the carriage up and down makes up almost a third of the total cost. For an open source project, it is important for the barrier of entry to begin working on the project to be rather low. This rather expensive lead screw heightens the barrier of entry, so a lower cost alternative would help support the open-source nature of the project.
In that same vein of promoting open-source hardware, making the device compatible with other 3D printers is an obvious step forward. This is much easier said than done, as the device, at its inception, was always intended to work well with the LulzBot Taz 6 due to its unique power output capabilities. Finding a way to allow other 3D printers to utilize this device would be a huge improvement upon the original project.
Conclusion
The 3D Automation project made great progress within the span of a few months and has a clear path of improvement going forward into the coming semesters. Working with the multiple softwares needed to make the project succeed has strengthened familiarity with open-source projects and 3D printing as a whole. Moving forward, the project has much to work on with different scraper designs, print removal strategies, and enhanced compatibility as the main points of improvement. Now that the device can successfully remove completed prints, it is important now to refine its process.