
Spring 2024
Update 1
Week 1 To Do list
- Read Lasersaur website information
- Read past OSHE documentation
- Test Lasersaur to figure out what is wrong with it
My only concern for next week is that we will not find any leads as to what is wrong with the lasersaur
Update 2
We managed to find a broken part [Figure below] on the Lasersaur but while searching through documentation both internally and on the Lasersaur website we were unable to find any model of said part. We were able to look through most of the CAD files but still have a few left. While this is certainly not the problem with the machine it is a start and looking through the CAD files and other documentation has got us more familiar with the machine. For next week my partner will continue to look through the documentation while I look for this part specifically.
- Find part
- Look through the remaining CAD
- Ask last year’s Team if anyone has part
- CAD replacement
- print part
I’m very concerned that I will have to CAD a replacement part and neither I nor my partner have any CAD experience.
Update 3
I was able to identify that no model of our Lasersaur exists anywhere in OSHE documentation or on the Lasersaur Website. But I was able to find a replacement for the part we need at the Bottom of the Lasersaur drawer. I tried Installing It but was unable to because this part is slightly too large to fit. Seems like the previous part was filed down to allow it to fit on. Started filing but PLA does not file very well. We also got the Program installed but couldn’t tell if it was connecting will continue to test next week. Since this is a troubleshooting project we will essentially be repeating our to-do list of looking at the documentation and then testing the Lasersaur but with different Ideas.
- Test Connection further
We will be making sure that the program is connecting since we are not seeing any movement on the other end.
- Test limit Switches.
We think an error in the switches could be why the program isn’t moving the device so we will try to take a look at those next week.
Update 4
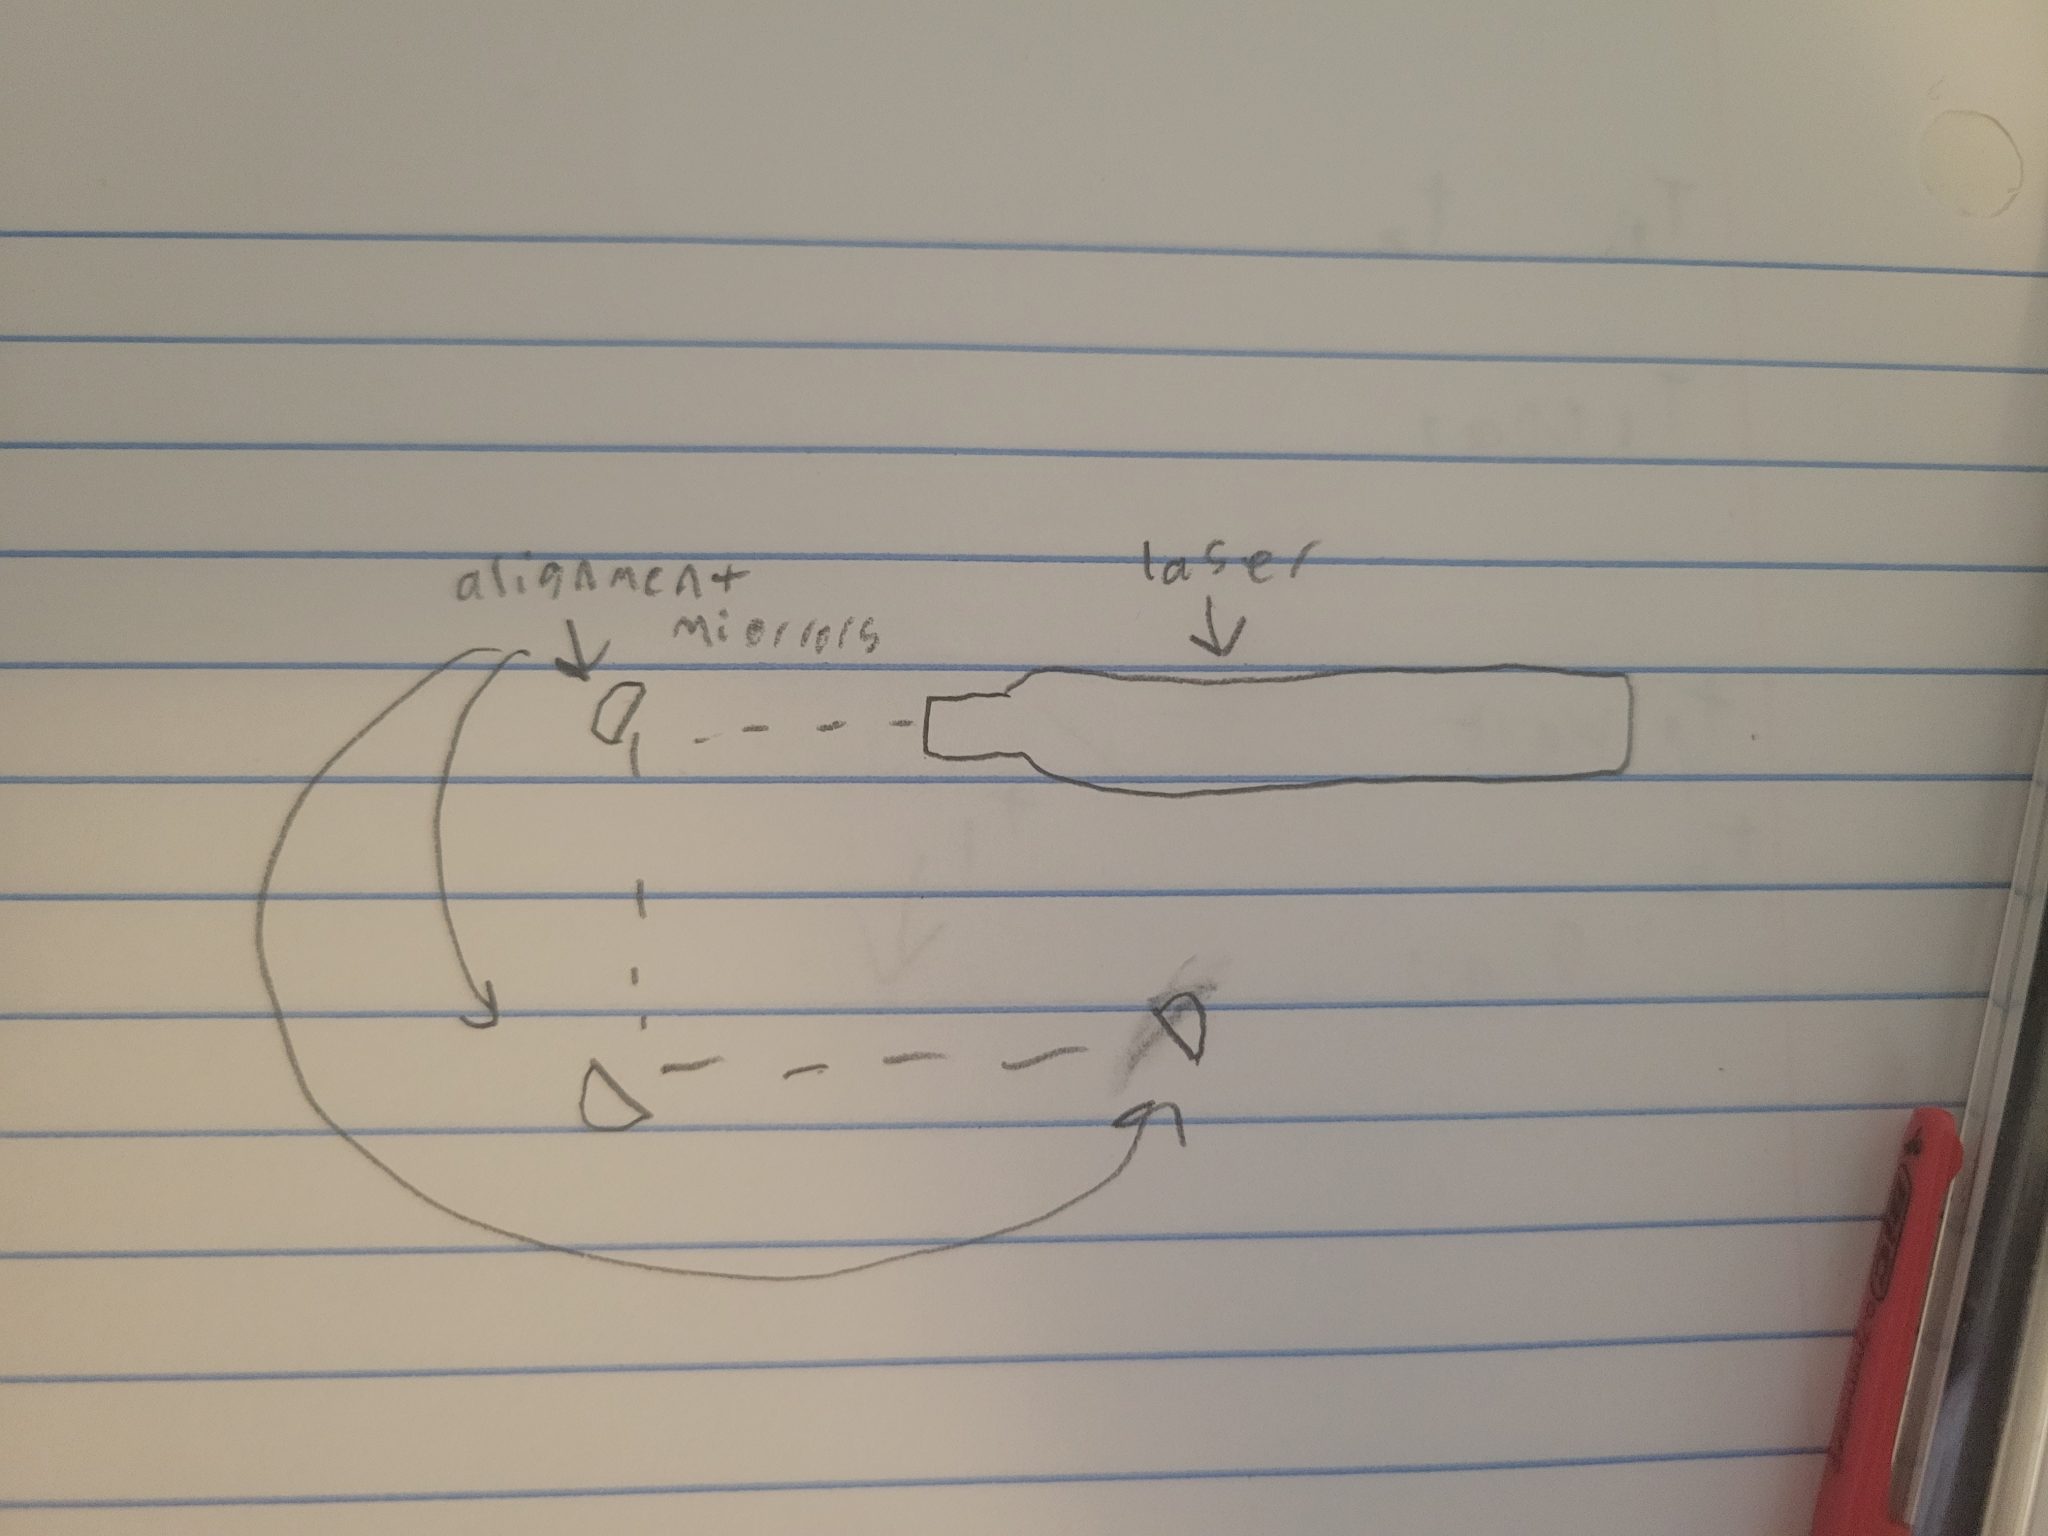
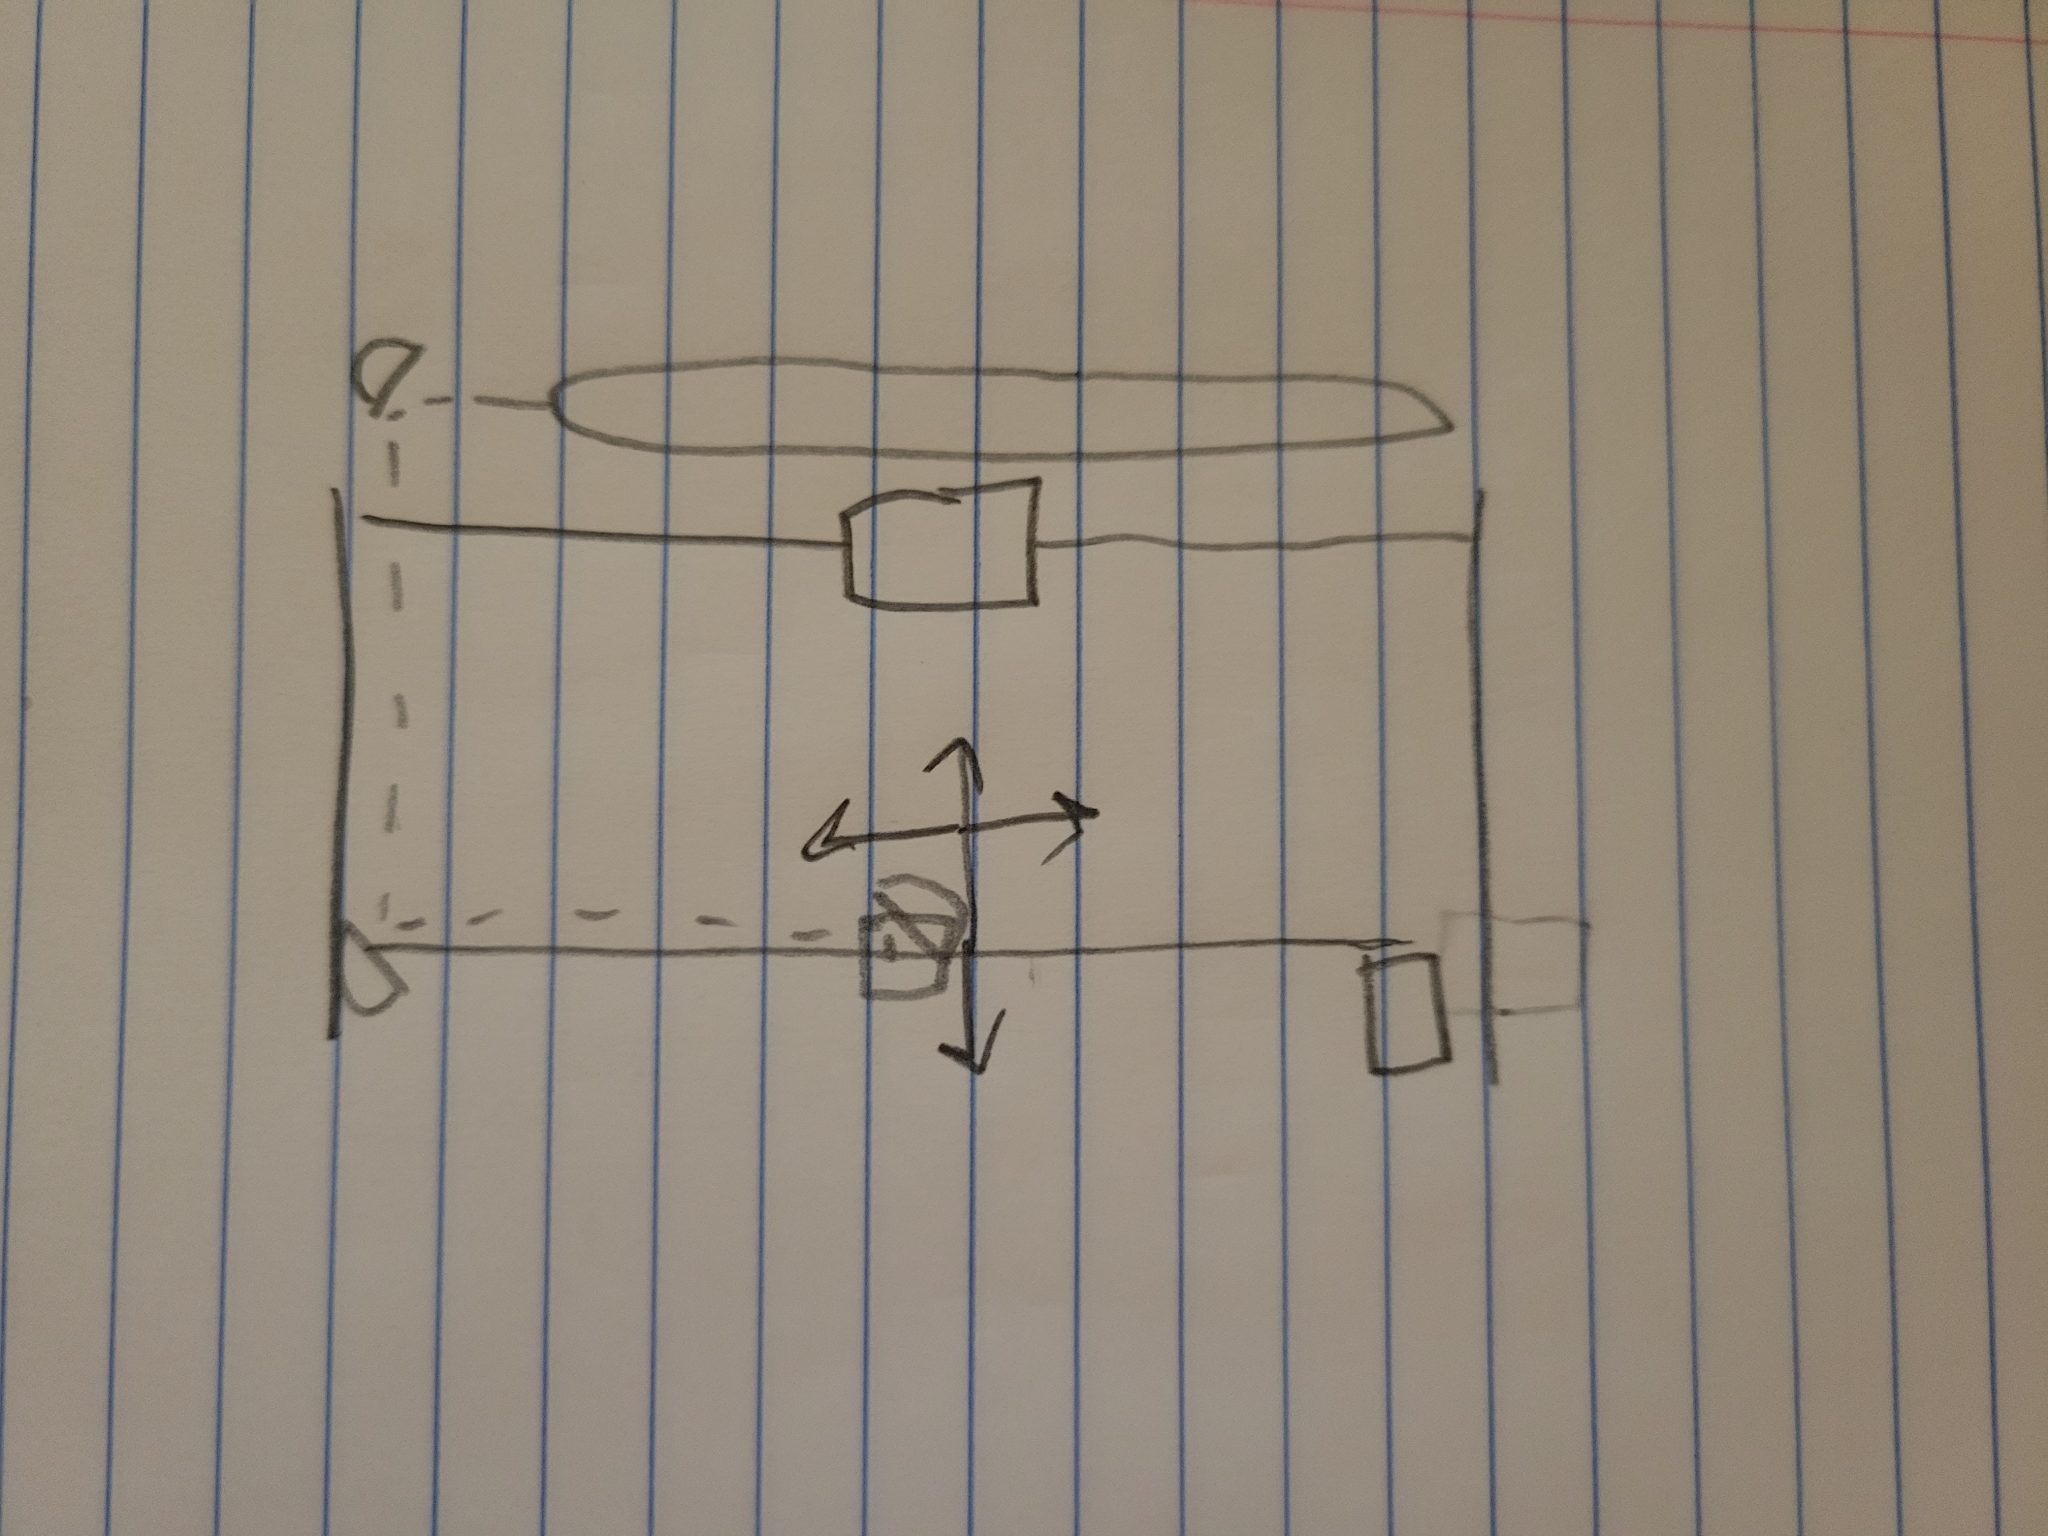
We have found out a major problem with the lasersaur the old alignment device did not have a straight laser making it so the device would never be able to actually align.
To Do
- Continue troubleshooting connection
- Take another look at the wiring
- Print new alignment device.
Im worried about the new device since neither I nor my partner have any experience in CAD or designing mechanical things.
Update 5
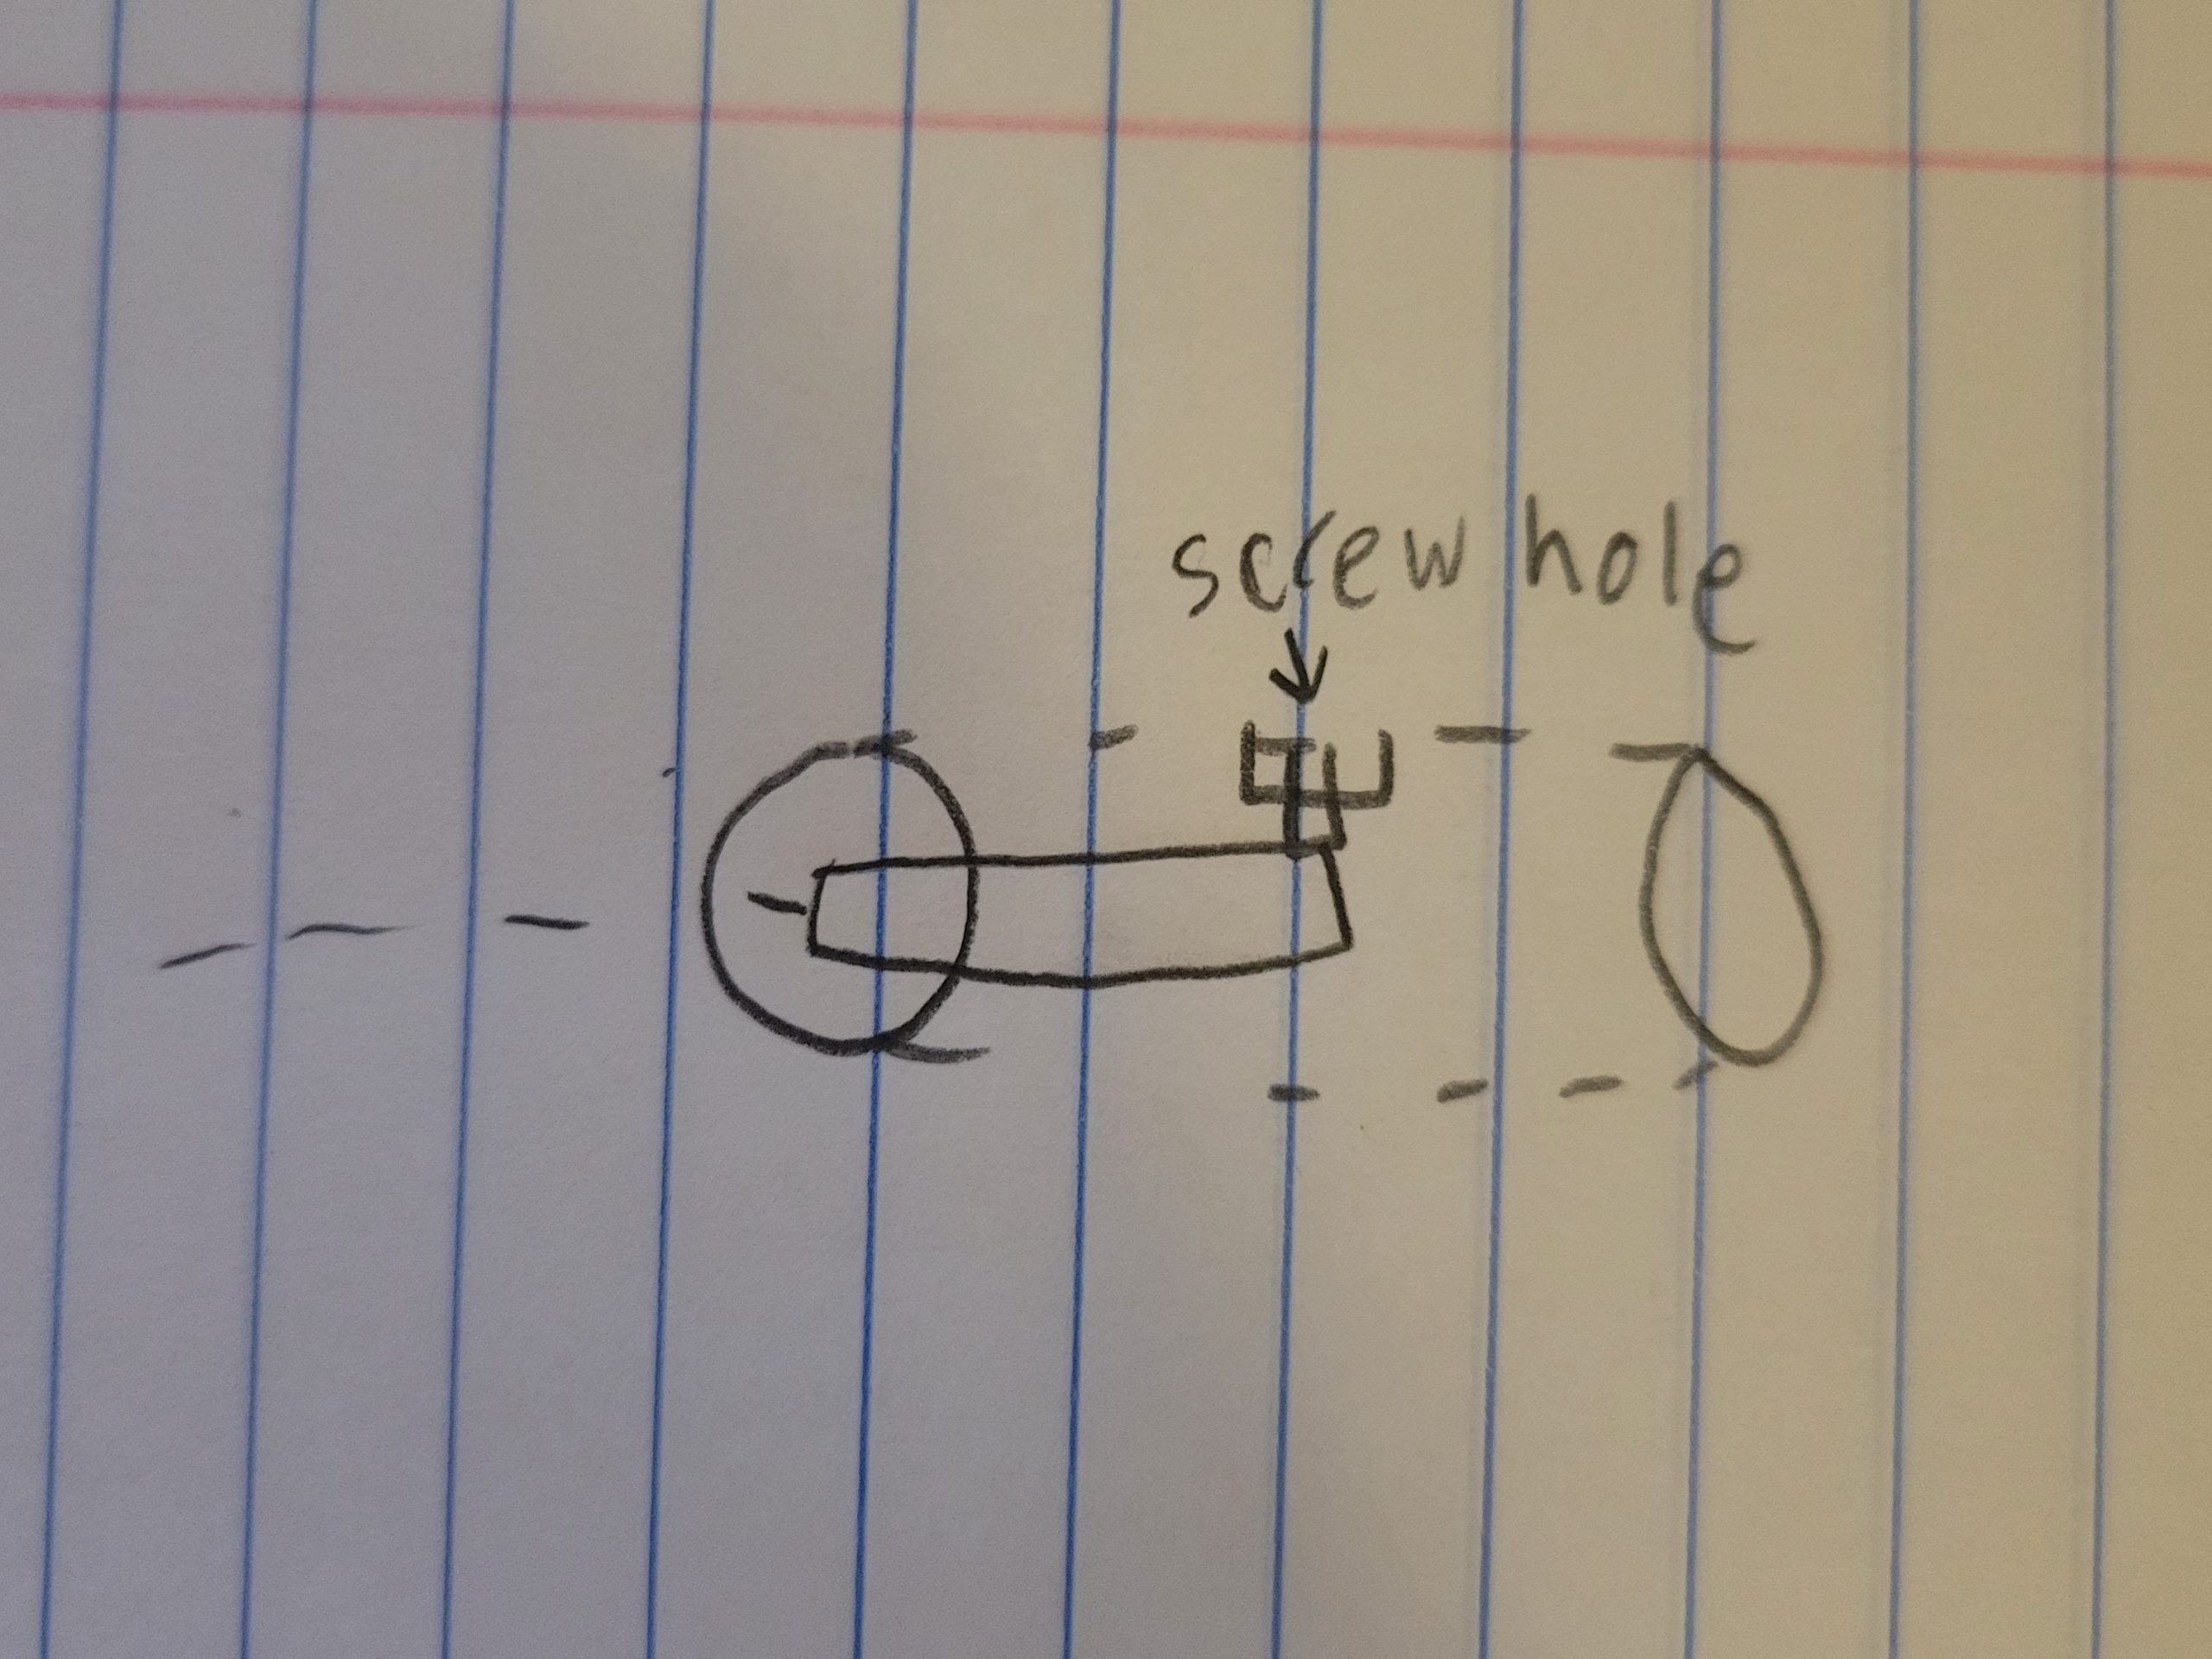
We made a lot of progress on our CAD but haven’t quite been able to figure out how to put the holes and hexagons in the part. We are going to use two screws to adjust the angle of the laser. These will screw into hex nuts that we glue into holes on the sides of the alignment device.
To Do
- Continue troubleshooting connection
- Take another look at the wiring
- Print new alignment device
I’m concerned because I cannot figure out how to use CAD.
Update 6
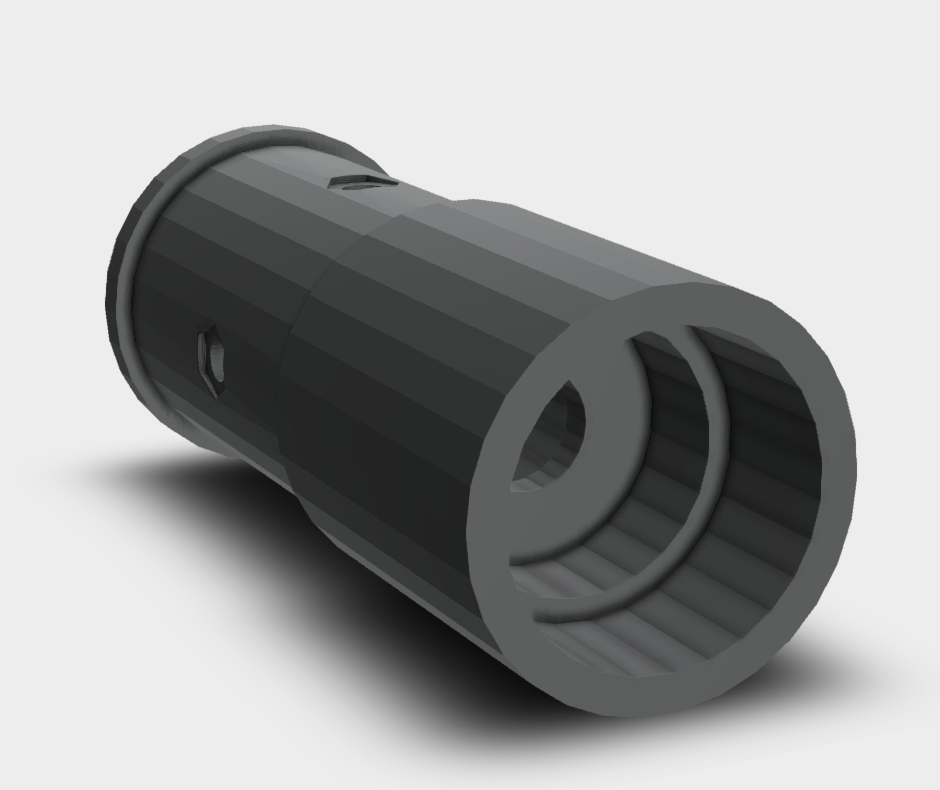
finally got the CAD model finished and have begun printing. I got an image from the cad file below and ill include a picture of the print in a future update. Now that we have that done we can test it and move forward on the other tasks.
To Do
- Continue troubleshooting connection
- Take another look at the wiring
retrace limit switches and make sure they are in the right spot on the board
- finish and test alignment device
put the nuts on the device and see if it can align the laser
My only concern right now is that we will have to reprint as we kept messing up our print.
Update 7
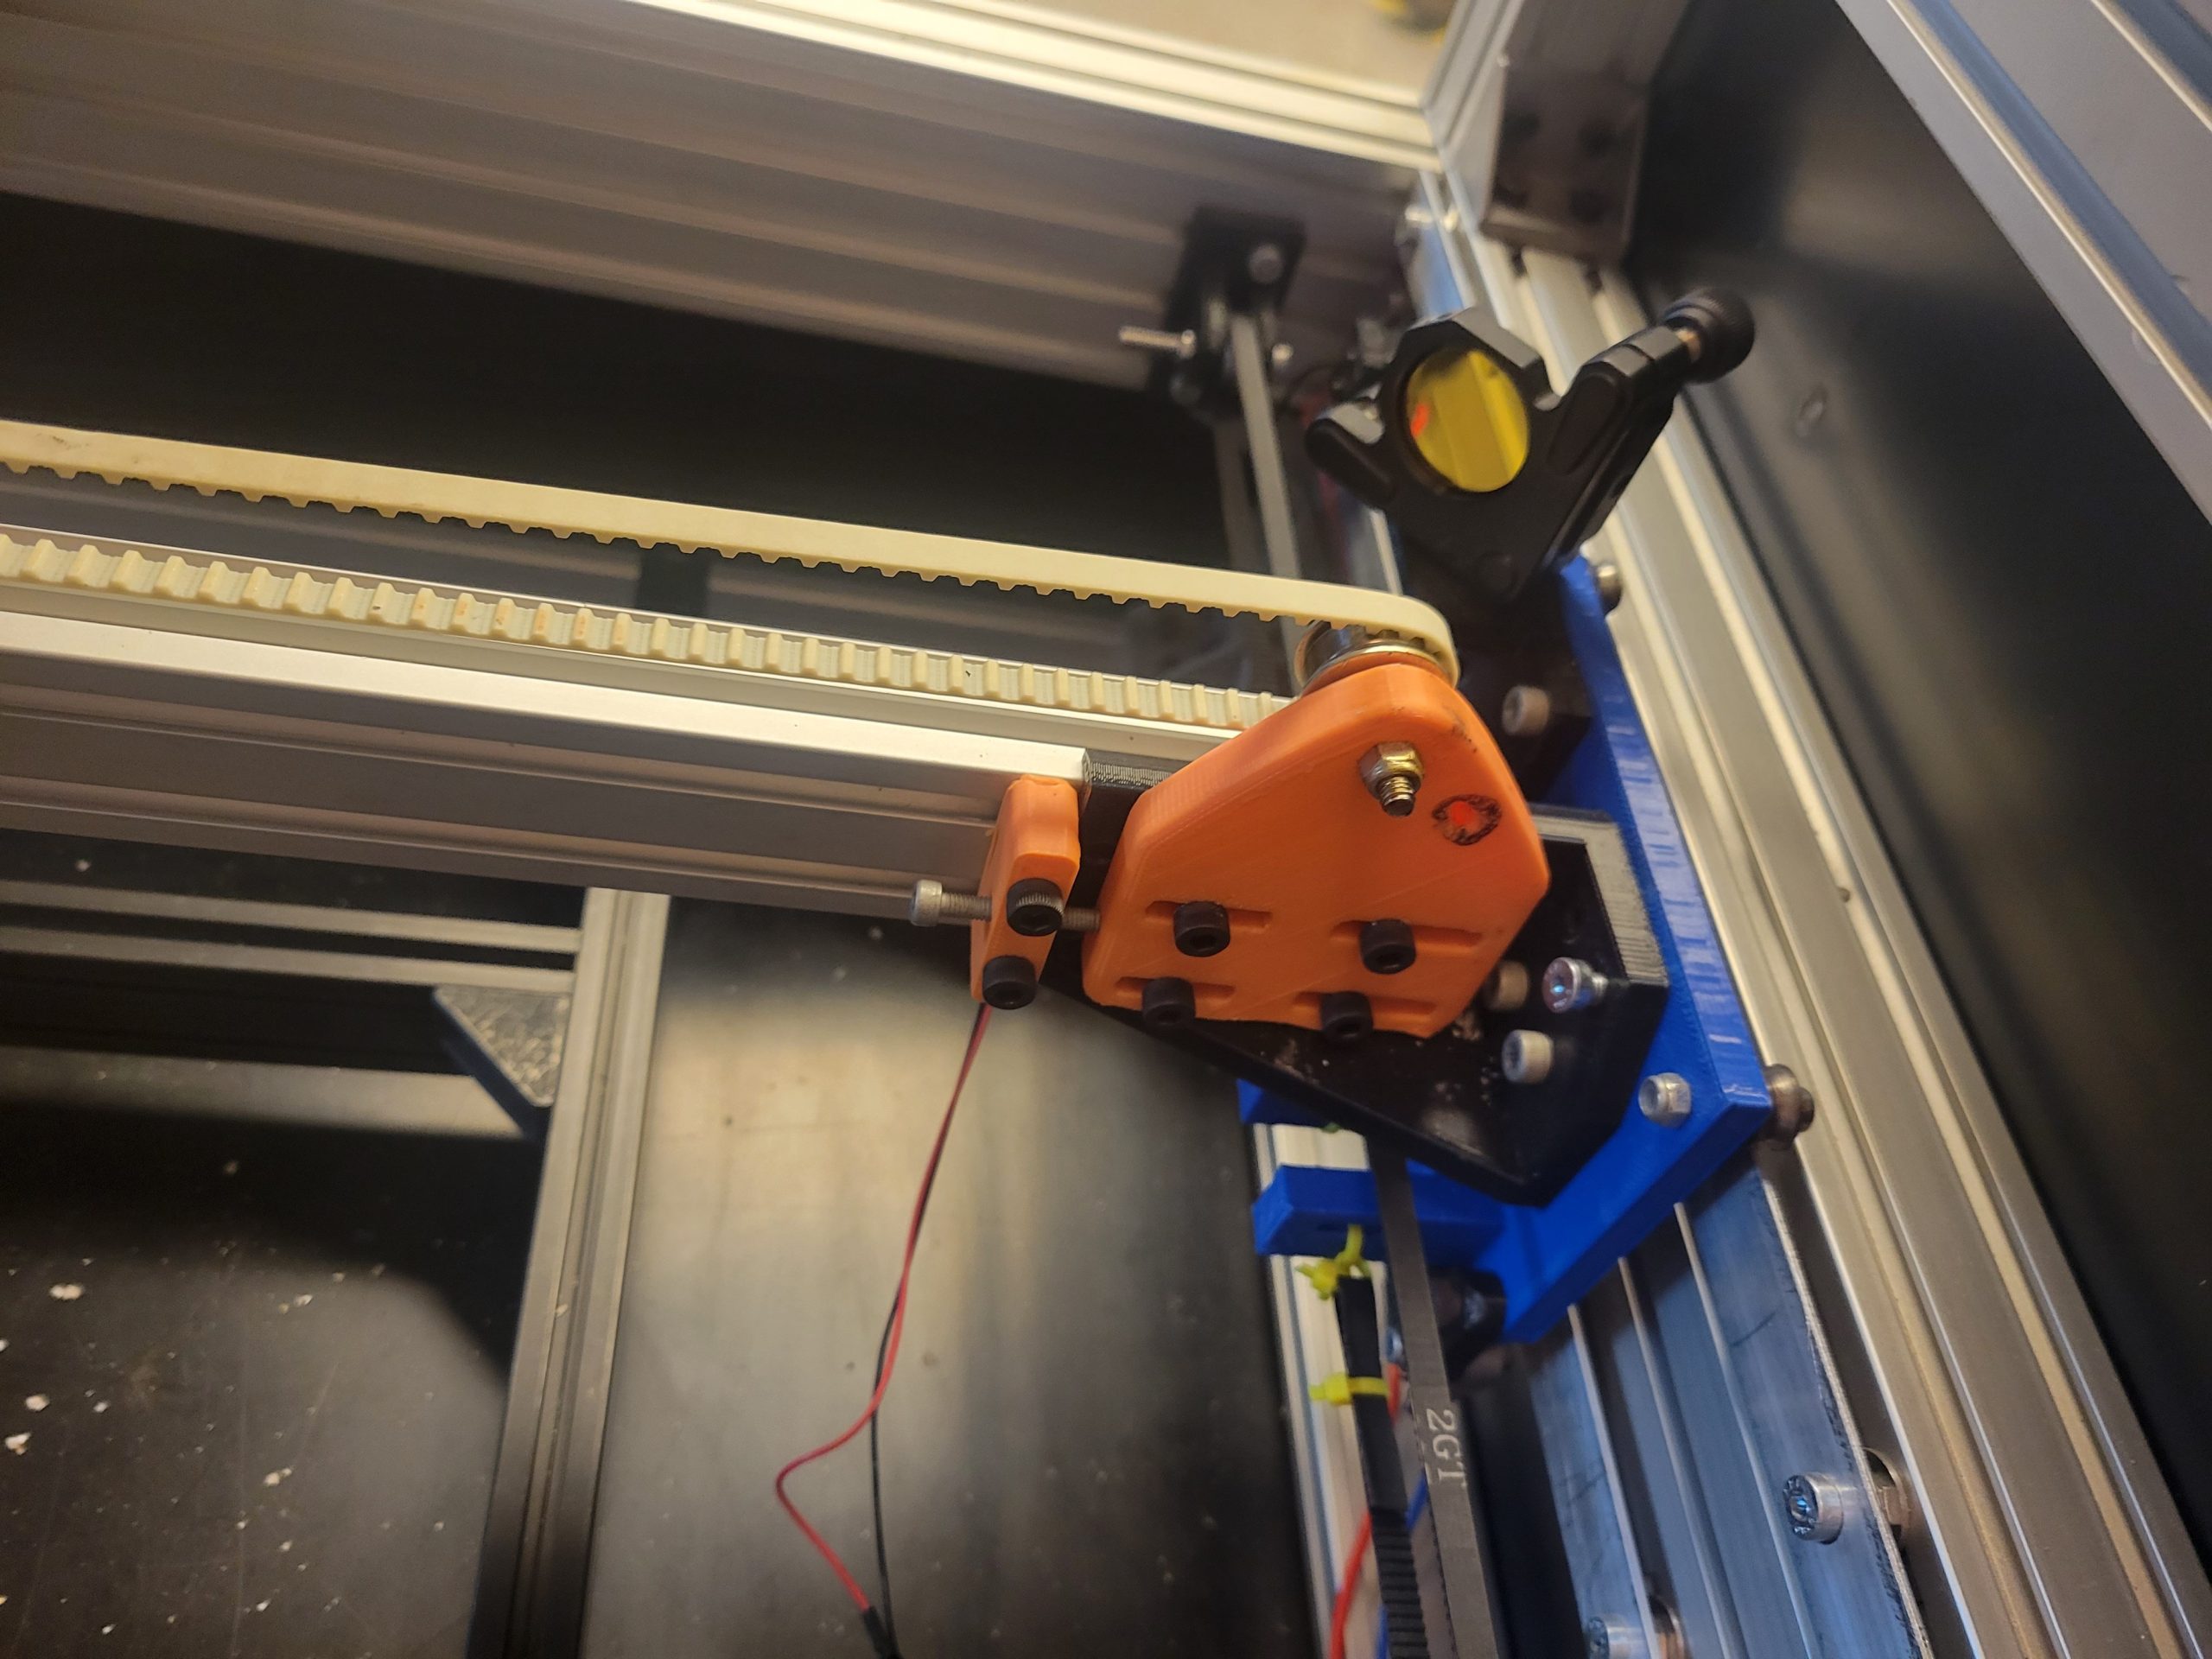
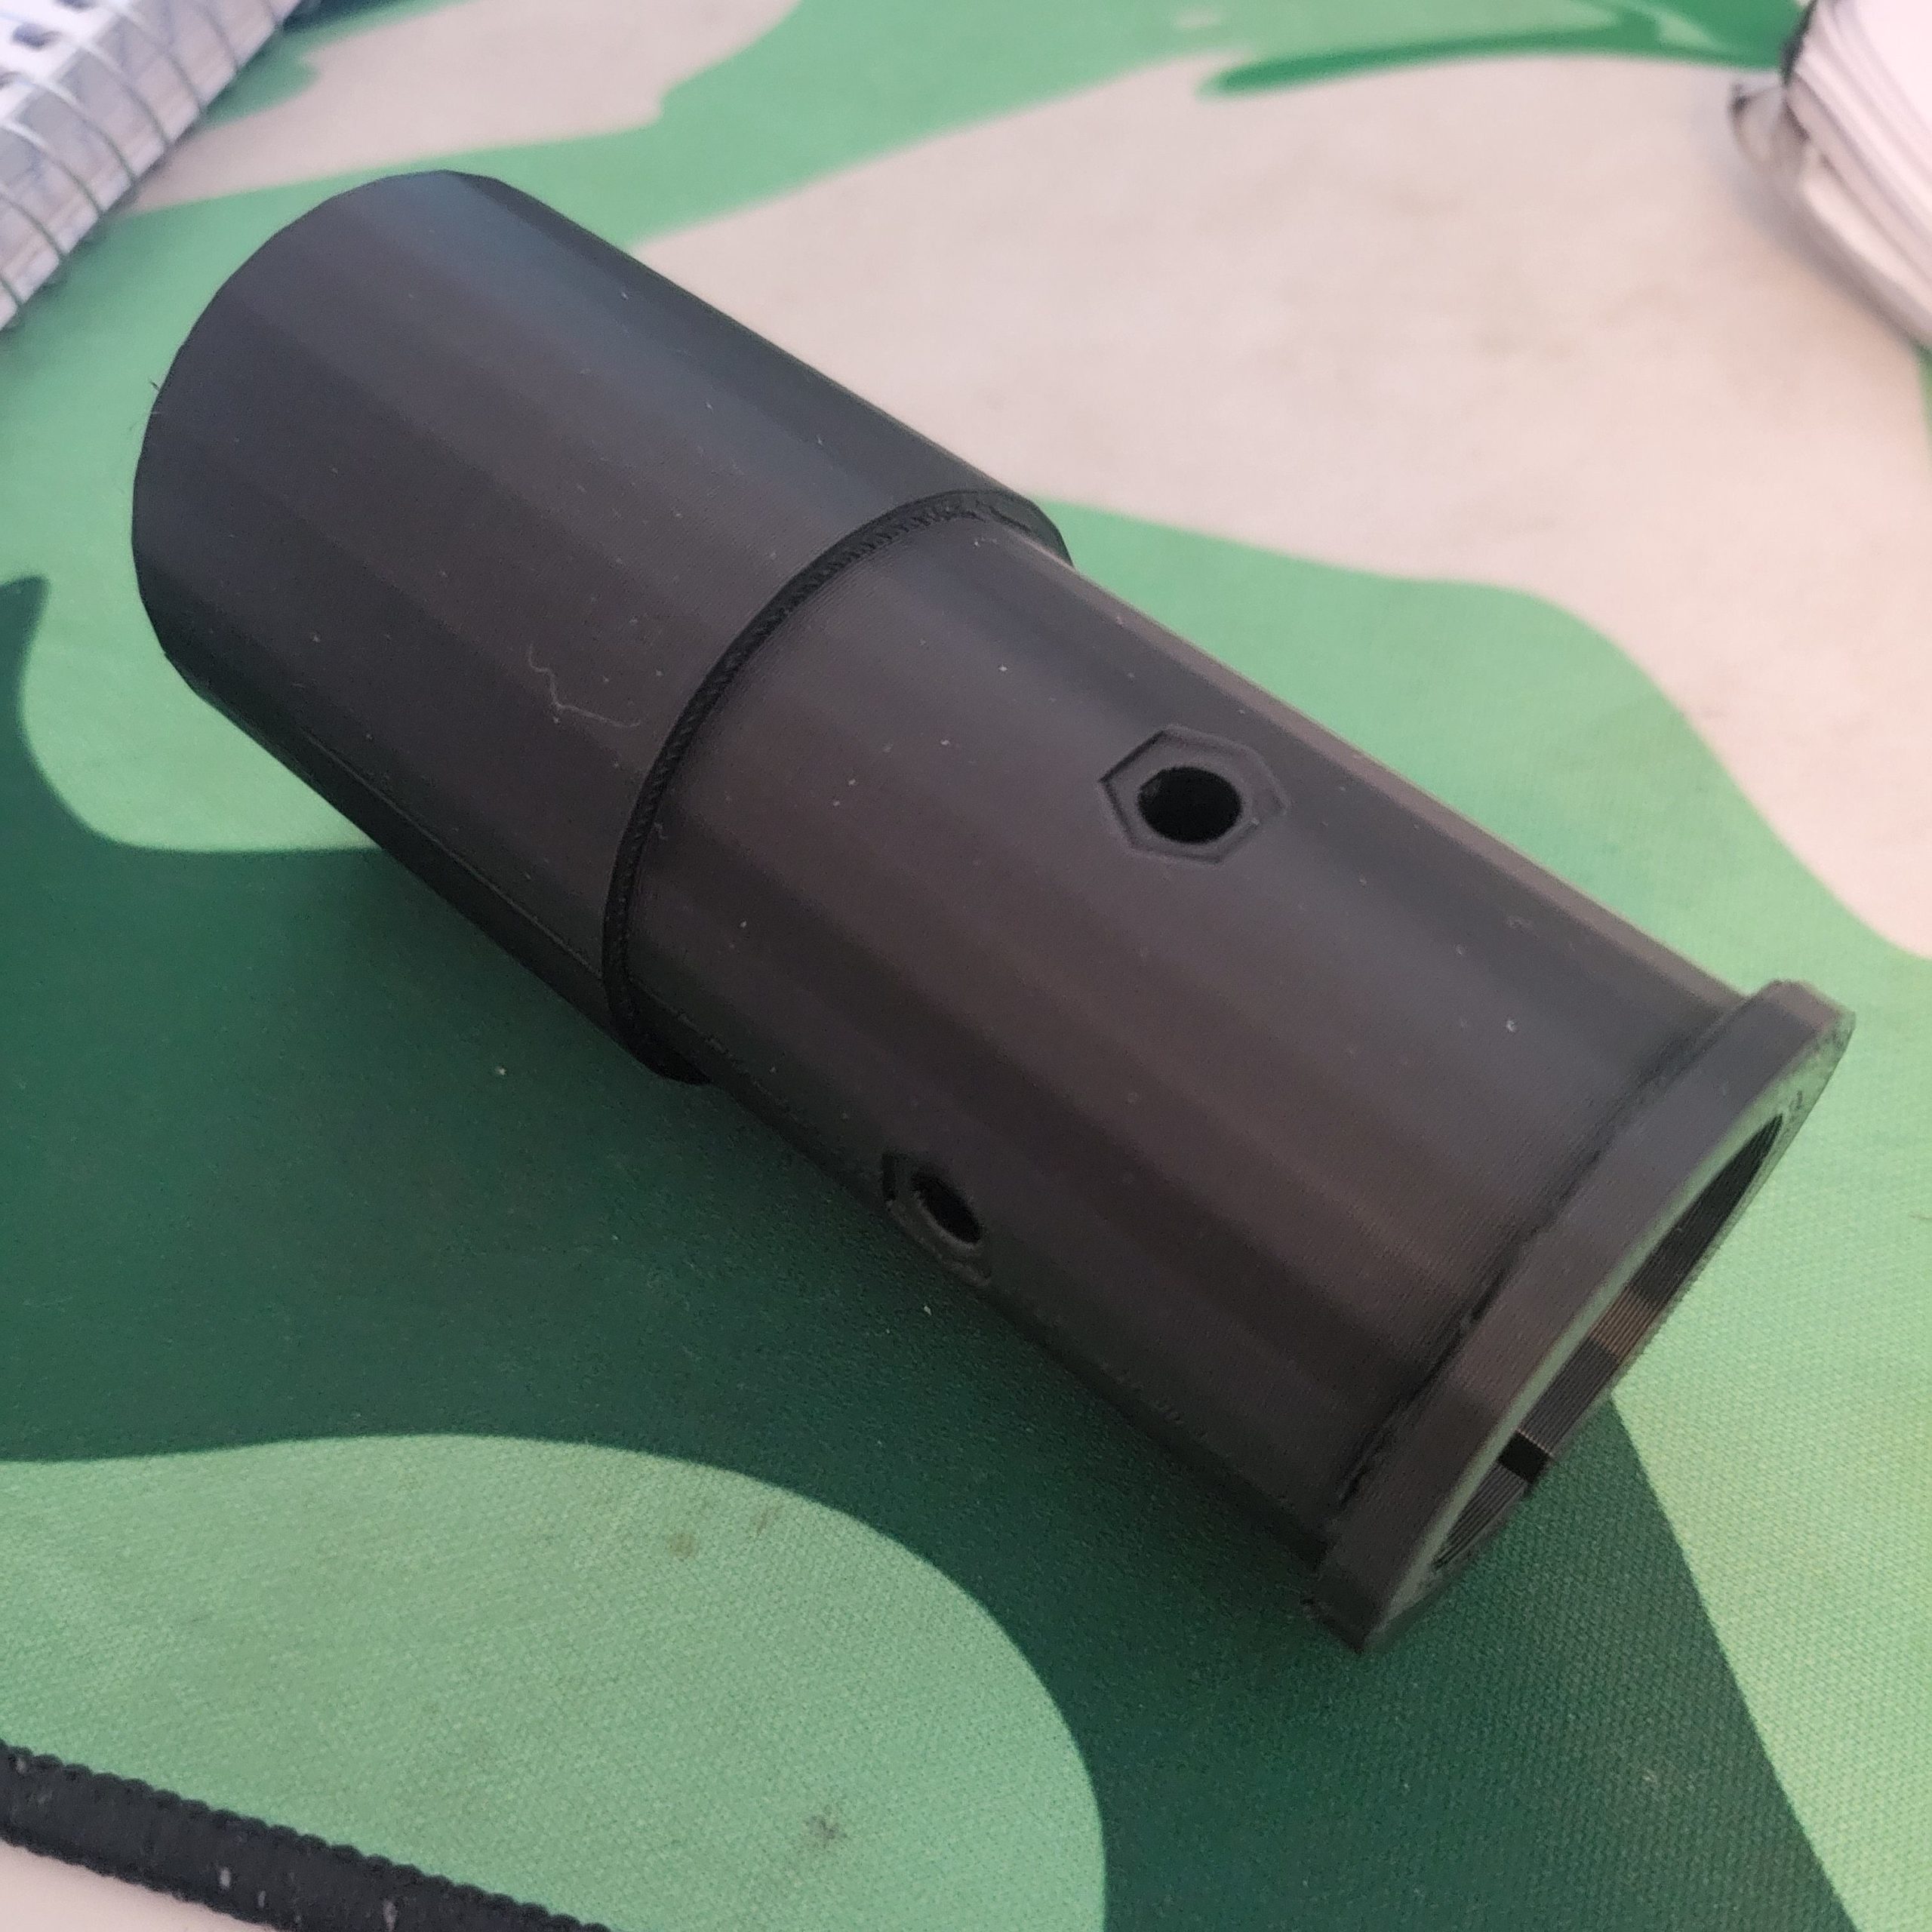
The print was good but the hex nut holes are two shallow also in CDR it was pointed out that we can’t rely on the fulcrum to apply pressure and should change up the design. I’ll need to redesign it next week. In the meantime we did some work on the connectivity and making sure we are connecting properly and that the wiring is set up right. I wasn’t able to implement it but after our meeting, I was let know by a previous student on the project that the water cooler currently has a loose wire.
To Do
- Continue troubleshooting connection
Meeting with Dr. Oberloier to help us test the connection.
- Fix wiring
Fix the loose wire
- design second iteration of the alignment device.
Im concerned about our meeting with Dr. Oberloier as I want to not look stupid and show him that we have been working hard on this project.
Update 8
Meeting with Dr. Oberloier went very well managed to determine that we are in fact connecting to the device but that the motors are not getting any power. This is strange because as soon as it connects the motors should have power will do further analysis on this soon. Also determined that the laser firing relay needs to fire and figured out that the water cooler needs to be on for the laser to fire but is not linked to the relay. Also fully disconnected laser as we made the high voltage arc.
To Do
- Test motors
track them and also figure out if they are in the board right.
- design second iteration of the alignment device.
determined that we will use 3 evenly spaced screws to align laser pointer, and am working on CADing this change
Update 9
Nearly finished new model just need to figure out how to get the holes rotated at 120 degree iterations.
To Do
- Test motors
track them and also figure out if they are in the board right.
- design second iteration of the alignment device.
small fixes left going to finish this up next week hopefully.
Update 10
had a surprise meeting with Joey Klapkowski a former student on the project and together we were able to test all the motor connections and determine that the problem was with software had to leave because of class but was told that after I left they found and error in the config file and after fixing it were were able to get the device moving. later i was able to finish CAD model and will print it next week.
To Do
- Test code to make sure the device actualy works.
- print alignment device
Update 11
Code works although we are having problems exporting items from autocad. Laser diode broke while testing and we cannot find another, will need to order it since otherwise we cannot align the laser. Also printed the wrong part and cant print the right one until later tommorrow week because of other final projects.
To Do
- Order new diode
- Print correct alignment device
- get some form of demonstation ready
Im concerned about our demonstration origninaly we could have just actually cut something but without the diode we have no way to safely use the laser. If it not here in time we will need to figure something else out
Update 12

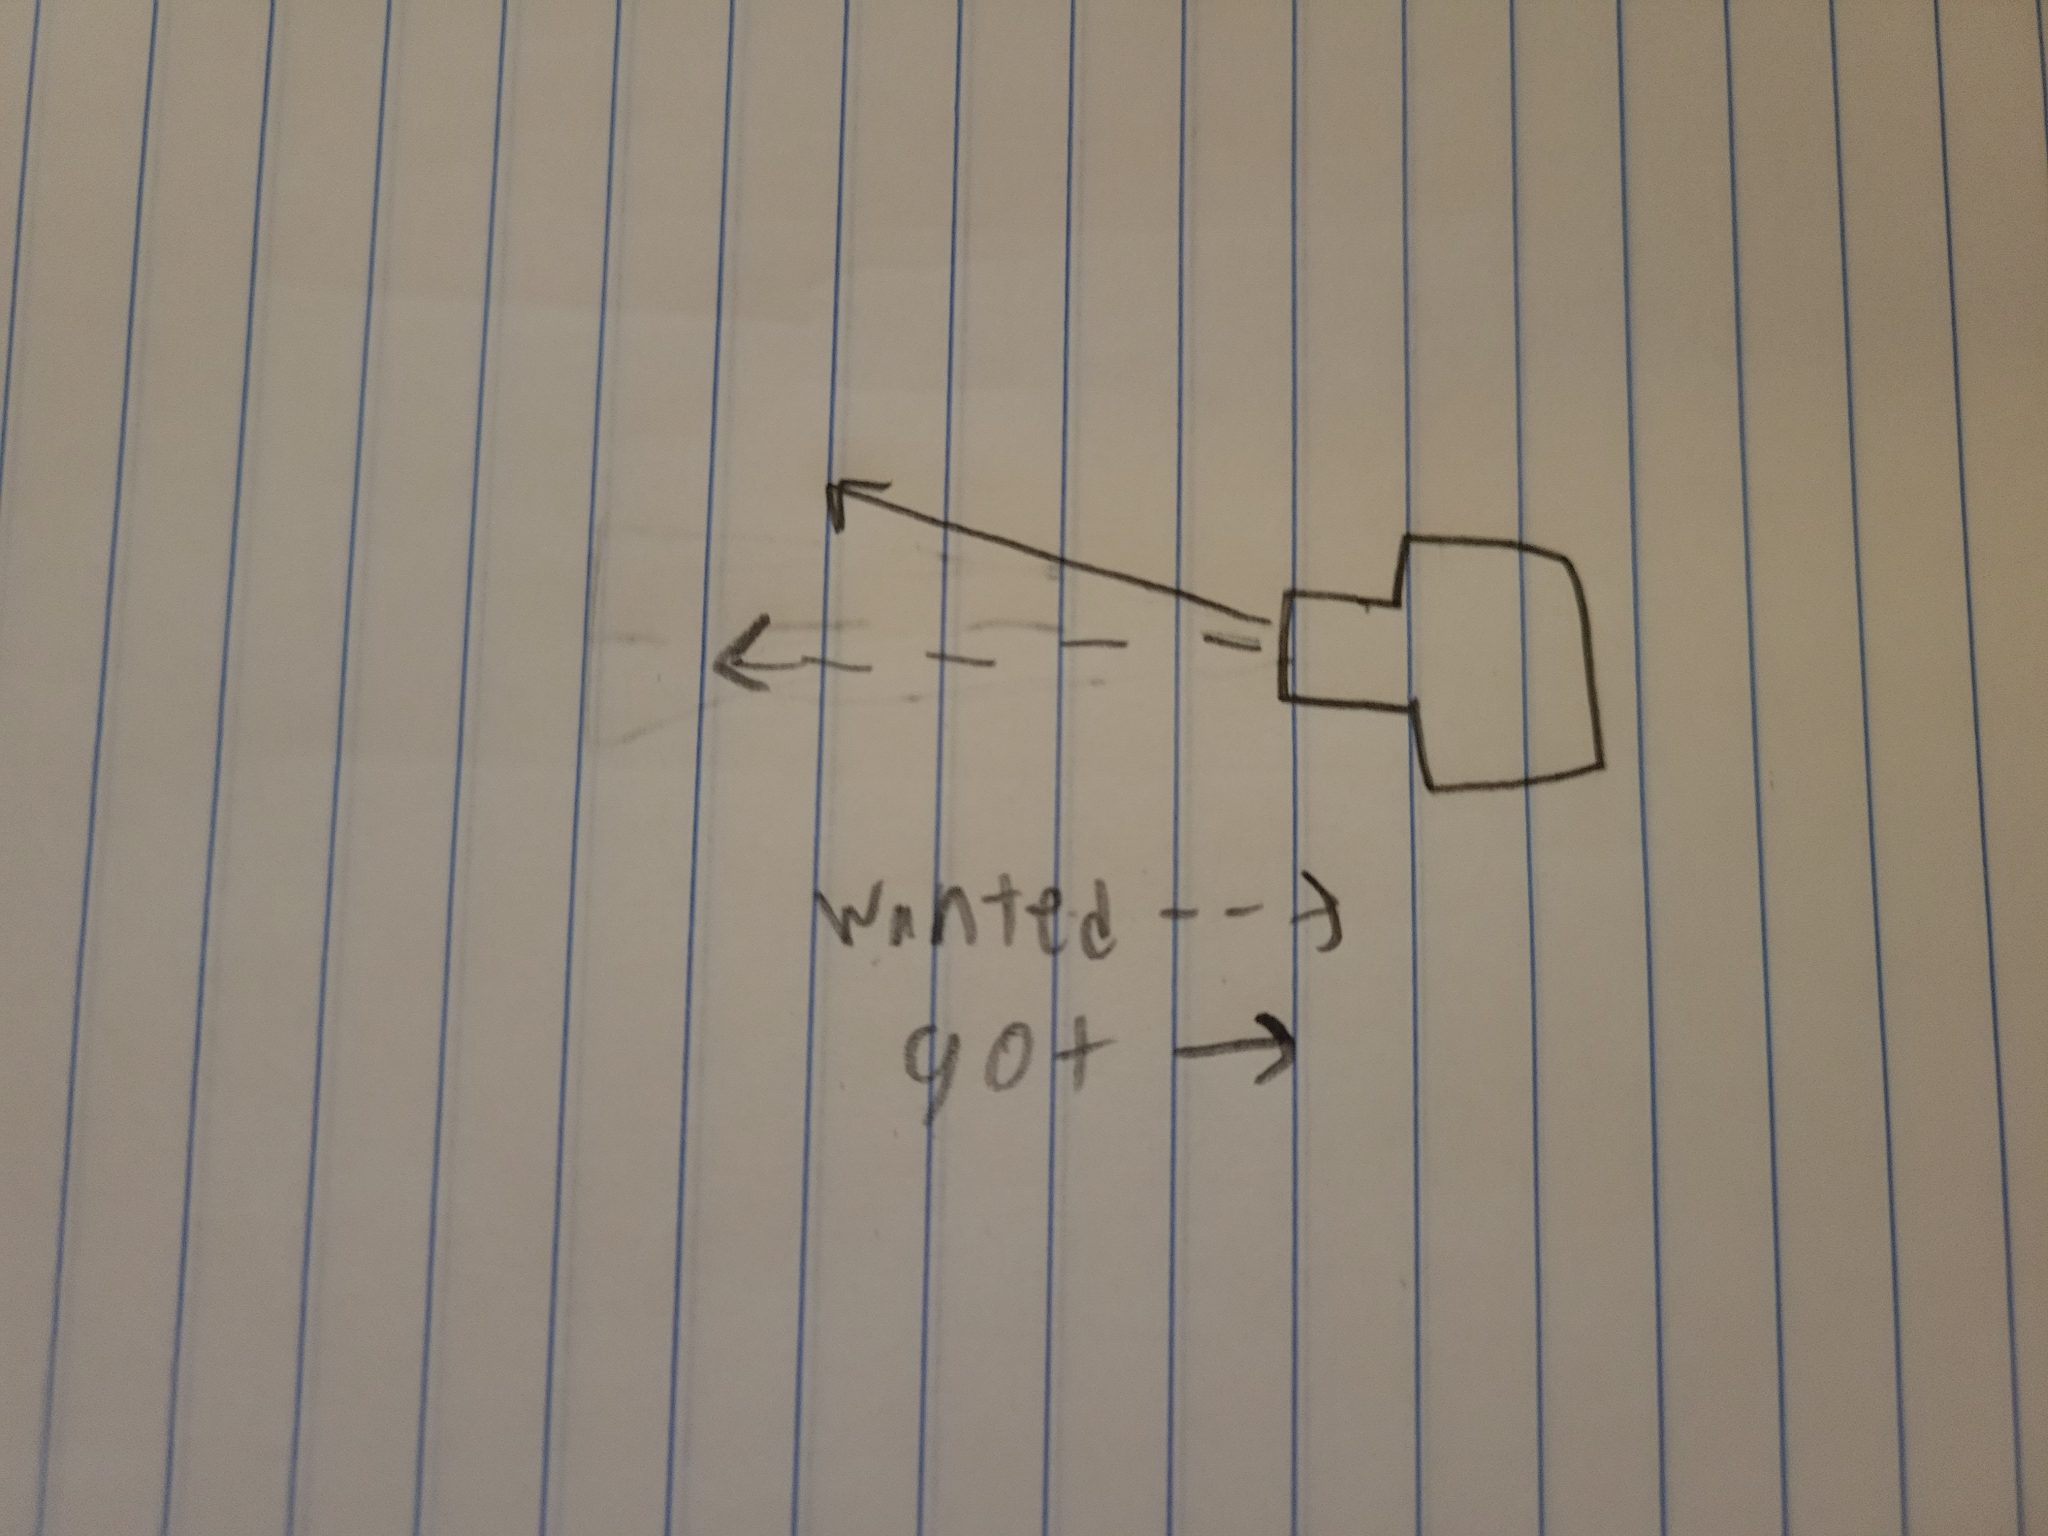
Device hasnt arrived but found a new solution managed to get videos/pictures of it drawing and painting for the media team and plan to have it paint for demonstration. While demonstrating we found that the Y axis is squished pretty badly will need to fix in the config most likely hopefully we can find it before demonstration.
To Do
- Get something for the device to paint.
- look thought config
I’m concerned that we will not be able to fix the Y-axis in time. but overall I’m really excited to show off all we have done this semester.
Fall 2024
Update 1
By the end of the semester, we are looking to have a robotic fish with all the things show in the sketch connected and working inside it. To accomplish this I’m looking into how different communication systems are affected by water as well as a effective way to water proof the fish.