
9/17/23 – 9/23/23
Unfortunately, I was busy with the MTU career fair, interviews, and studying for two exams, I was not able to get any work done for the project this week.
My goals for the next week are to start completing Functional Requirements 3 (Conduct thorough research of existing technologies to gain insights, inspiration, and a comprehensive understanding of the current state of relevant technology solutions available in the field) and 2 (Develop custom mold for chocolate bar production).
Semester 2 – Spring 2024
Week 1 – Week 3: As a team, we ordered some parts to start working on motorizing the extrusion of chocolate instead of pushing down the syringe with our hands. On the side, I have been working in CAD to try and make a peristaltic pump that can interface with the parts we ordered, including a stepper motor and Arduino Nano.
Dylan and I also met up and made a GANTT Chart to be able to better see our project scope over the course of the semester.
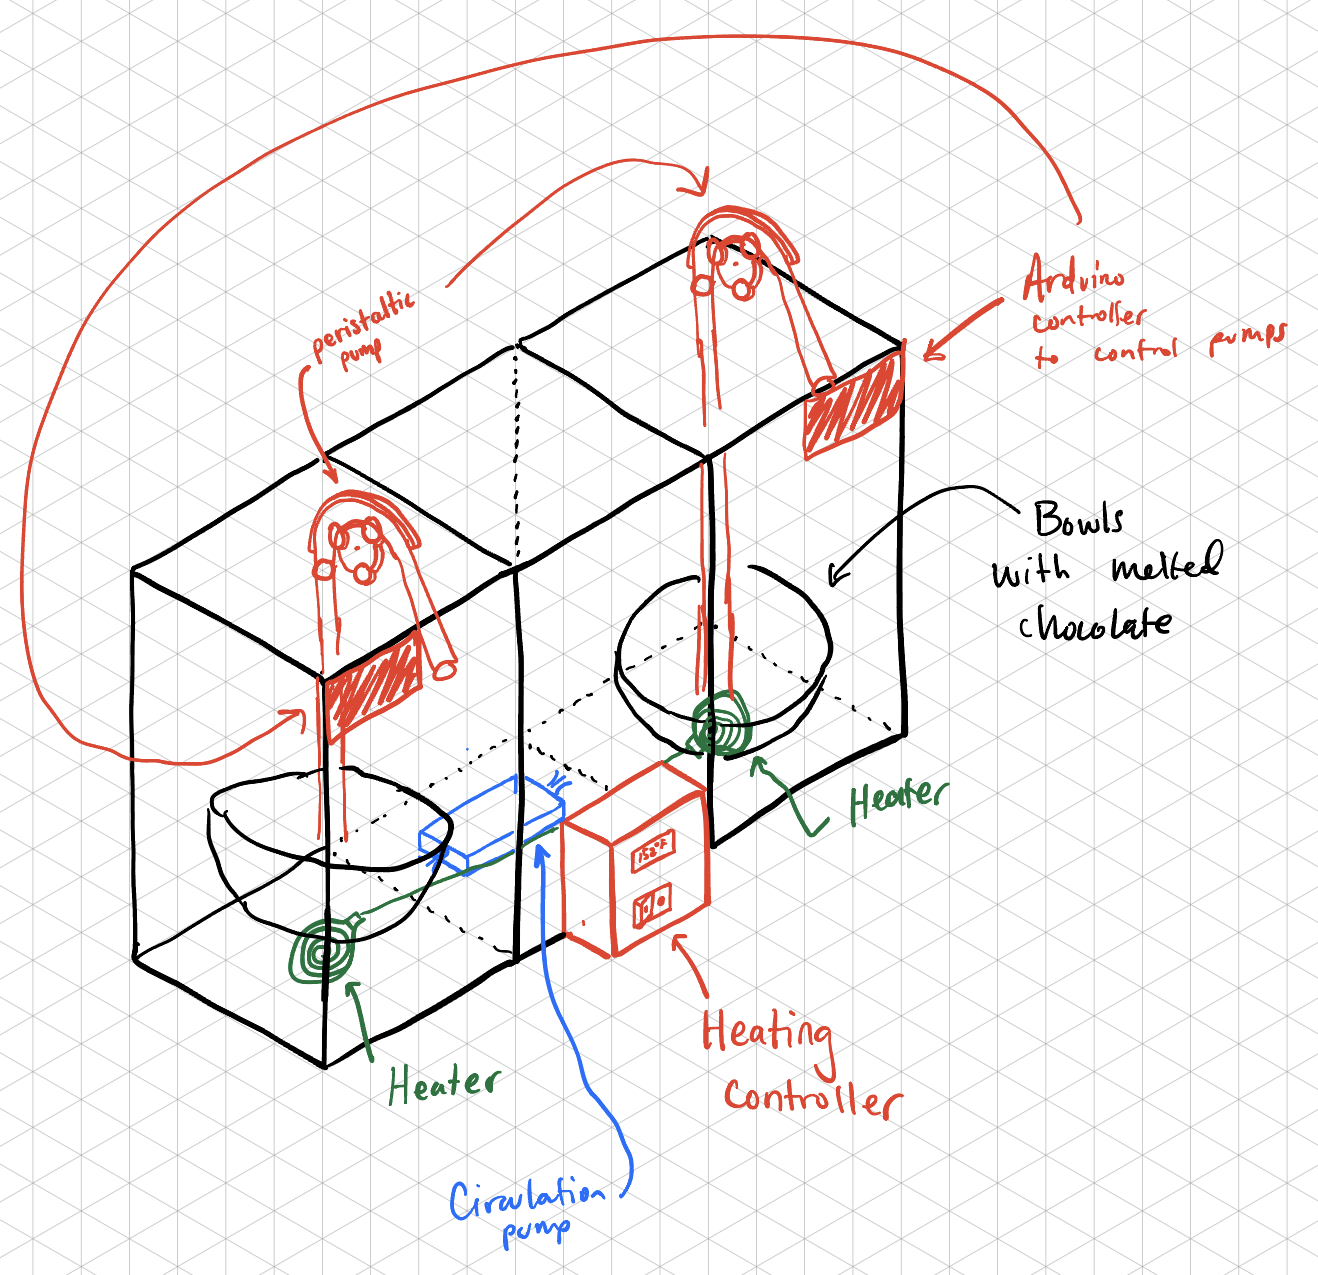
Here is a sketch of what the end-of-semester Choco-Fab project could look like. Here we have added a peristaltic pump to extrude the chocolate from out of bowls instead of the current hand-pushed syringe system. In addition, there is an added circulation pump to help make sure the water temperature is the same around the entire tank.
Goals for week 4:
- Familiarize myself with Arduino IDE to start thinking about how the stepper motor will be controlled
- Start working on modeling the peristaltic pump on CAD
- Come to a consensus for the design above
Concerns going forward:
I don’t necessarily have any concerns going forward, but I would like to start meeting with my teammates outside of class more often.
Week 4
This week, I continued to work on my plan for the peristaltic pump.
This mainly included researching articles, watching videos, and looking at existing CAD files for peristaltic pumps. I consulted old LEAP Leader, Ethan, who has 3D printed a peristaltic pump before.
In addition, I also consulted my LEAP Leader boss, Dr. Brett Hamlin, who hasn’t done anything similar but gave some good ideas.
This link proved very useful in the design process for the peristaltic pump.
To-Do:
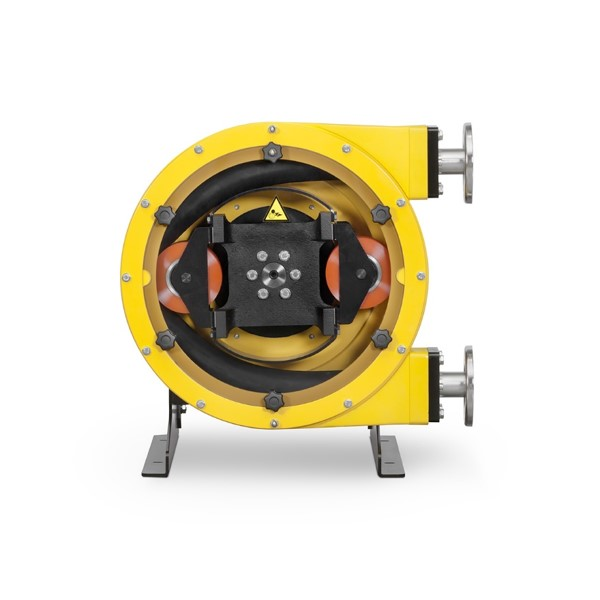
- The plan is to design a roller Peristaltic Pump. An example image is to the right.
- There are n rollers in a peristaltic pump that compress the tube to pump the chocolate. I need to come to a consensus on how many rollers the pump should have.
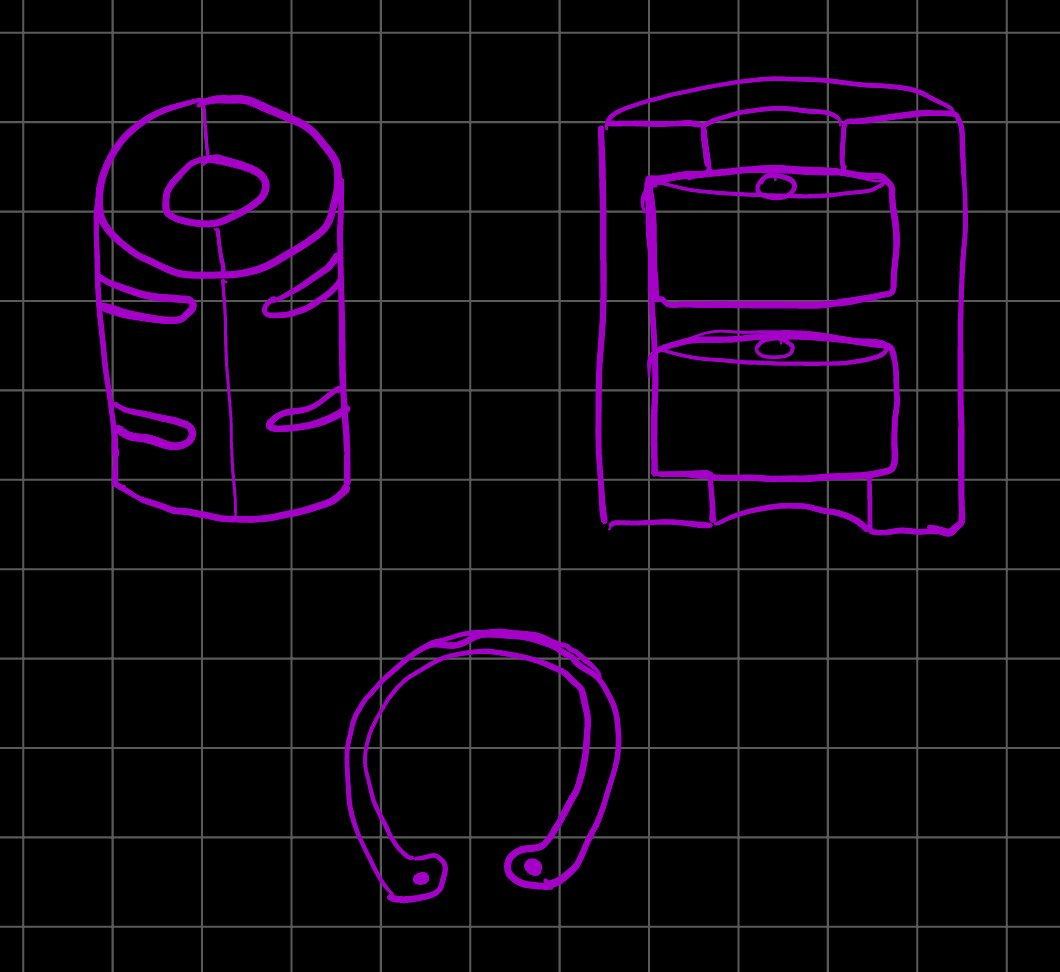
- I need to develop a design for the rollers and the piece connected to the motors and the rollers.
- I’m planning to use skateboard bearings to allow the rollers to roll freely.
- I need to design the exterior housing of the pump and figure out how everything fastens together.
Concerns
- I don’t have any concerns for this next week.
Week 5
This week, I was able to make some leeway on the peristaltic pump, I decided the pump would have three rollers that spin freely using skateboard bearings, with the pump itself being powered by a stepper motor. For this upcoming week, I would like to work on the mechanism for the three rollers and how they connect. with the skateboard bearings.
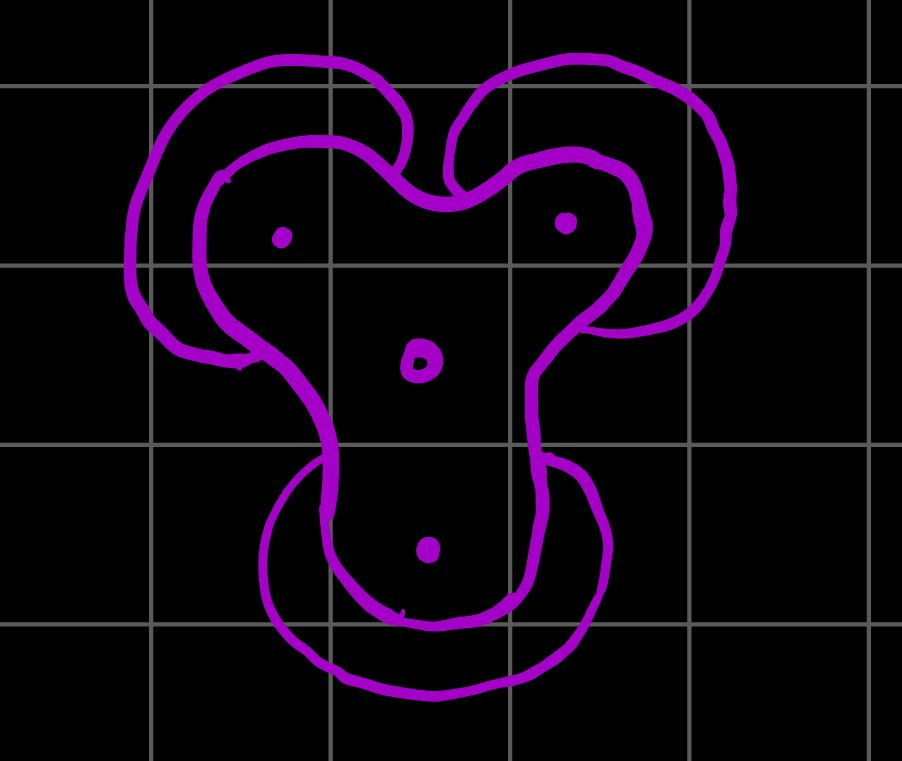
I devised a plan for connecting the 3D-printed roller pieces to the skateboard bearings using a C clamp. Each roller will have two skateboard bearings inside, because one skateboard bearing is not thick enough to cover the diameter of the tubing. Two bearings are enclosed by two half-cylinder pieces held together by two C clamps.
We also met as a group, and discussed our thoughts on making the Chocolate molds for this semester. I recommended that we consult with my buddy Beau, a fellow Michigan Tech Student and founder of Toys Tools Technology LLC, who has experience making different types of molds.
To-Do:
- Design a Peristaltic Pump with 3 Rollers
- I’d like to buy bearings and C clamps for the rollers, but I want to wait until the design comes together more.
- I need to familiarize myself with CAD again and start modeling the peristaltic pump out.
- After modeling the centerpiece and the rollers, I need to design the pump’s exterior housing and figure out how everything fastens together.
- Design Chocolate Molds
- Schedule a meeting to consult Beau and discuss different options we have regarding these Chocolate molds. I would like to make molds out of Silicone, but I do not want to jump the gun.
Concerns
- Beau is busy and prefers to make plans about a week in advance. I need to schedule a meeting with him and ask for a consultation.
- I’m pretty rusty in CAD and am worried about how long it will take to familiarize myself with it. I’m choosing to learn OnShape because it’s used in ENG1102, and I have to help others learn OnShape as well because I am a LEAP Leader.
Week 6
This week was the week before CDR (Critical Design Review), and our team met to discuss what the rest of the semester looks like.
I started refamiliarizing myself with CAD, OnShape, specifically. It’s new to me, but it seems pretty straightforward, and I have to learn it for my LEAP Leader job.
I found an OnShape fidget spinner tutorial that was beneficial two reasons:
- It helped me familiarize myself with OnShape assemblies.
- It helped me make skateboard bearings in CAD.
I also met with Beau to discuss options on different Molds leading up to the CDR. This led to three possibilities for what the chocolate molds could be made out of:
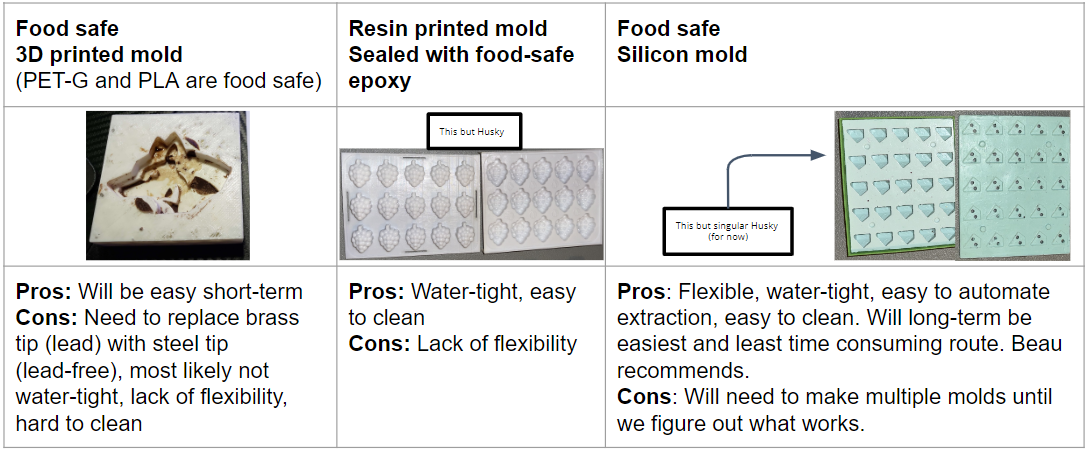
(The photo on the left is courtesy of our test last semester, and the photo on the middle and right are courtesy of Beau’s mold collection)
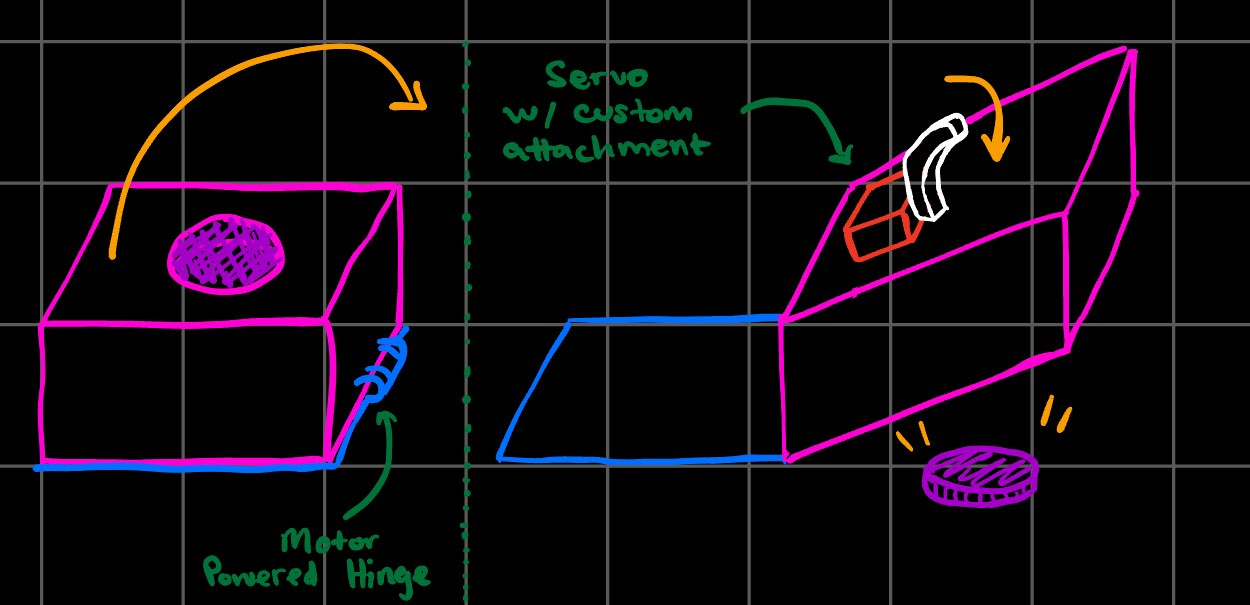
I also started brainstorming possible designs for automating the extraction of chocolate from the molds. The design below has the chocolate mold on a hinge which flips it over, and uses a servo with a custom attachment on the back to push the chocolate out of the mold. This design would only work for a silicone mold.
To-Do:
- Complete CDR slides.
- I’m starting to create the Peristaltic Pump parts in CAD. I’m working on the rollers and will go to the centerpiece next.
Concerns
- Next week is an exam week.
- We have not reached a consensus as a team on what type of chocolate extrusion system we’d like to use. In the GANTT chart, we were initially planning on switching from the plunger design to the peristaltic pump, but it looks like the CDR might change this decision, in addition to another teammate who does not want to switch to a peristaltic pump.
Week 7
On February 19th, we had our CDR. We discussed many potential future endeavors and received a lot of good feedback on our current work.
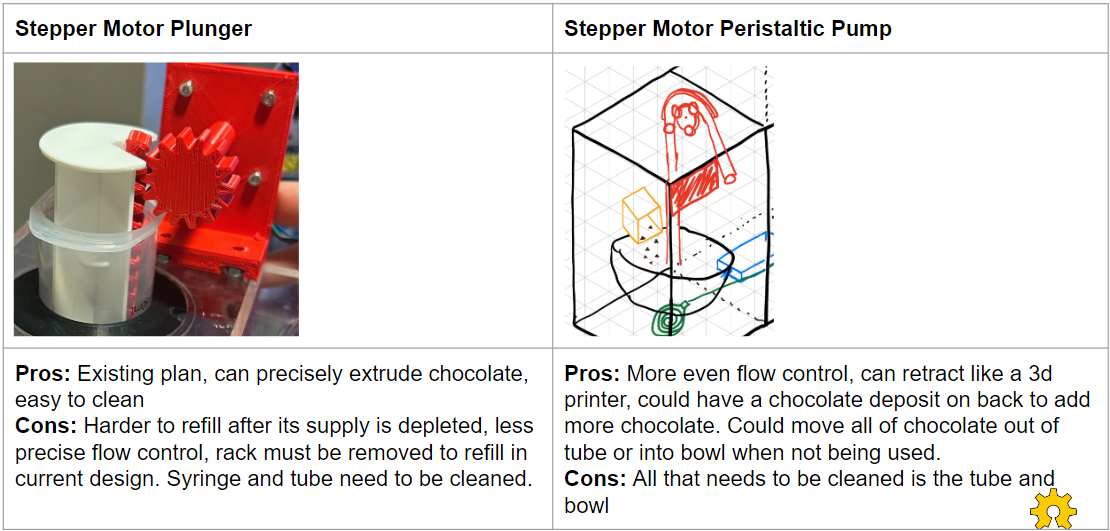
The advice we were given on the peristaltic pump vs. plunger design scenario is that we should work towards the plunger design, since it is closer being done and we should push for the MVP (Minimum Viable Product). So, it seems like this is it for now for the Peristaltic Pump, and we are going all in on the stepper motor plunger design.
For the Chocolate Mold debacle, we were steered in the direction of the Silicone mold, and those present at our CDR felt the same. One person did ask a question about whether or not we looked into buying our Silicone molds online, and we thought about this but had not found any real custom mold makers online before the CDR. It would also take too much out of our budget to get custom molds made online, and Beau being willing to help us out is cutting us a pretty good deal.
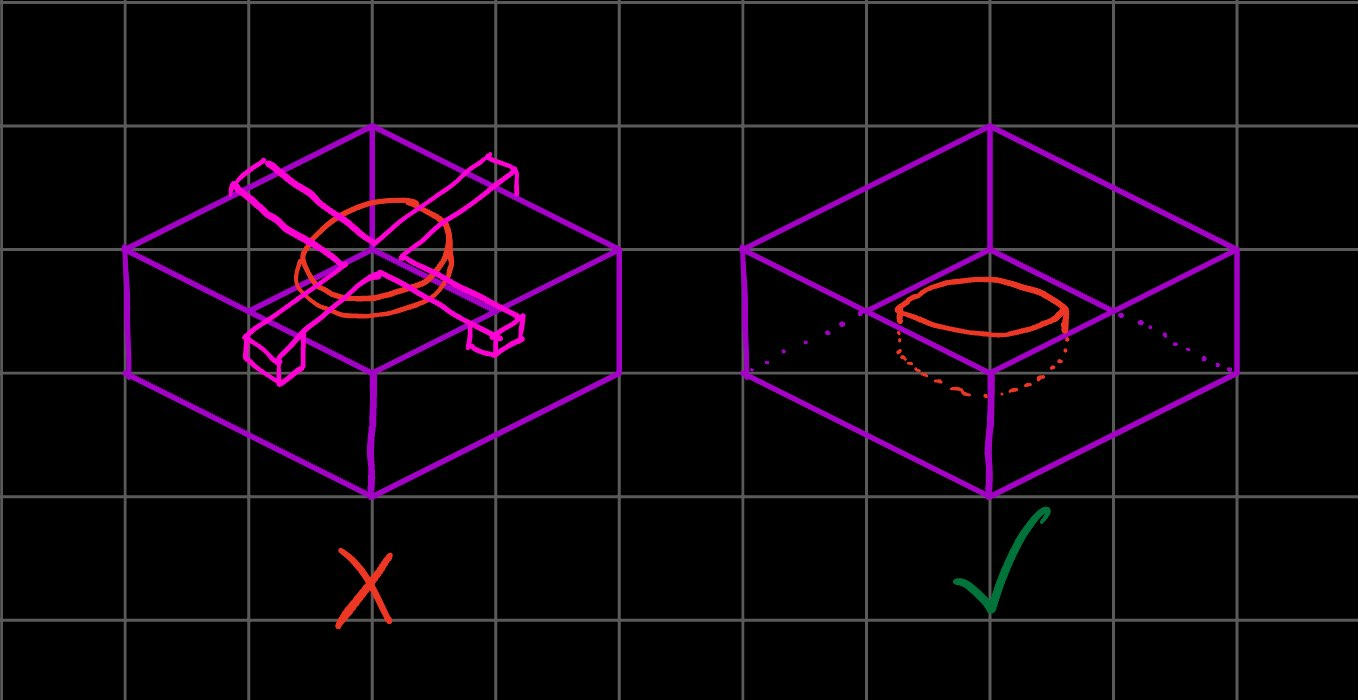
For the possible Silicone mold extraction design, my old roommate Carson (shout out Carson) recommended that we spin the mold from its center instead of one of its sides. We did not think about this before, but this is definitely a better idea, since it is easier to rotate something from its center of mass, and since it will be a much more stable and less straining design in the end with this idea.
Aside from that, this week was a big exam week and I unfortunately was not able to get a lot done. Since the peristaltic pump is out of the way for now, I’m moving towards working on the Silicone mold design.
To-Do:
- Start planning how the Silicone molds will be made
- This includes consulting with both my team and Beau on what everyone thinks.
- Iterate on the chocolate mold extraction design; the silicone molds are the priority for now, though, since they are more critical.
Concerns
- I don’t have any concerns for this upcoming week.
Week 8, post Spring Break
The Friday before coming back from spring break, the building next door to mine burned to smitherines. Unfortunately, my heat and hot water were connected to the building next door and I was left needing to move. I was lucky to have an accomodating group of guys offer me a room, but moving still set my productivity back.
I met with Lindsey this week and we sent out the plans for this Semesters Social Media post. We also created a new Social Media post form for this semester, since there are new projects and since we want the form to be able to accept large video files.
I also scheduled a meeting with Beau next week to make Silicone Molds and ordered food-safe Silicone online.
Along with the Silicone, I also ordered servos that can be used for prototyping automated chocolate extraction from the molds and the mix-in dispenser.
Initially, my plan was to 3D print a box and then 3D print the part for the chocolate piece with an attachment that centers it into the top of the box, but this idea is too complex for no reason. The better plan for the future is to make the box and the chocolate piece one part. They’ll both print together and this idea is overall less complex.
To-Do:
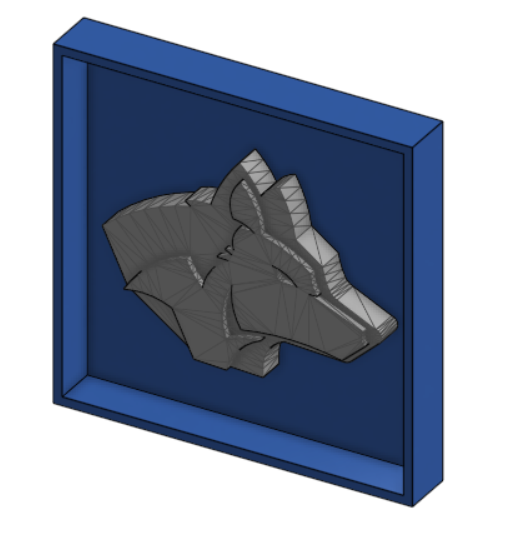
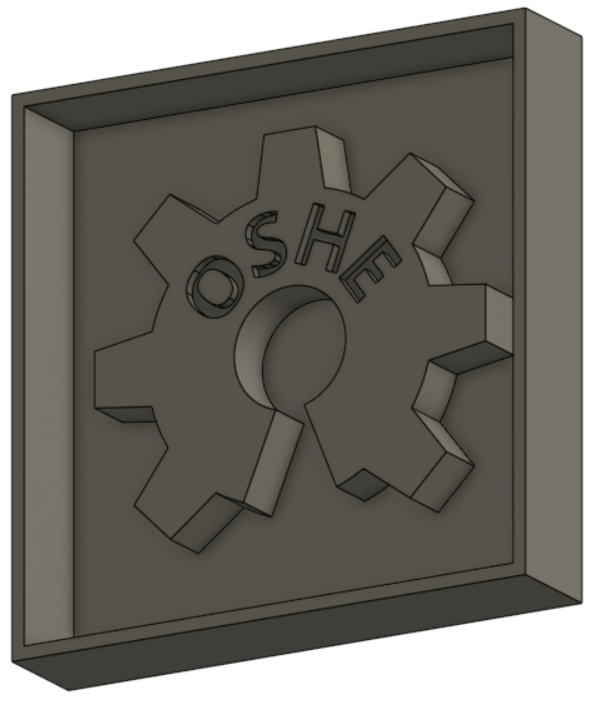
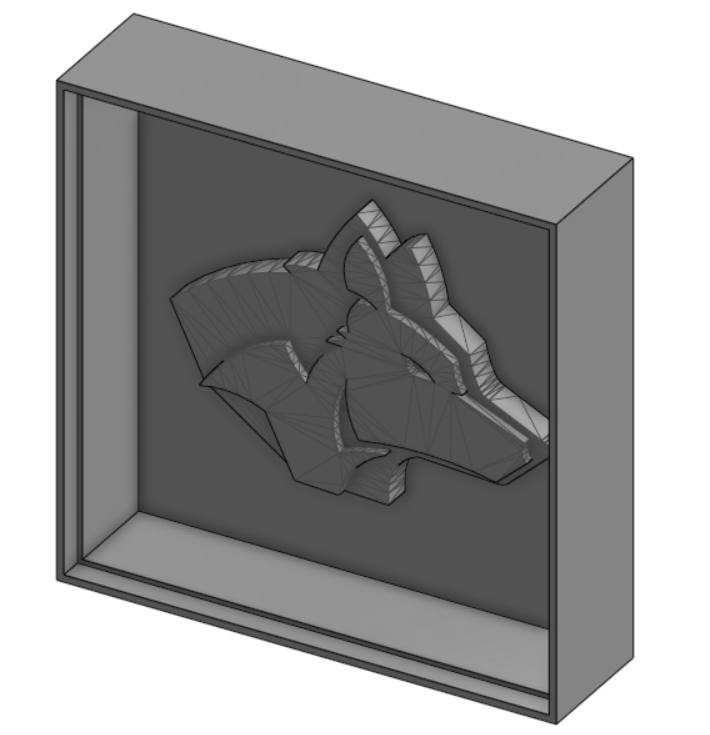
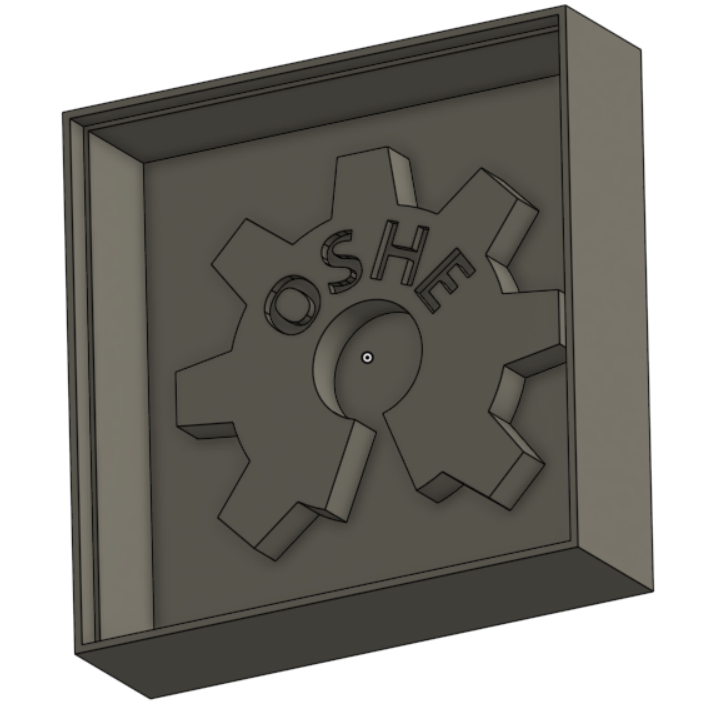
- Make 3D models for the molds for the molds of the Husky Silicone Mold and the OSHE Logo SIlicone mold.
- The length and width are 100 mm x 100 mm, but I need to reach a consensus on the height of the mold.
- Seth already has premade OSHE Logo and Husky STL files; I need to figure out how to build boxes around these and have them printed as one piece.
- Iterate on the chocolate mold extraction design; the silicone molds are the priority for now, though, since they are more critical.
Concerns
- No concerns this week related to OSHE/Choco Fab
Week 9
This week, I started working with Dylan on the silicone MTU Husky and OSHE chocolate molds. The current plan was for both chocolates to be 10mm in total height and for the silicone mold to be 12.5mm in total height. The part-to-end thickness, or the thinnest thickness of the silicone mold, is 2.5 mm.
For this, we’re using Seth’s Husky model, and I recreated the OSHE logo since the “OSHE” in Seth’s STL file was mirrored the wrong way.
I modeled two boxes around them so that we could print and cast the silicon molds from these molds for the molds.
They both printed overnight, which was good because Beau was available to make Silicone molds the next day.
I went to Walmart to buy clay and petroleum jelly, both of which are used in the silicone mold-making process.
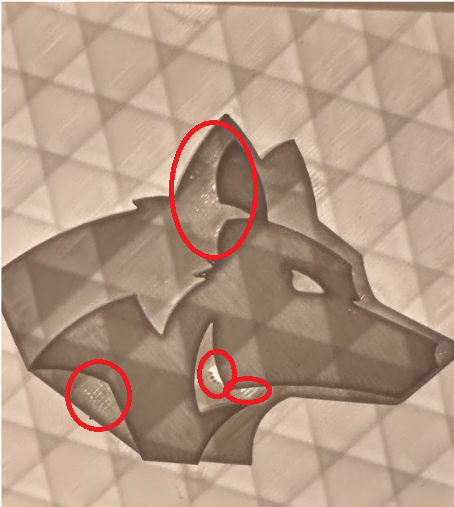
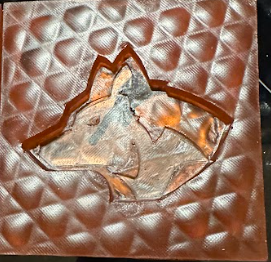
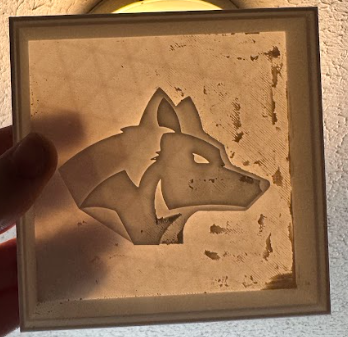
Before making silicone molds out of these, I first needed to use a flathead screwdriver and clay to fill in all open gaps of the 3D print so that any imperfections in the print wouldn’t lead to a failed silicone mold cast. This can be best seen in the photo on the right with the Husky mold pointed towards the light. Any minuscule gap needed to be filled with clay and then cleaned up.
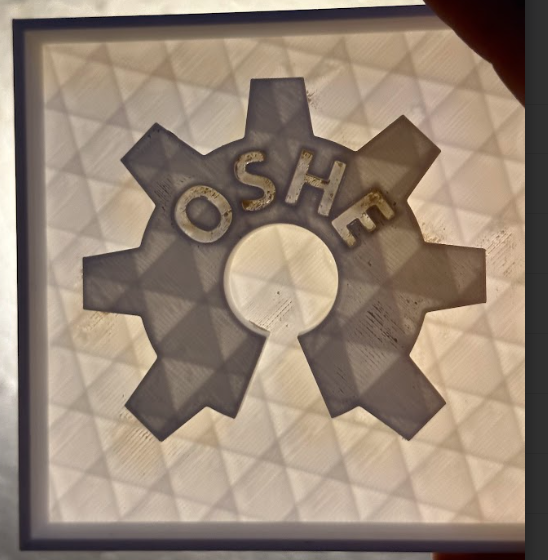
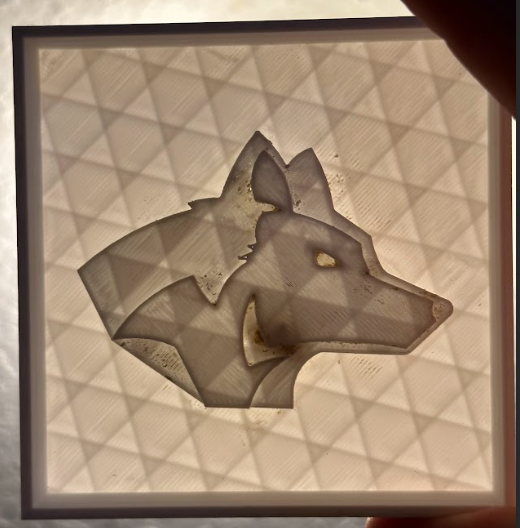
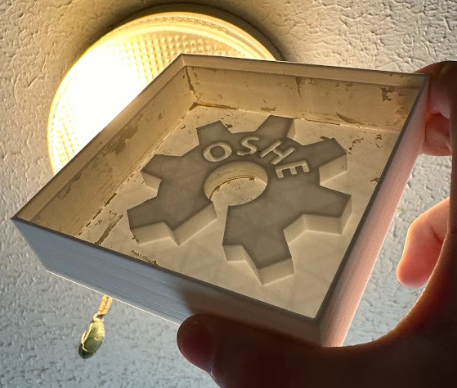
The photos below show the 3D-printed molds after they were sufficiently filled with clay.
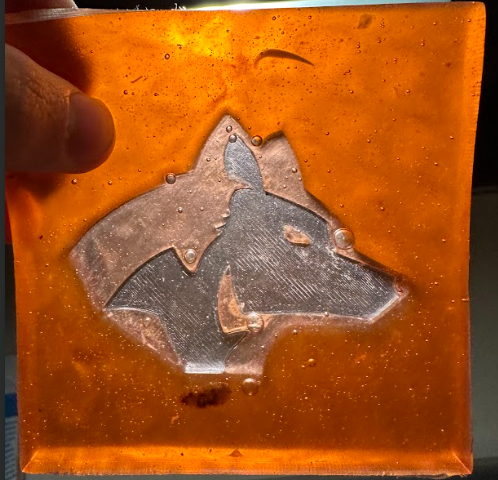
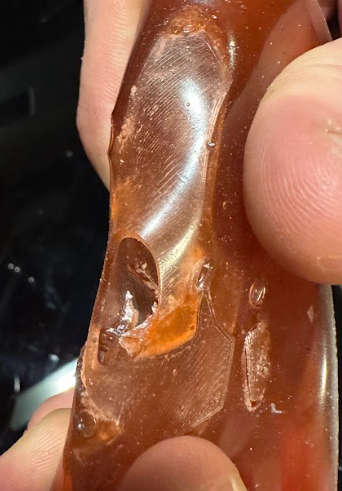
From here, Dylan and I went to my buddy Beau’s apartment to test the integrity of the two molds with Amazing Remelt Material, which is a remeltable material that can test the integrity of molds. This let us see what our mold would look like before we inevitably cast it with silicone. The Amazing Remelt Materials will also fill any gaps that were missed with Clay. Unfortunately, the Amazing Remelt Material was far too hot, and the 3D prints melted slightly during the test, which left a cool effect from the floor layers of the print sagging into the infill, but was still not ideal. The good thing is that this did not negatively affect our progress at all since it also told us that 2.5mm part-to-end thickness is far too short and will not survive long when the purpose of these molds is geared towards Automation.
To-Do:
- Iterate upon the 3D models and make a change or two.
- The most important part is increasing the part-to-end thickness so that it can survive in an automated setting with the repeated use of a servo to knock the chocolate piece out. I need to do some research and see if there are any recommendations for this online.
Concerns
- My main concern is that these silicone molds will be needed soon, both for other parts of the project and for the Social Media Post.
Week 10
A couple of changes have been made to the 3D models for the molds for the molds. For starters, the chocolate OSHE logo and Husky have both been changed to 8mm height instead of 10mm height (per request from one of my teammates), and the part-to-end thickness has been increased from 2.5mm to 12.5 mm, which is about 1/2 an inch. A fill line has been added, where at 20.5mm, the walls get thinner to signify that we have filled to the correct height, and now there is some wiggle room such that silicone won’t spill out from the top if it gets moved around while it’s curing.
Unfortunately, printing these has not been successful yet.
To-Do:
- Get these 3D parts printed and get Mold’s made ASAP.
Concerns
- I spent a lot of time this week trying to get these parts printed; I’ve had ~15 prints fail on the first layer, and I think its either an issue with my filament or my printer bed is not level. I have not been able to successfully level my printer bed and get a good print started, though.
Week 12
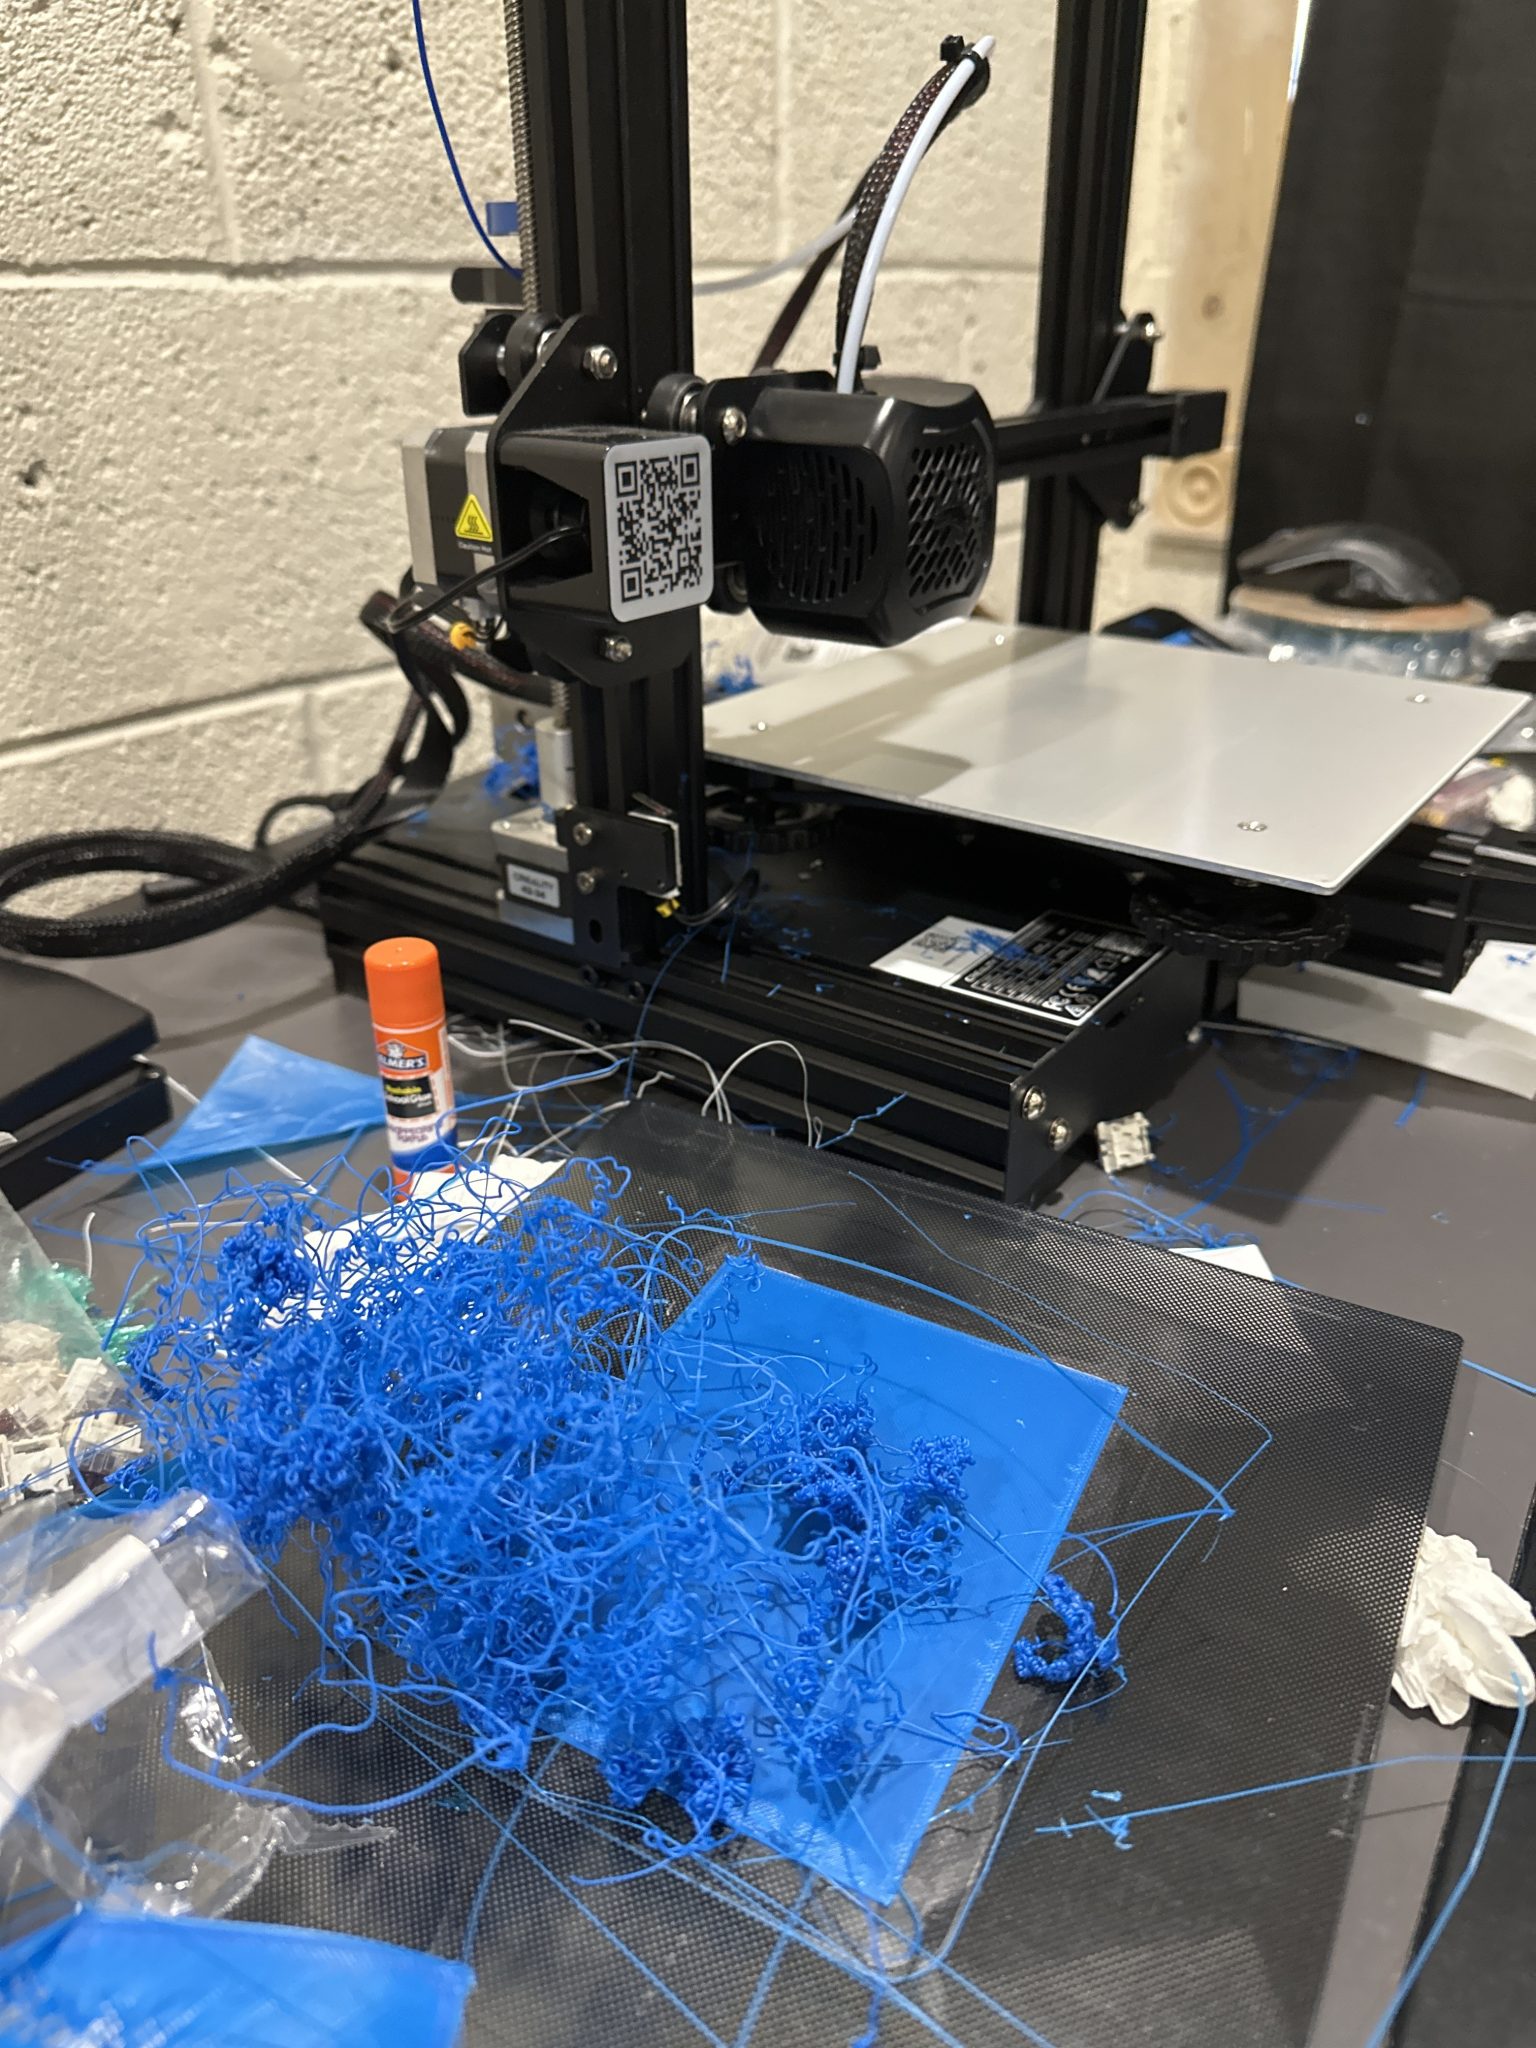
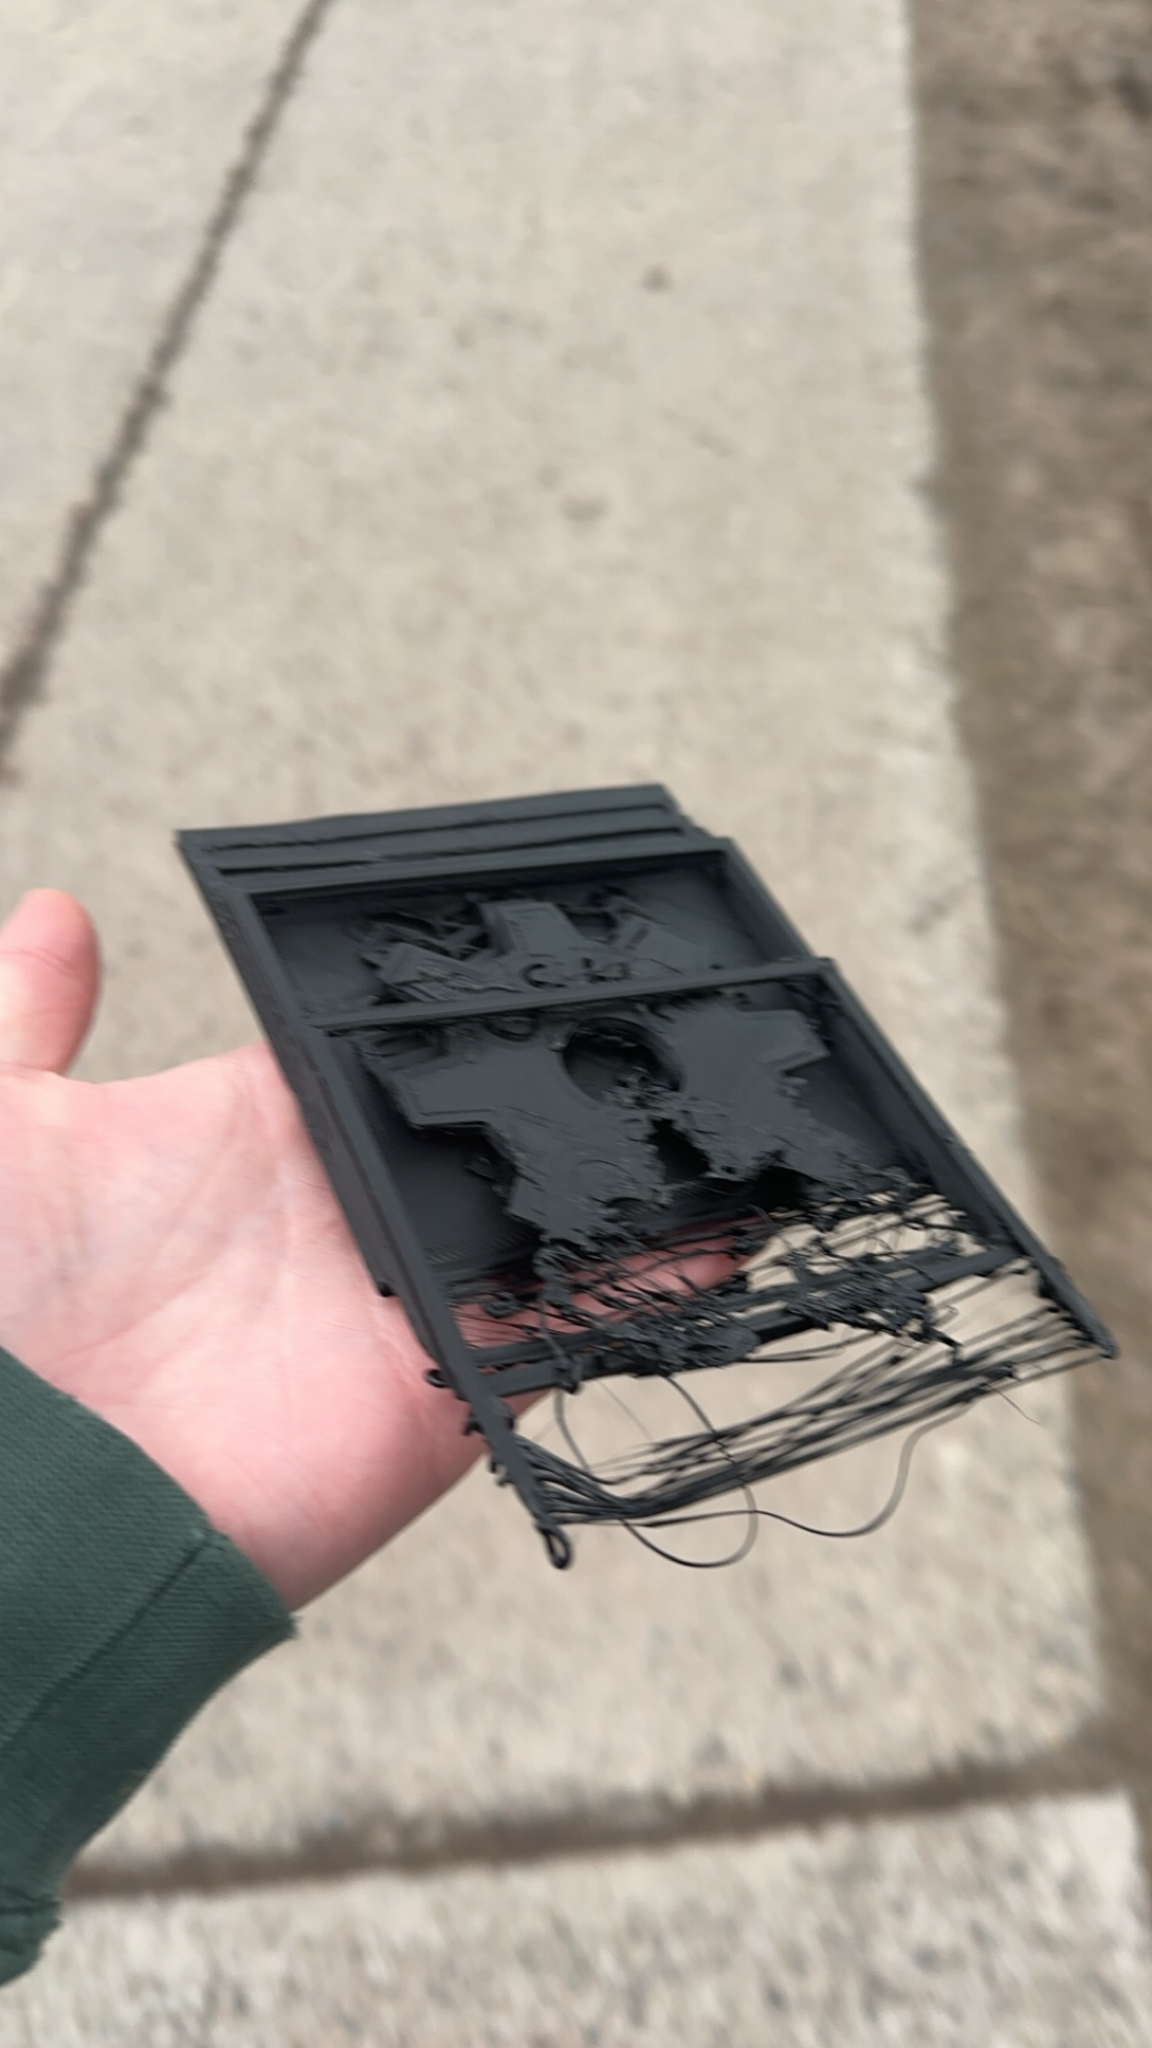
Unfortunately, I ended up spending the next week trying to get these prints to print to no avail. I think this is due to a skill issue on my part. Here are the two prints that failed the worst. On the left, this print failed due to the filament adding tension that would not let the printer’s stepper motor move as far over as it should’ve. On the right, I could not even begin to know how this print failed. I just woke up, and my print bed was off the printer, and there was a ton of stringy extruded filament that did not reach the right spot.
To-Do:
- Get these 3D parts printed and get Mold’s made ASAP.
Concerns
- This is by far the most consecutive failed prints I have had in my life. Without these molds made, we can’t even do a serious test of our current design. I need to get these parts printed.
- I’m also concerned that our chocolate extrusion design will not be implemented in time.
Week 13
Unfortunately, I had another week of failed prints this week, but on Friday, one of my friends, Nick, kindly offered to print my parts on his Prusa Mini, which auto-levels and almost never has failed prints. I had a slight issue with the Husky STL and the box around it wanting to print as two separate parts, but now that we have that taken care of, these prints should be done by Sunday or Monday.
To-Do:
- Get the Silicone Molds made ASAP
- Get these prints printed ASAP.
- Find a time to meet with Beau ASAP so that we can utilize his workspace, vacuum chamber, and expertise to ensure the smooth production of the Silicone molds.
Concerns
- There are no concerns this week. I think I can get the silicone molds made early in Week 14.
Week 14
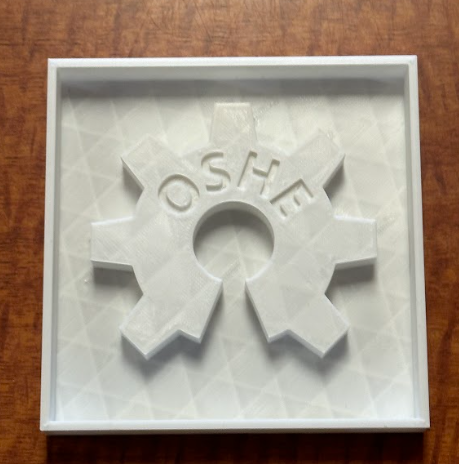
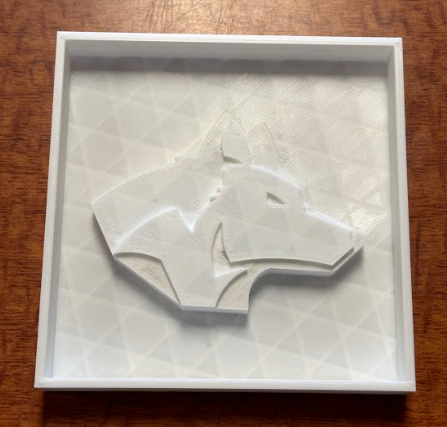
We finally got good prints for both parts on Monday morning! Below are the 3D prints after Clay was used to fill any open gaps.
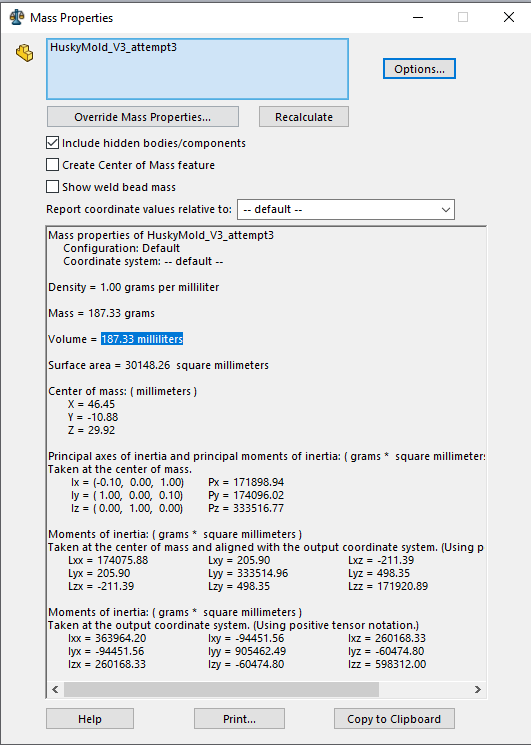
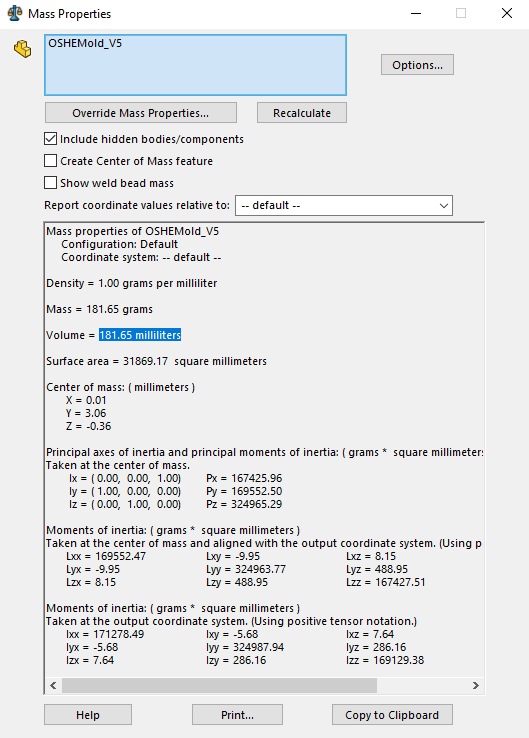
On the same day, I was able to go to my buddy Beau’s apartment. We did an Amazing Remelt Test which ended up being successful. We both had other things to attend to, and met the next day to make the Silicone molds! For this, we used Solidworks to calculate the negative volume of silicone that is needed for each mold. Those can be found below.
From here, we mixed together a 1:1 ratio of the Part A and B solutions for the silicone, used a paintbrush to lather Vaseline all over the 3D-printed parts, and poured the silicone into the molds. After this, both molds went through a vacuum chamber to remove all the bubbles, and then we let the Silicone molds cure for a day. The results were fantastic!

To-Do:
- Try to assist my teammates given the opportunity before we present next Thursday.
Concerns
- I have a lot of schoolwork I need to complete before the semester ends. I may be unable to find time to help my teammates before all is said and done.
Fall 2024 – Semester 3
Week 1 – Week 2
< Upload YOUR sketch of what the project might look at the end of the semester. It doesn’t have to be a perfect picture, but try and include as many details and annotations as you can. >
To-Do:
- Look into an open source embedded platform that we could use to build our IRL Subtitles platform.
- Look into what type of hardware platform we should base IRL subtitles on.
Concerns:
< List any concerns you might have about the next week. >
Week 3 – Week 4
This week, I was able to look into different Open Source Embedded Software platforms we could use for IRL Subtitles. I narrowed the search to Real-Time Operating Systems (RTOS). There are multiple highly received open source RTOS platforms, including Zephyr, ChibiOS, RIOT, and NuttX. However, one open source RTOS platform caught my eye over the rest, FreeRTOS. FreeRTOS was released by Amazon Web Service (AWS) in 2003 and has been updated and maintained since, with the latest release occurring five months ago. It also has extensive documentation and example projects and already supports over 40 different microcontroller platforms. I’m going to float the idea of starting with FreeRTOS and running with it at the next meeting. Alternatively, if my teammates would like some more info before deciding, I’ve already taken a lot of notes and might make a table comparing all of the different RTOSs to choose. This may be one of the topics to discuss during CDR.
I’ve also discussed with our team what type of microcontroller or microprocessor platform we should base our design on this semester. One big thought/topic for discussion is whether we want to do all computations on the glasses themselves or use Bluetooth to offload the heavy computations onto something else, a phone or computer, perhaps. The ESP32 architecture is catching my eye currently, it’s widespread, fairly inexpensive, and already supported by FreeRTOS, but I’d like to do more research and talk to my teammates before we pick anything.
To-Do:
- I want to discuss the findings with my teammates at our meeting this upcoming week and hear if they have any input or feedback before proceeding from there.
- I would also like to work with my team to develop a more descriptive outline of the project tasks and concrete goals we’d like to accomplish before CDRs.
- Do more research on the different hardware platforms we could use for IRL Subtitles.
Concerns:
No concerns at the moment.
Week # – Week #
< Reflect on what you were able to complete last week. What items need to get moved onto your To Do list for this next week? Which items are no longer necessary? >
To-Do:
< Create YOUR To Do list for the coming week – and make it as exhaustive as you can. Start with a goal and break it up into as many pieces as you feel makes sense. >
Concerns:
< List any concerns you might have about the next week. >