
Progress This Week:
- Set up OSHE website account
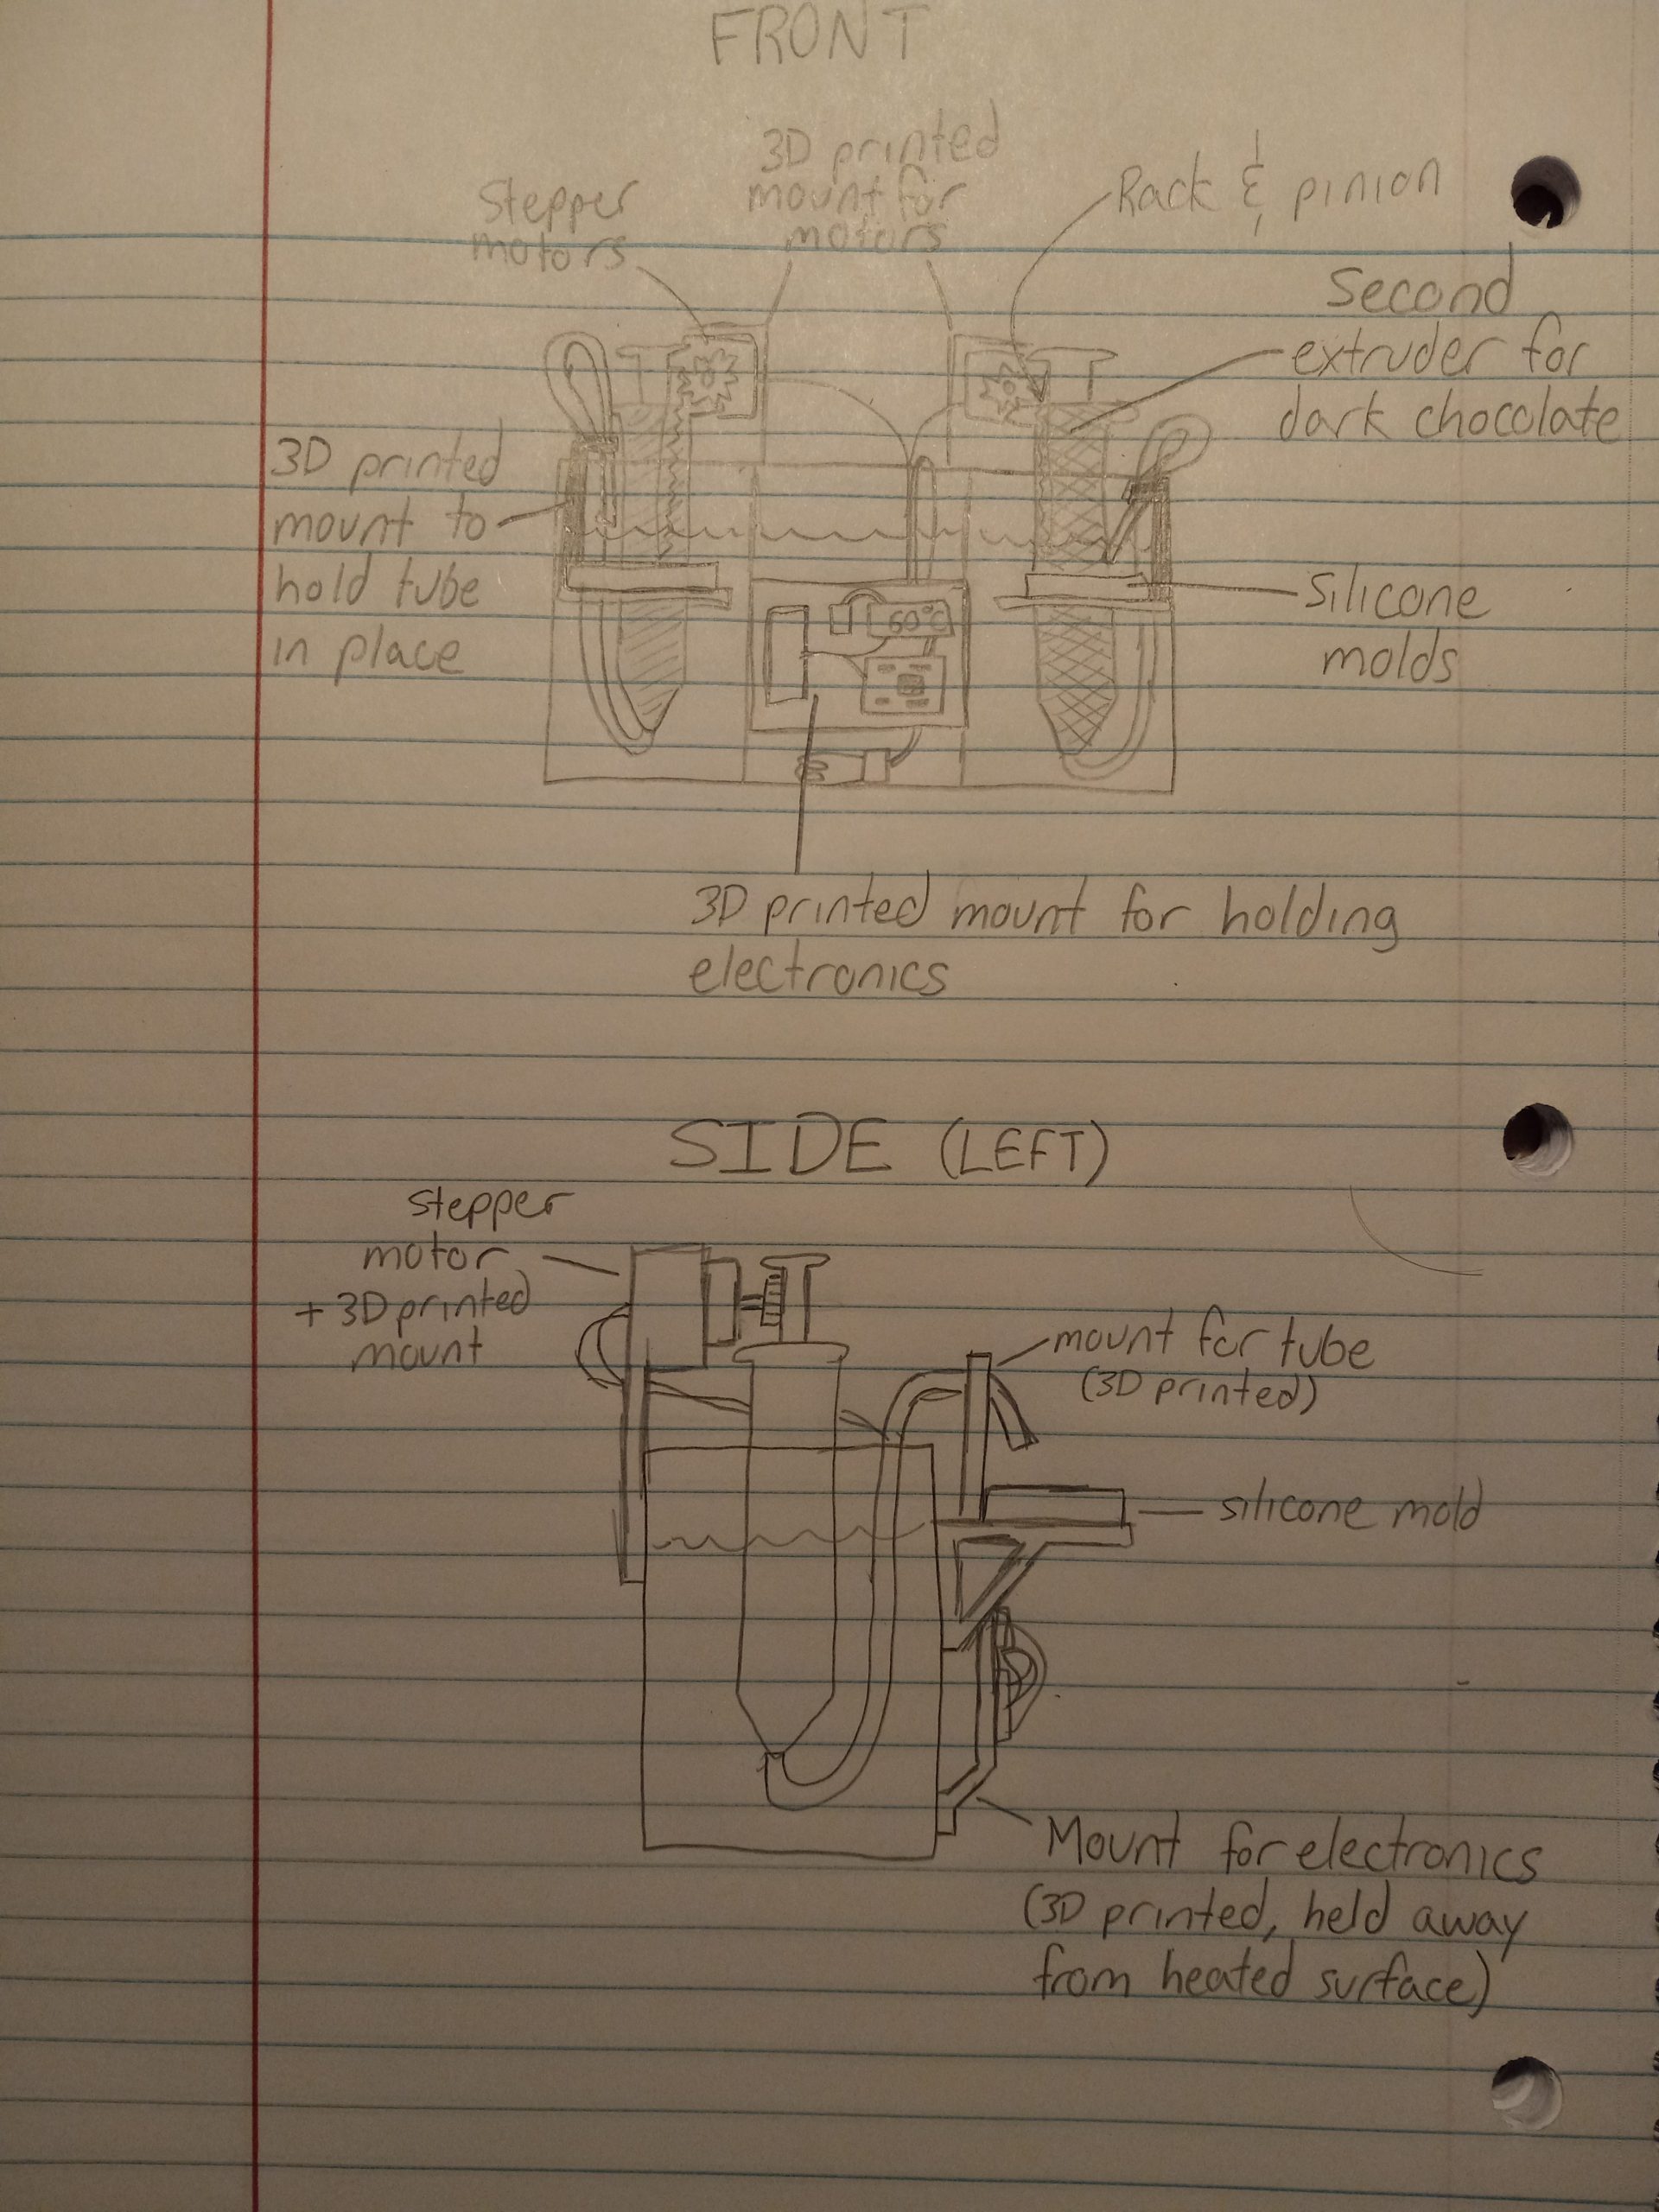
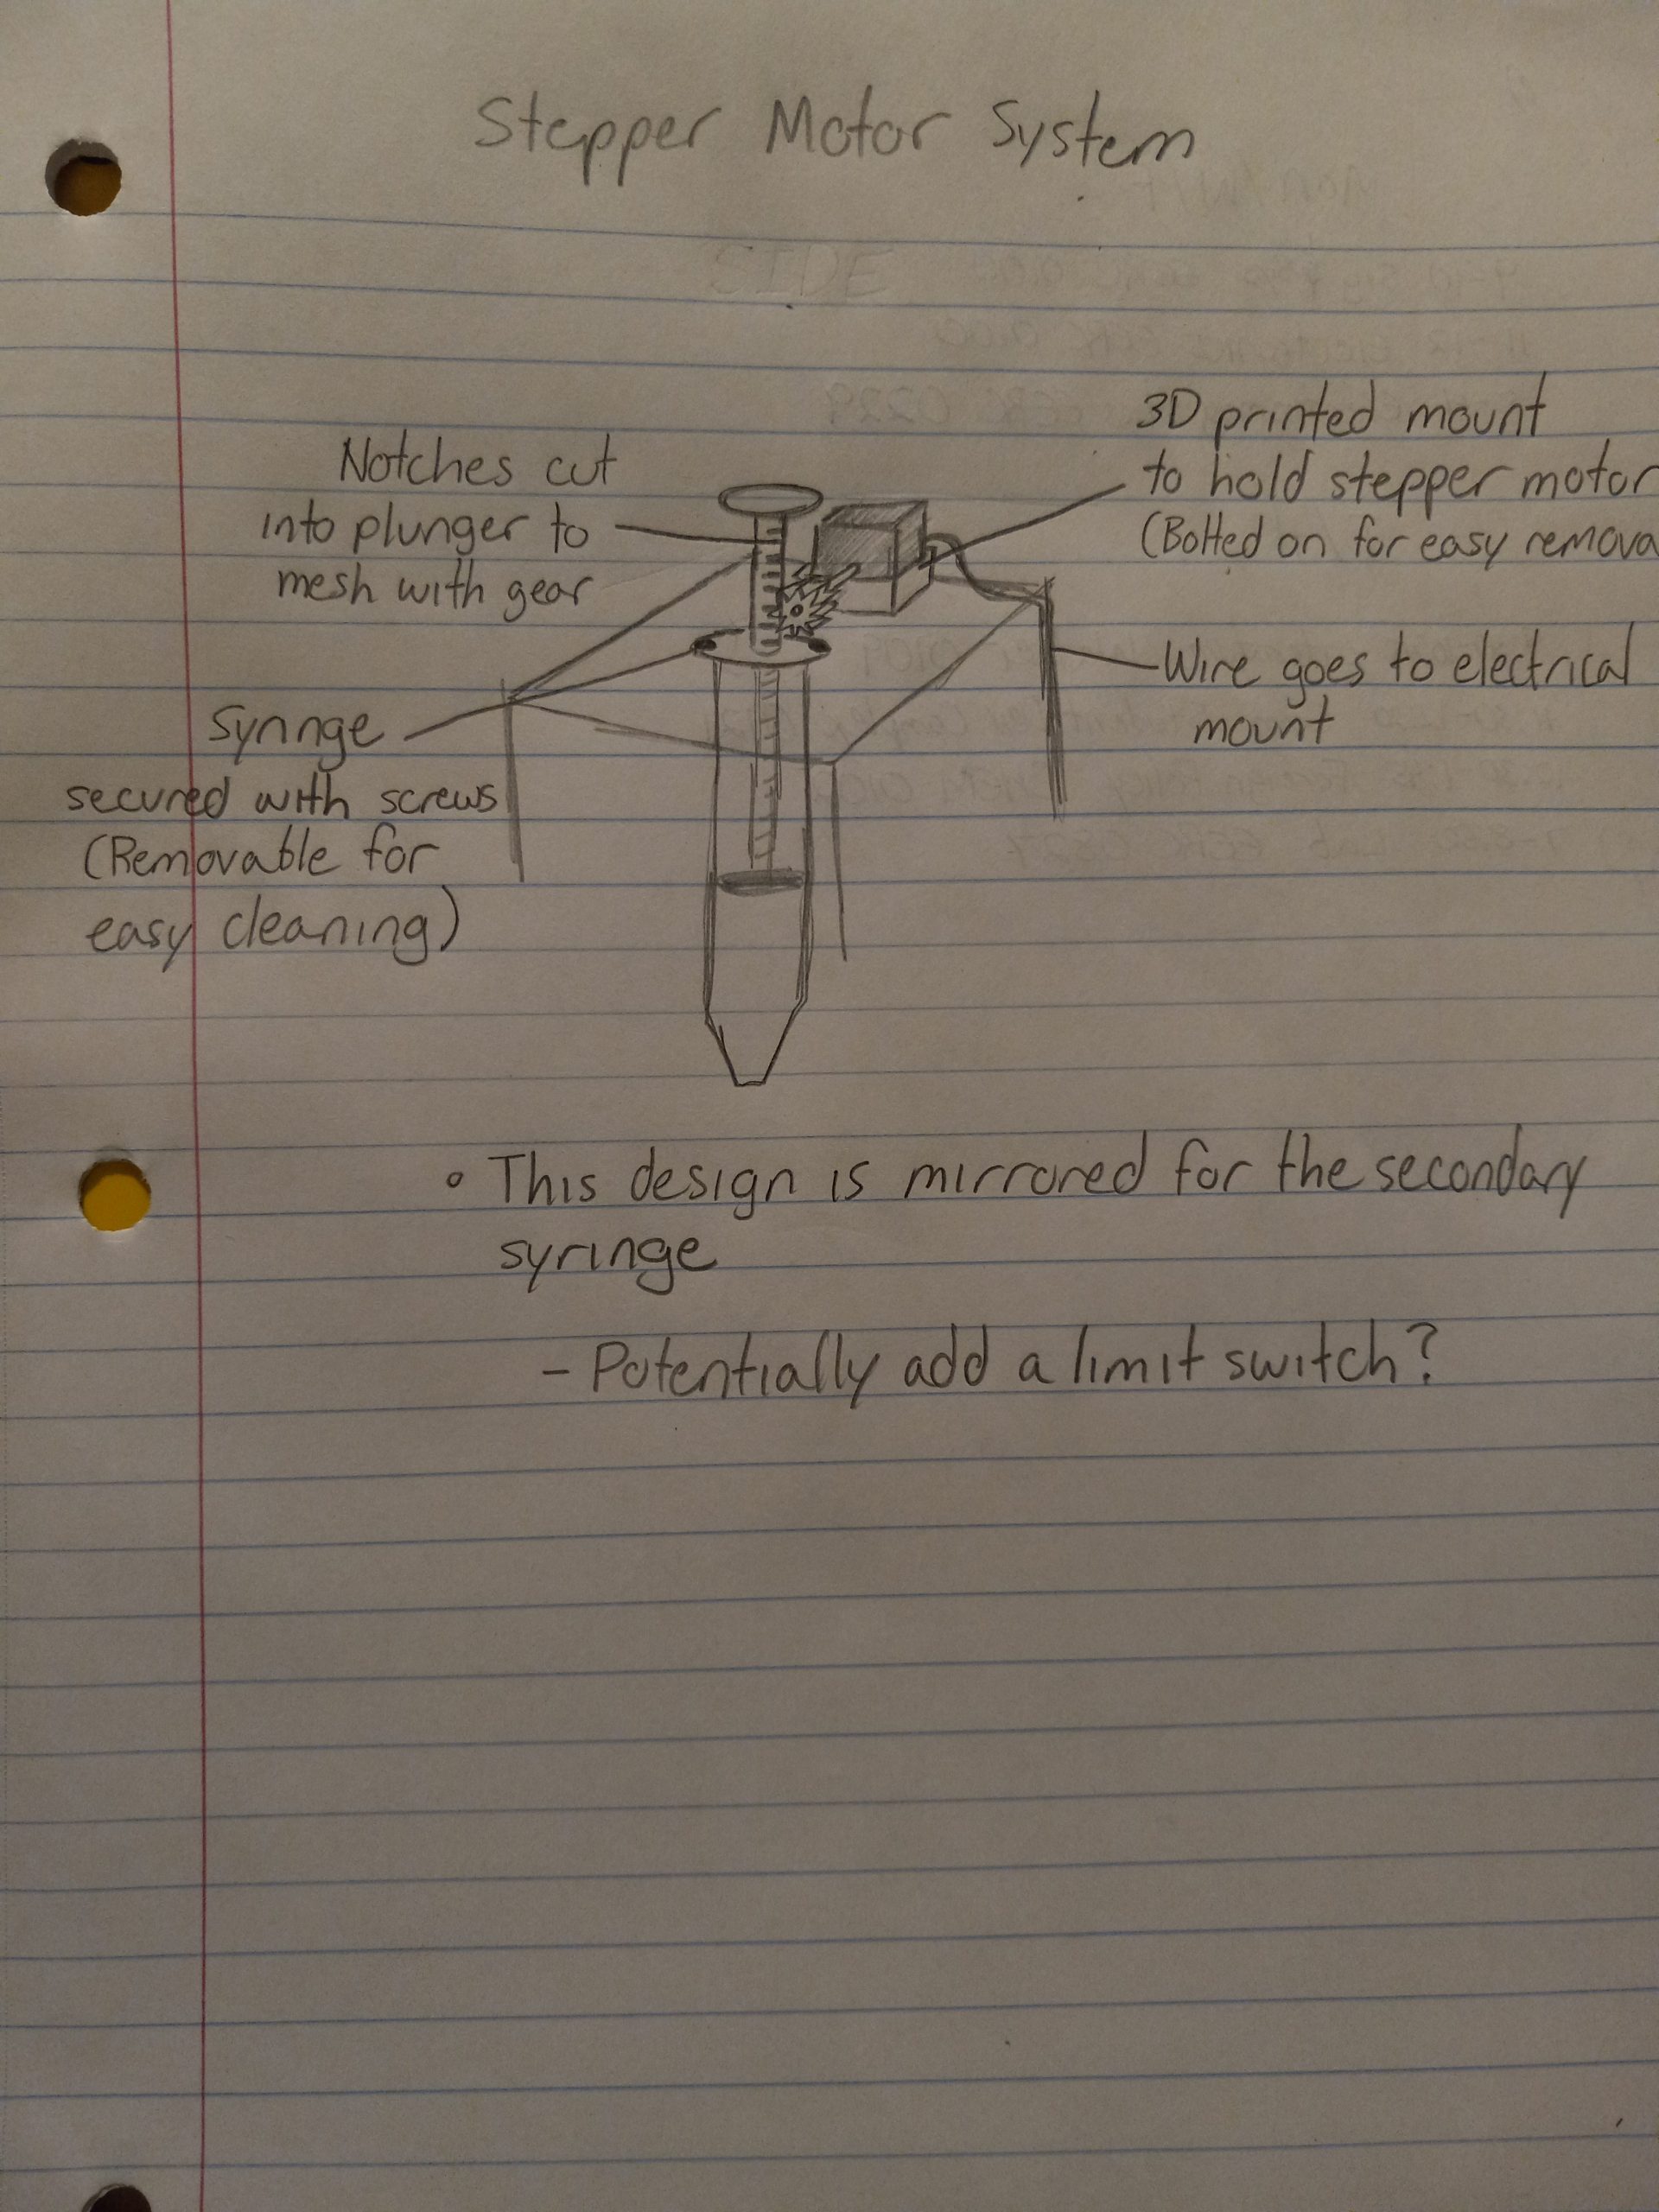
- Created initial plans for automatic chocolate extruder system
- Created to-do list for next week
To-do List for Next Week:
- GOAL: Get the automatic extruder electrical components operational
- Touch up on coding language for microcontroller
- Write code to microcontroller to control stepper motor
- Connect wiring between power supply, microcontroller, and stepper motor
- Get stepper motor rotating on command
- Verify power supply works with microcontroller
- If power supply is not compatible, order buck converter
Concerns for Next Week:
- Some time concerns, as my classes have a lot of assignments due at that time. Above goals should still be achievable.
Week 5:
Progress:
- Created code for operating a stepper motor in Arduino IDE
- Verified that the Elegoo (cheaper version of the Arduino) works with C code written in Arduino IDE
- Verified that a 12V power supply will work with the Elegoo
- Reworked the design of the stepper motor mount and rack & pinion system to be more stable and easier to install
Problems:
- Ordered parts did not arrive this week, so physically setting up the stepper motor was not possible
To-do list for next week:
- GOAL: Get the automatic extruder electrical components operational
- Connect wiring between power supply, microcontroller, and stepper motor
- Get stepper motor rotating on command
Concerns for next week:
- The parts are taking longer than expected to arrive
Week 6:
Progress:
- Fixed some syntax problems in Arduino code
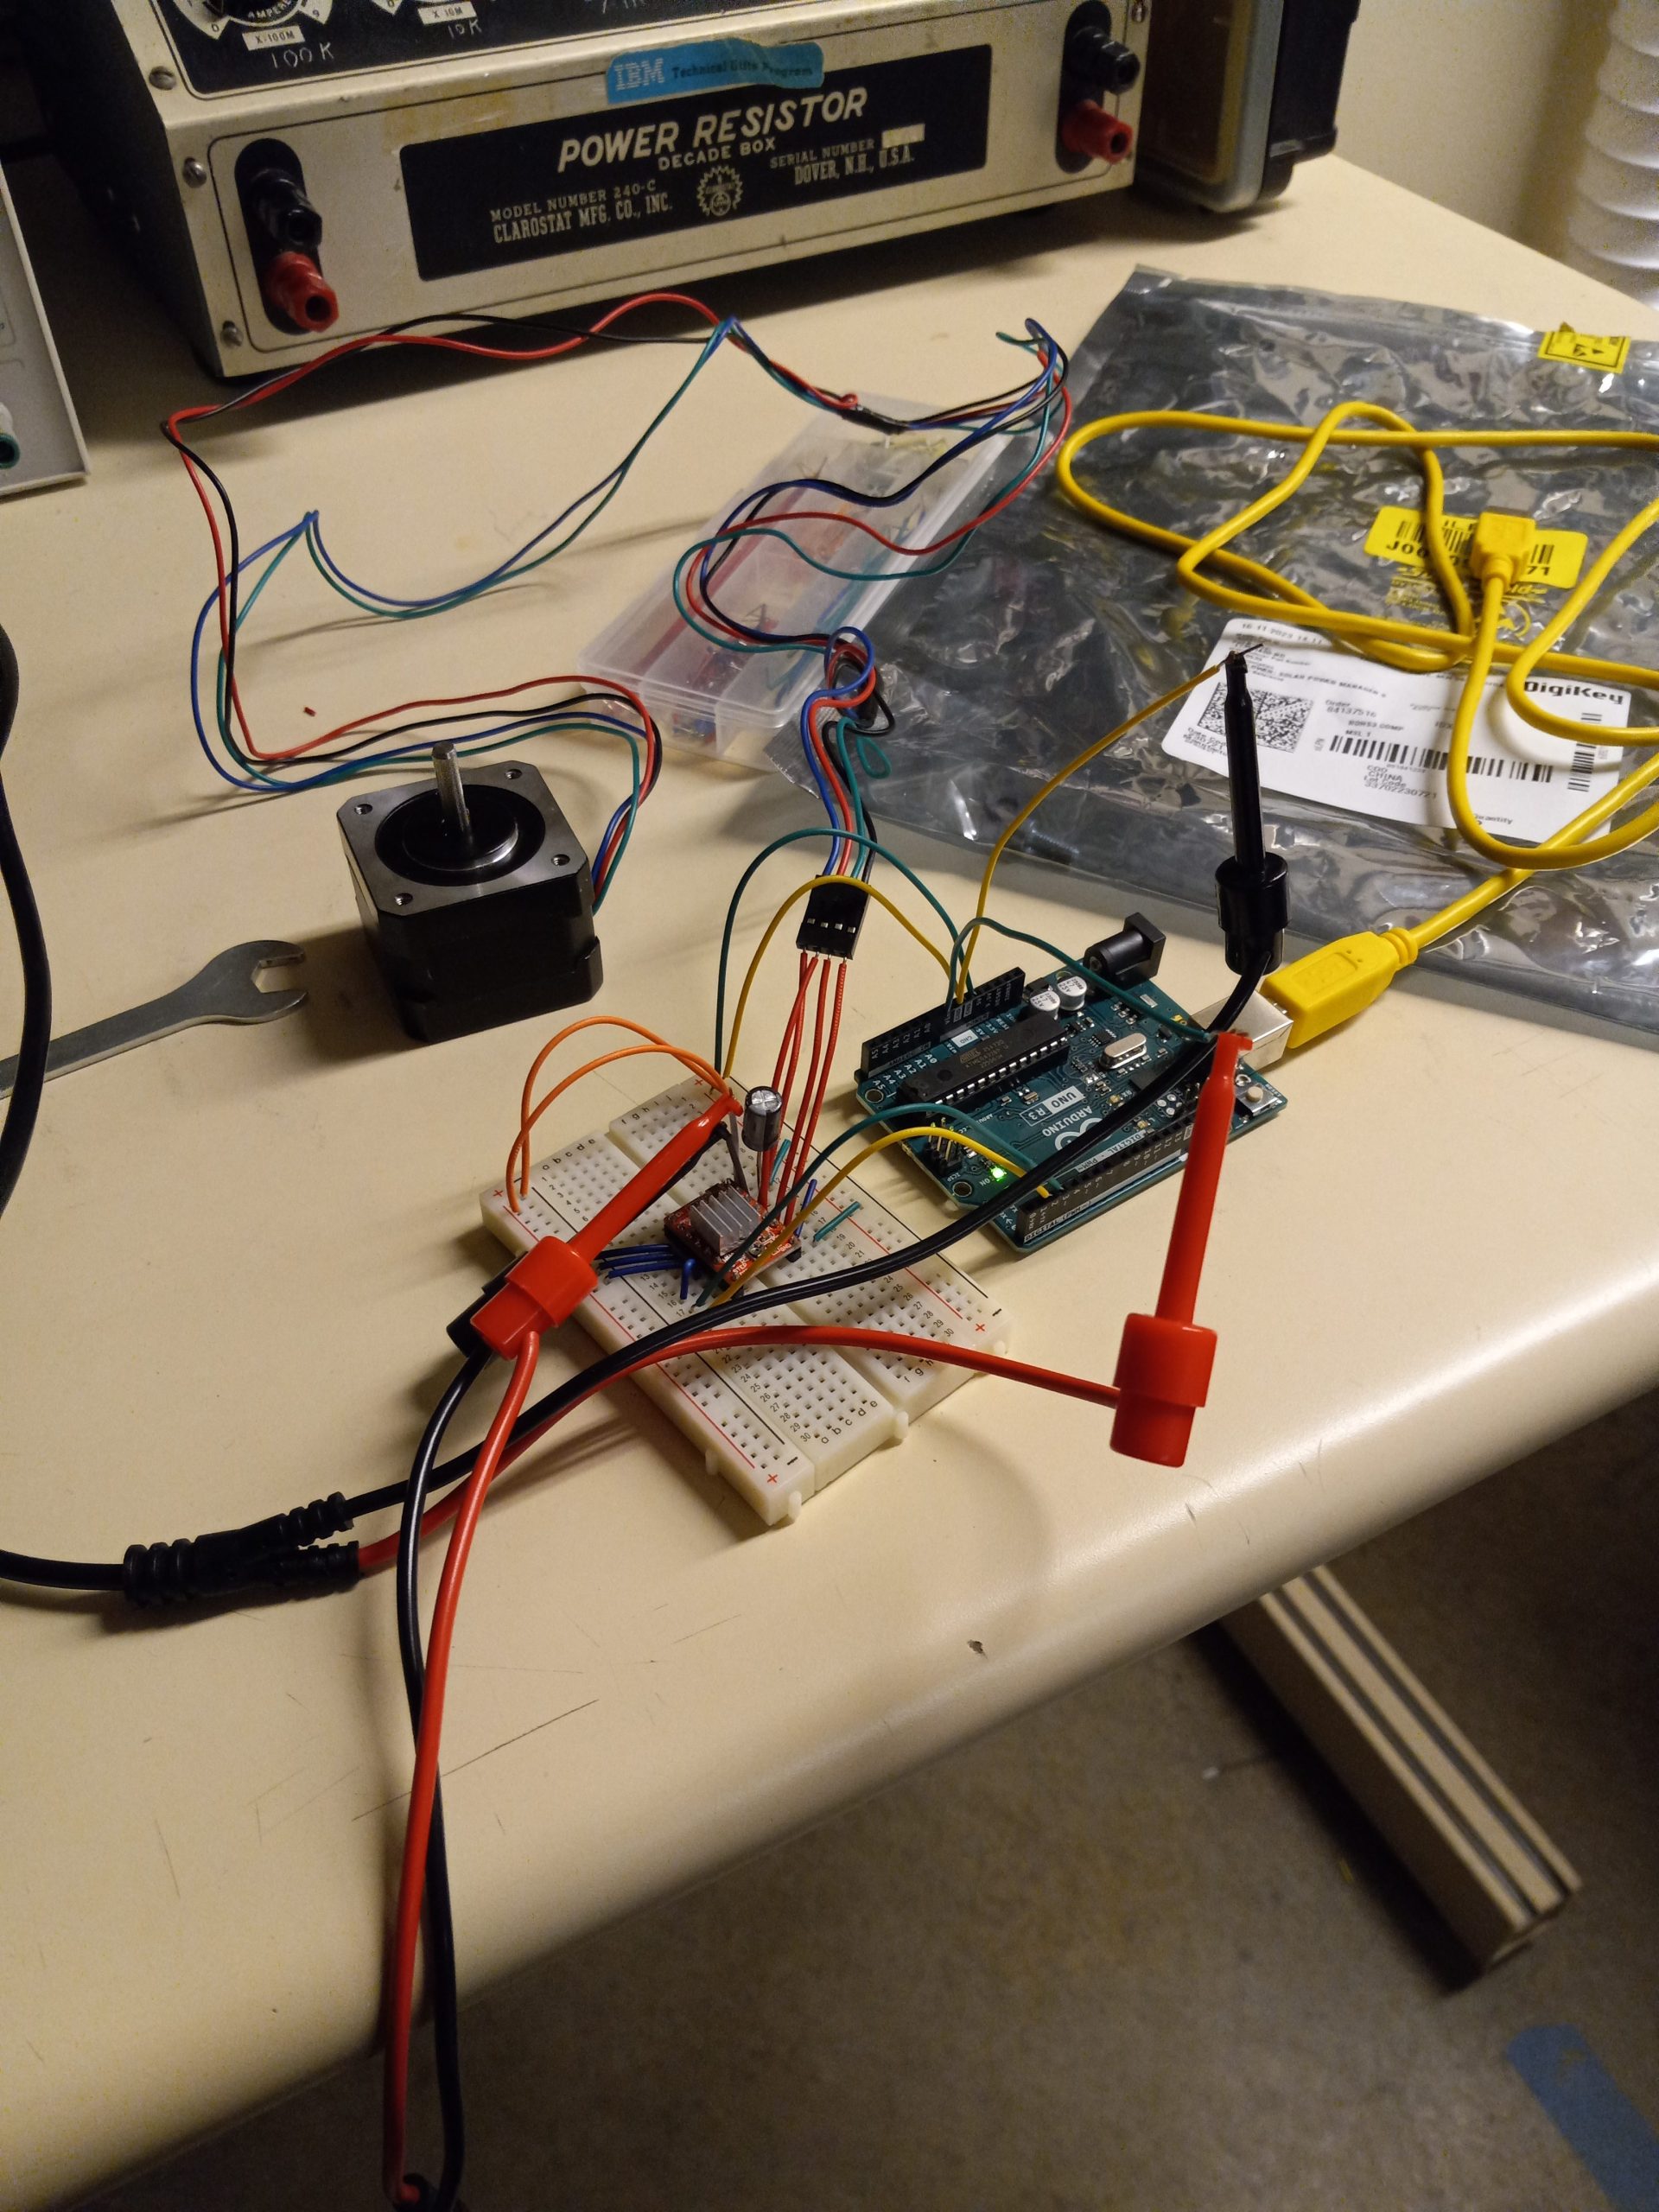
- Wired Arduino to a stepper driver and stepper motor (using temporary parts found in lab)
- Tested function of stepper motor– it works as expected (constant rotation in one direction)
To-do list for next week:
- GOAL: Create more complex functions for stepper motor
- Add limit switch to the stepper motor circuit
- Add an activation button to the stepper motor circuit
- Code the stepper to move in two directions instead of just one
- Code the stepper to move a set distance on activation button press, and a set distance in the opposite direction when the limit switch is pressed
Problems:
- Parts have still not arrived. I used available lab parts to make a temporary solution.
Concerns for next week:
- I’m concerned that the parts might still not arrive.
Week 7:
Progress:
- Created code to reverse stepper motor rotation when limit switch is pressed
- Created code to move stepper motor a specified distance when the activation button is pressed
- Added limit switch and activation button to the circuit
To-do list for next week:
- Add another stepper motor, limit switch, and button to have 2 functioning steppers
- Edit the code to make the second stepper operational
- Create PowerPoint and perform Critical Design Review
Concerns for next week:
- None as of right now
Week 8:
Progress:
- Created code for running two stepper motors (have not been physically added yet)
- Presented at Critical Design Review
To-do list for the week after break:
- Get the second stepper motor wired up
- Start looking into designs for mounting the stepper motors to the frame
Concerns for that week:
- While I have verified that the power supply supplies 12V, I am not sure if it also supplies 5V for the electronics.
Week 9:
Progress:
- Obtained the Elegoo and a driver board that holds multiple drivers
To-do list for next week:
- Figure out which pins on the driver board correspond to which pins on the Elegoo and change the programming accordingly
- Replace the test Arduino and stepper hardware with the new Elegoo hardware
- Create a project overview
Concerns:
- Some time concerns due to the workload from other classes
Week 10:
Progress:
- Figured out which pins on the driver board correspond to the Elegoo pins
- Connected two stepper motors to driver board and got them operational
To-do list for next week:
- Measure the amount of chocolate in mL is needed to fill a mold
- Determine the distance the plunger needs to travel to extrude that amount of chocolate and calculate the number of steps it would take in the code
- Edit the code to have the motors turn that distance upon button press
Concerns:
- The silicone molds are taking longer than expected to get back, may need to decide as a group whether we want to order them from a different source if it’s looking like they won’t come in time
- There is not a clear way to add inputs onto the driver board (aka limit switch and activation button), it may be necessary to make my own circuit on perf board
Week 11:
Progress:
- Burned out a stepper driver and fixed it afterwards
- Gathered components to move circuit to a soldered perf board
- Decided on circuit dimensions so Dylan can print the casing
To-do list for next week:
- Still need to measure mL needed to fill chocolate mold (and edit the code to reflect that)
- Move the circuit to perf board (more permanent and secure and can take inputs)
Concerns:
- Can’t measure the mL the steppers need to extrude until the device is back from Seth’s house and the molds are done
Week 12:
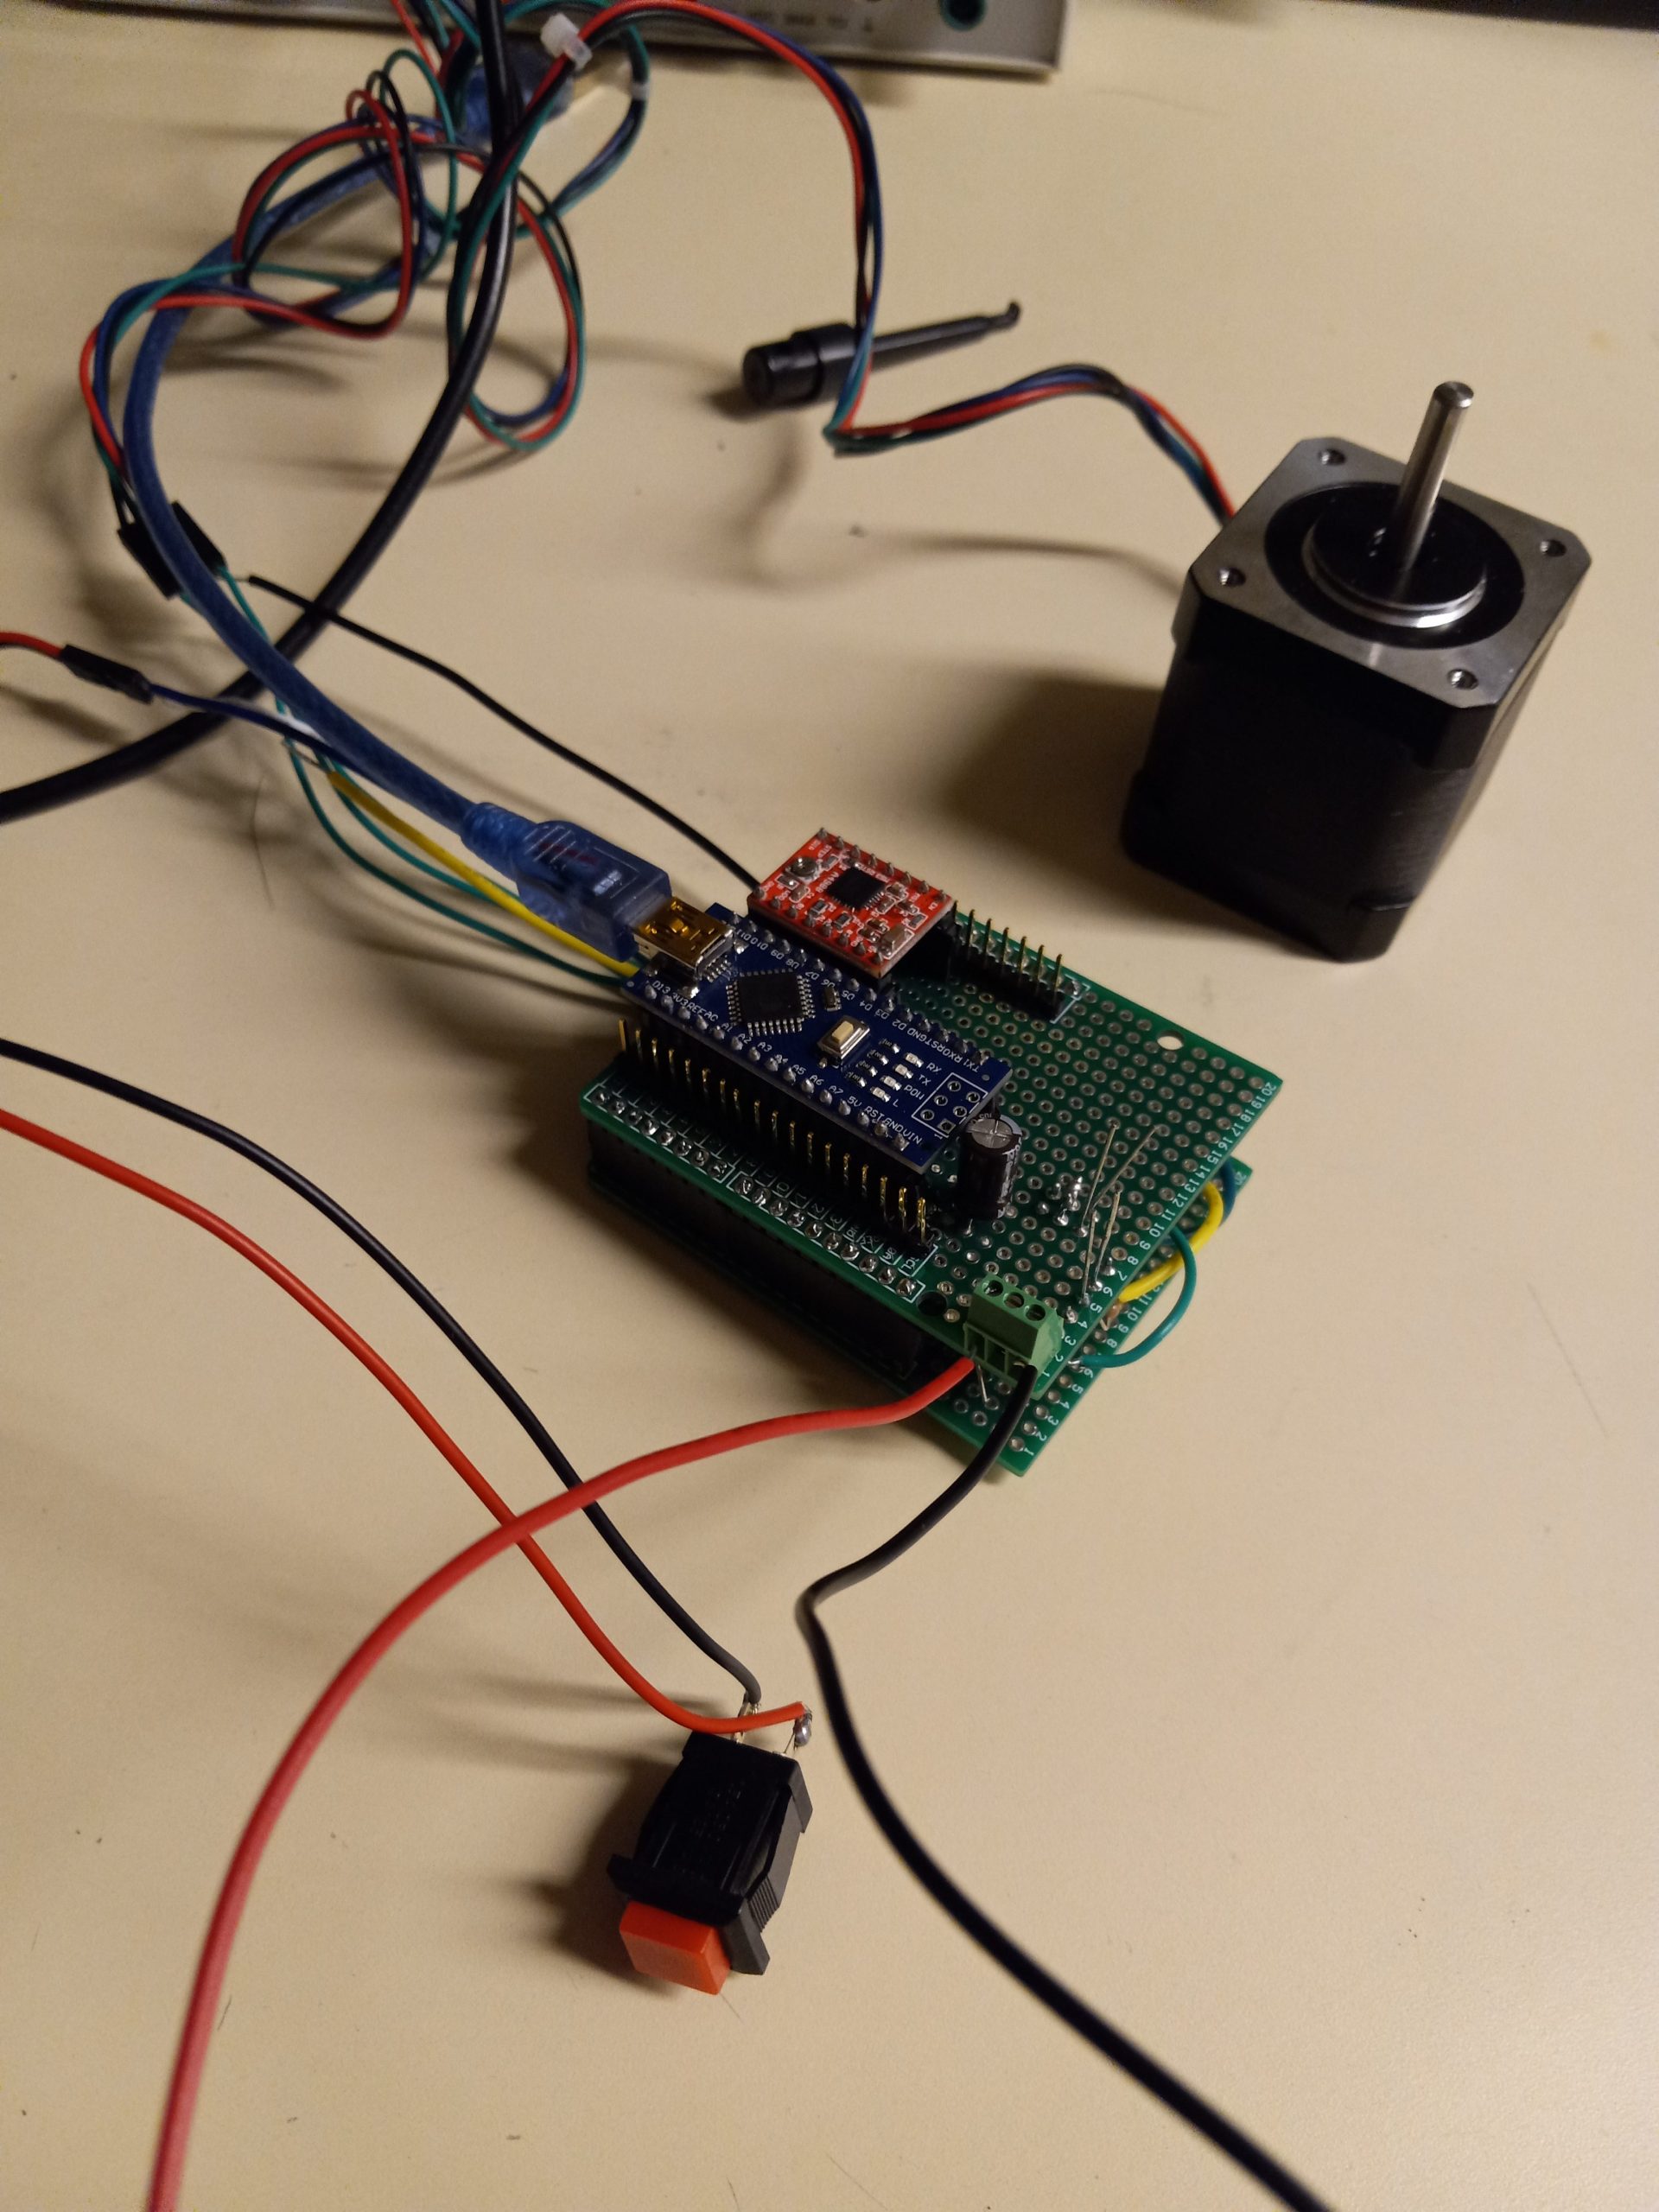
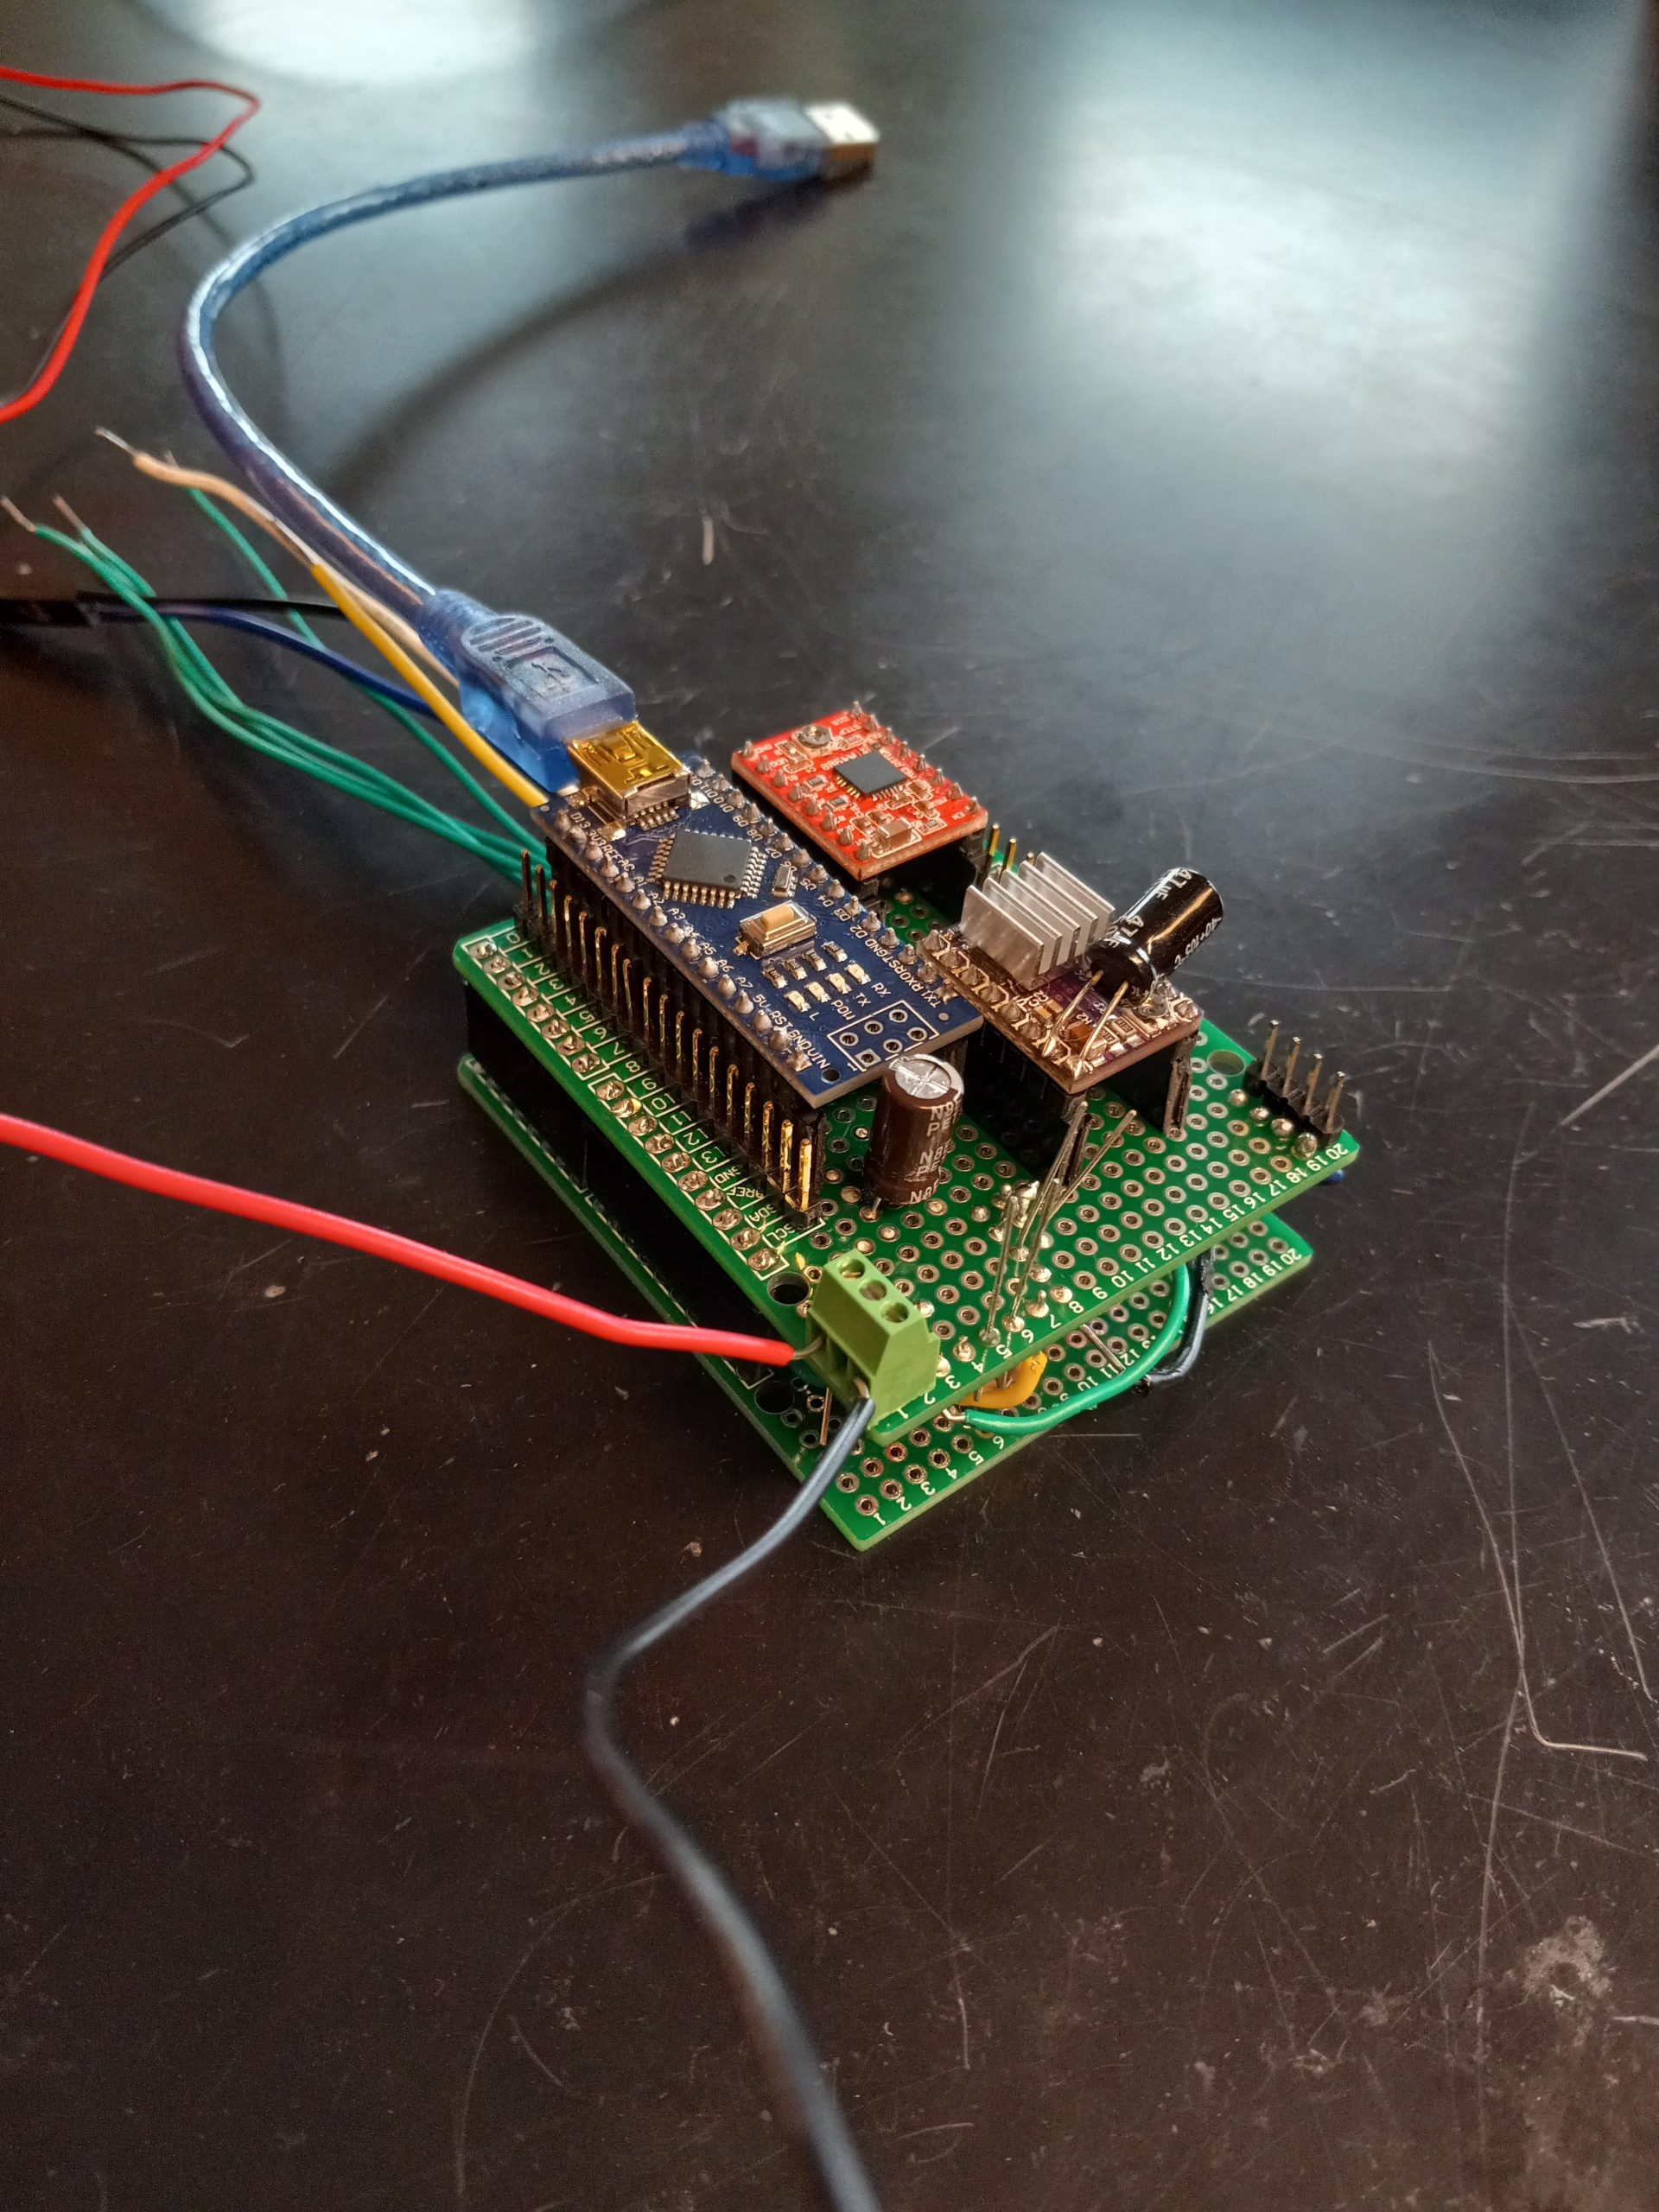
- Moved code to an Arduino Nano to reduce circuit footprint
- Soldered circuit onto perf board
- Troubleshooted circuit for quite some time (first stepper is now operational)
- Helped with project report draft
To-Do list for next week:
- Solder the second stepper driver onto the perf board
- Get the second stepper operational on perf board (will likely involve troubleshooting)
Concerns:
- End of semester is getting close, finishing on time should be possible but will be tight
Week 13:
Progress:
- Second stepper driver circuit soldered to perf board, still need to solder a few more connections to the Arduino so it’s not quite testable yet
- Scheduled project check-off time with team
- Improved Characterization and Methodology sections of final report
- Identified a potential problem with powering servos for mix-ins device: 5V pin on the Arduino can’t supply enough current to drive a servo and the power supply is 12V, which also can’t be used for the servos
- 5V wall plug-in sourced from the lab to potentially provide current for the servos
To-Do list for next week:
- Finish the last few connections on the second driver
- Test second driver for functionality
- Work with Seth to integrate electrical with mechanical
- Create code for servos
- Test the functionality of the 5V wall plug-in for the servos
Concerns:
- Next week will be a time crunch
- Perf board is getting quite full of wires, it may be difficult to solder all the connections needed
BREAD Bioreactor
Week 2:
Progress:
- Set up meeting times with group members
- Connected with Canadian project members to get up to speed on what was done previously
- Contacted sponsor to obtain project information and project wishlist
To-do list for next week:
- Research electronic pressure sensors and methods of electronic pressure control
- Look over code to learn how BREAD system works
- Research components needed to produce a new slice
Concerns:
- None for now
Week 3:
Progress:
- Researched electronic pressure gauge options and prices
- Researched E-stop and DC-powered buzzer options and prices
- Researched pressure control options
- Contacted stakeholder for information on the function of the bioreactor
- Installed Ki CAD for future circuit design
To-do list for next week:
- Contact stakeholder for information on current pressure control capabilities (does it interface with electronics, or does it use manual pressure release valves?) and verification that our plans fulfill their needs
- Decide on the best options for parts
- Order parts if possible
Concerns:
- Off-the-shelf pressure control methods are looking quite expensive from a brief look online, expensive parts might not fit the open source criteria
Week 4:
Progress:
- Met with group to determine parts needed for slice design
- Formed a shopping list of parts to be ordered
- Researched pressure control methods
To-do for next week:
- Order parts on list
- Open up KiCad design and start the basic design
- Take a look at the Estop button in the lab
- Gave work update presentation with the rest of the group and worked on presentation slides
Concerns:
- Difficult to find the exact parts that they used for the electrical cabinet, there’s a chance the screw terminals we are ordering might look strange
Week 5:
Progress:
- Ordered screw terminals, pressure sensor, Arduino Nano, and wire
- Found old slice code on GitHub
- Started figuring out how the code works
To-do for next week:
- Begin slice design
- Figure out how to make an estop interrupt in the code
Concerns:
- None for now
Week 6:
Progress:
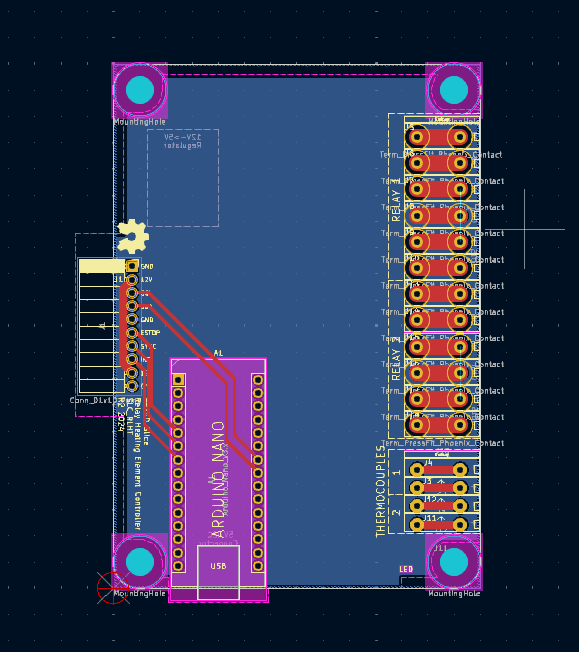
- Created a basic slice design on KiCad
- Worked on code– some difficulty with getting interrupts to trigger, not sure what the issue is
To-do for next week:
- Continue working on the pressure slice
- Figure out why the interrupt isn’t configuring properly
Concerns:
- Concerned about not being able to get the estop code working for the slice
Week 7:
Progress:
- Presented for CDR
- Created CDR presentation
To-do for next week:
- Work on slice design
Concerns:
- Exams next week will make progress difficult
Week 8:
Progress:
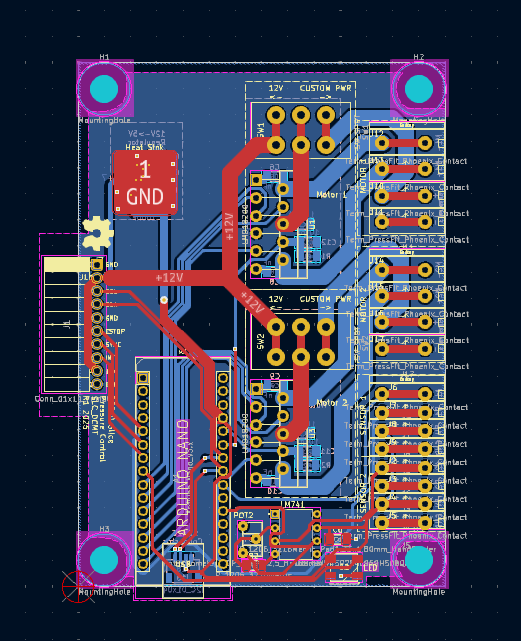
- Worked on slice design– added DC motor controllers and switches for an optional custom voltage supply, as I am not 100% confident that the motors we are using take 12V
- Added estop indicator light to slice design
- Realized that the screw terminals we ordered have the screws on top and not the side, meaning it would be impossible to hook up wires or unhook wires from the slice once it is installed
- Found screw terminals that match the rest of the terminals used in the cabinet, will order these to replace the wrong screw terminals we already ordered
To-do for next week:
- Finish slice design so I can order the PCB and extra parts I have added
- Take a look at the estop button system
Concerns:
- None for now
Week 9:
Progress:
- Added an op-amp to the input terminals of the board design to make it more compatible with sensors that may output small voltages (not directly necessary to our project, just could be nice for open source reasons)
- Compiled an updated list of components needed to make this slice design
To-do for next week:
- Look at estop bus/button
- Finalize slice design– make sure resistors/capacitors are correct
Concerns:
- Did not get around to checking out the estop bus this week
- It’s getting mighty close to the project deadline, I doubt that parts will come in time even if ordered now
Week 10:
Progress:
- Worked on project update presentation
- Presented project update presentation
- Finished pressure slice board
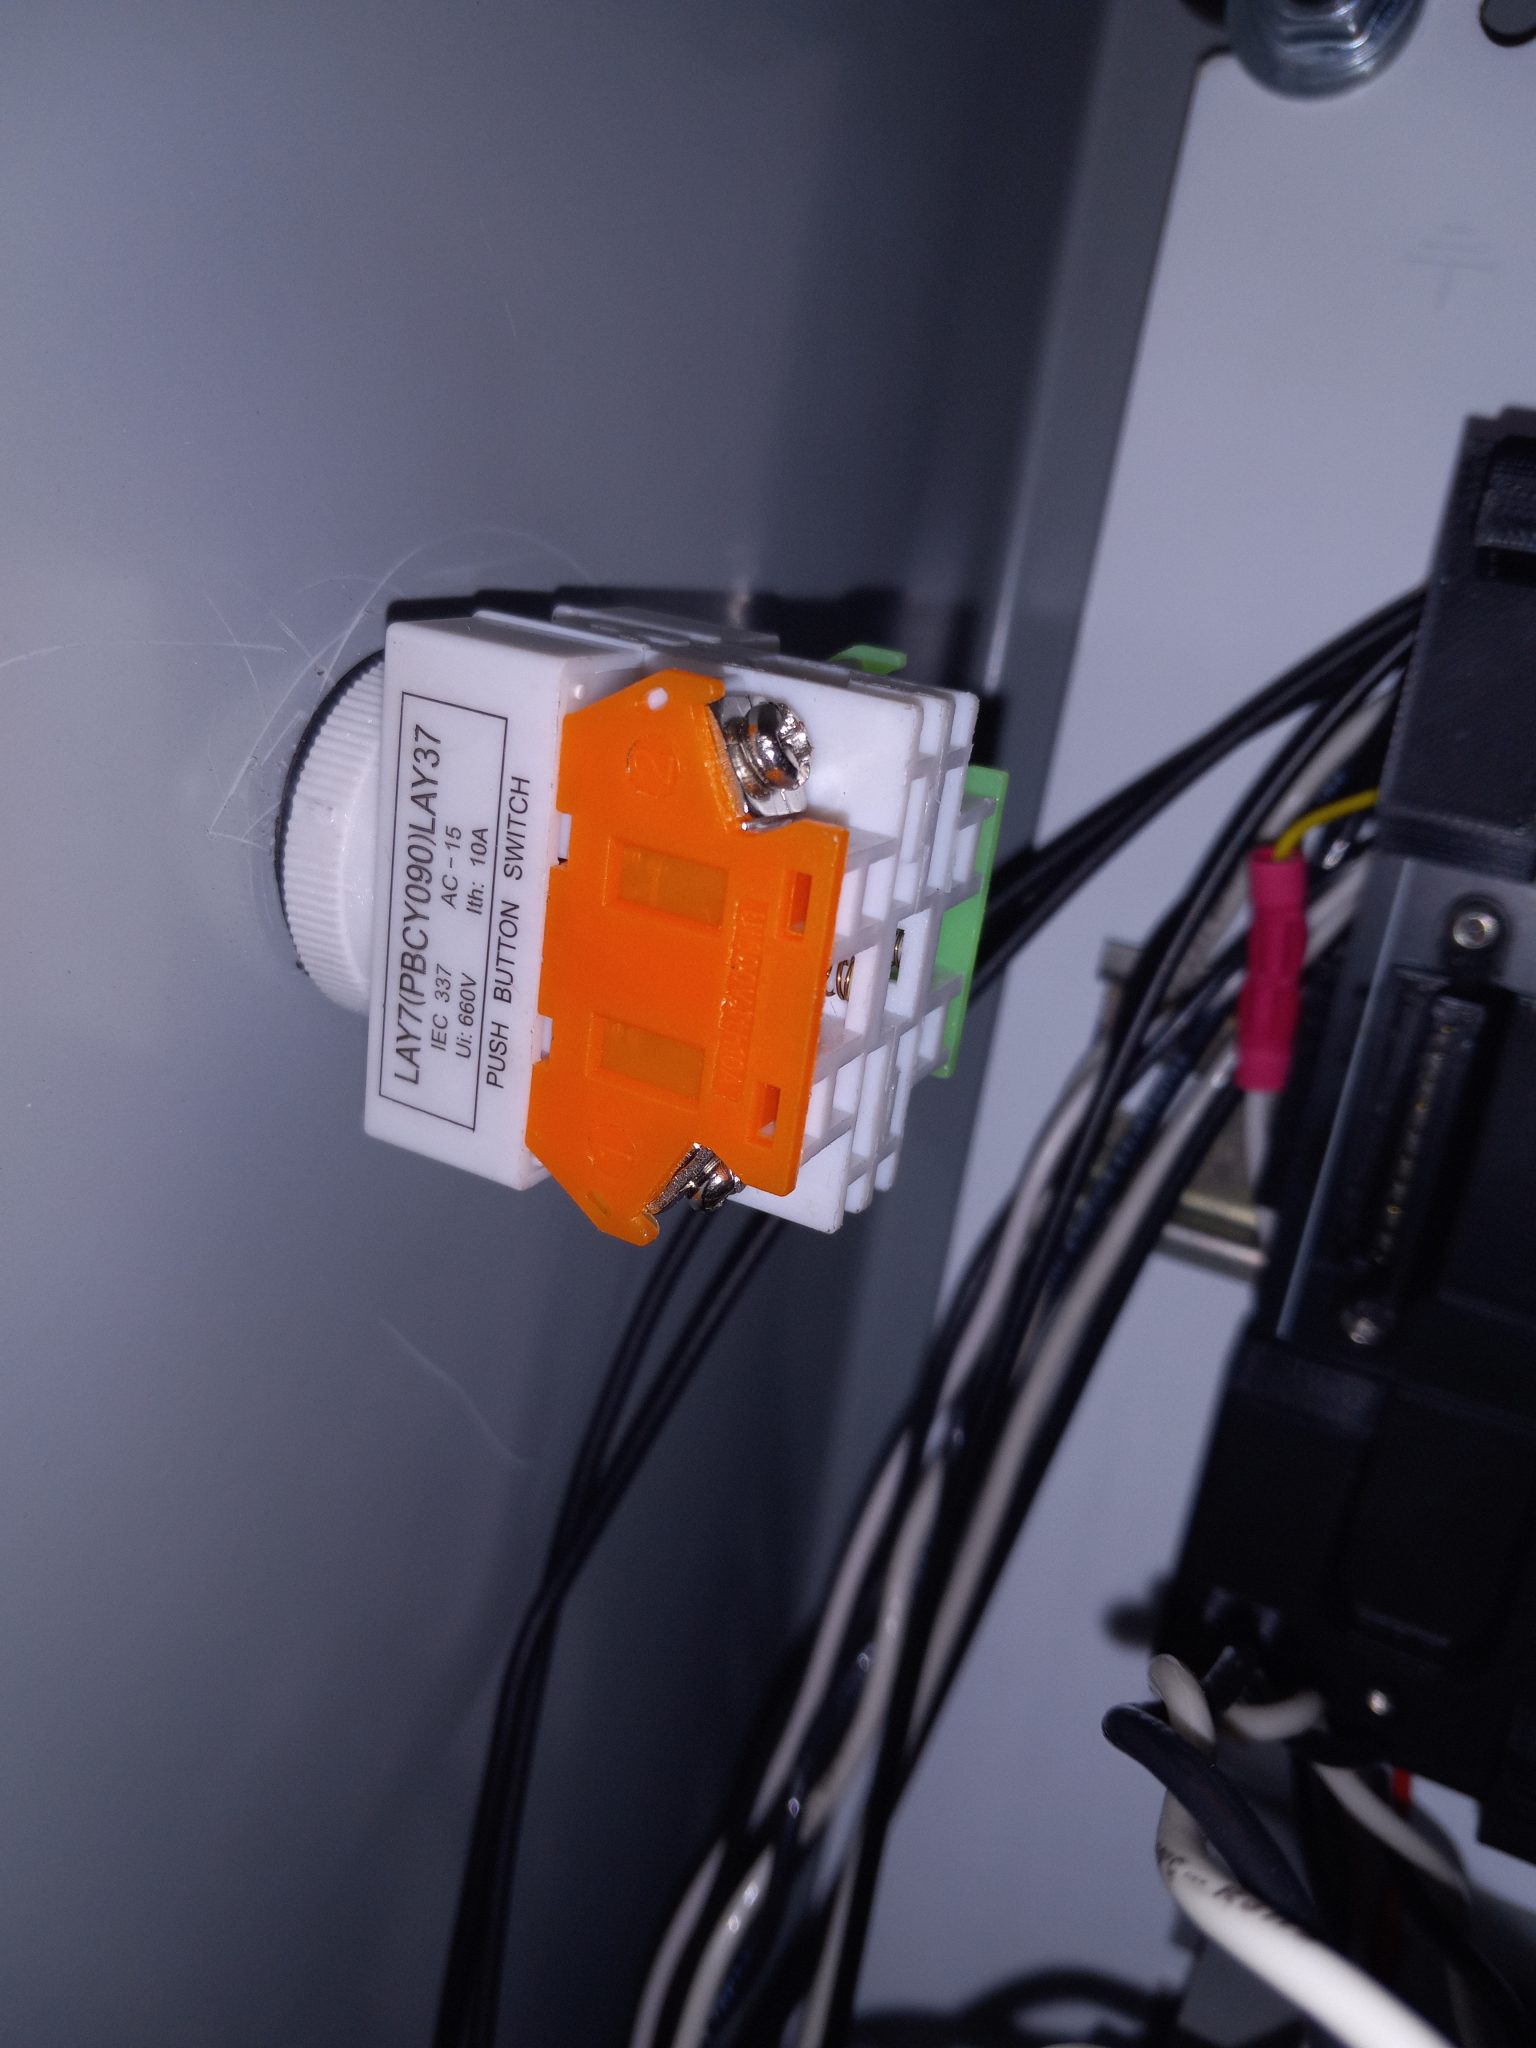
- Scoped out estop button and estop bus– problem is that there are no obvious ways to connect an external wire to the bus to interact with it
To-do for next week:
- Figure out how to wire the estop button into the bus
- Test the estop button
- Order parts/ PCB from JLCPCB
Concerns:
- It’s probably too late to get parts/PCB in time
Week 11:
Progress:
- Connected the estop button to the estop bus using the wires we ordered earlier
- Did calculations on the MOSFET used in between the ESP32 and estop bus to make sure it won’t burn out if we force the estop line high externally
- Voltage tested the bus to make sure that the line is being pulled low when it’s supposed to
- Tested estop functionality– it didn’t work
- Had to reset the system to get the motors working properly again
To-do for next week:
- Get estop button working
- Find out if the estop problem is physical or software
Concerns:
- Might not be able to get estop working in time
Week 12:
Progress:
- Attempted to get estop button working– it still doesn’t stop the motors from moving, but it does shut down control of the motors
- Presented project to Shane
- Verified that the MOSFET controlling the estop bus did not burn out, despite initial concerns
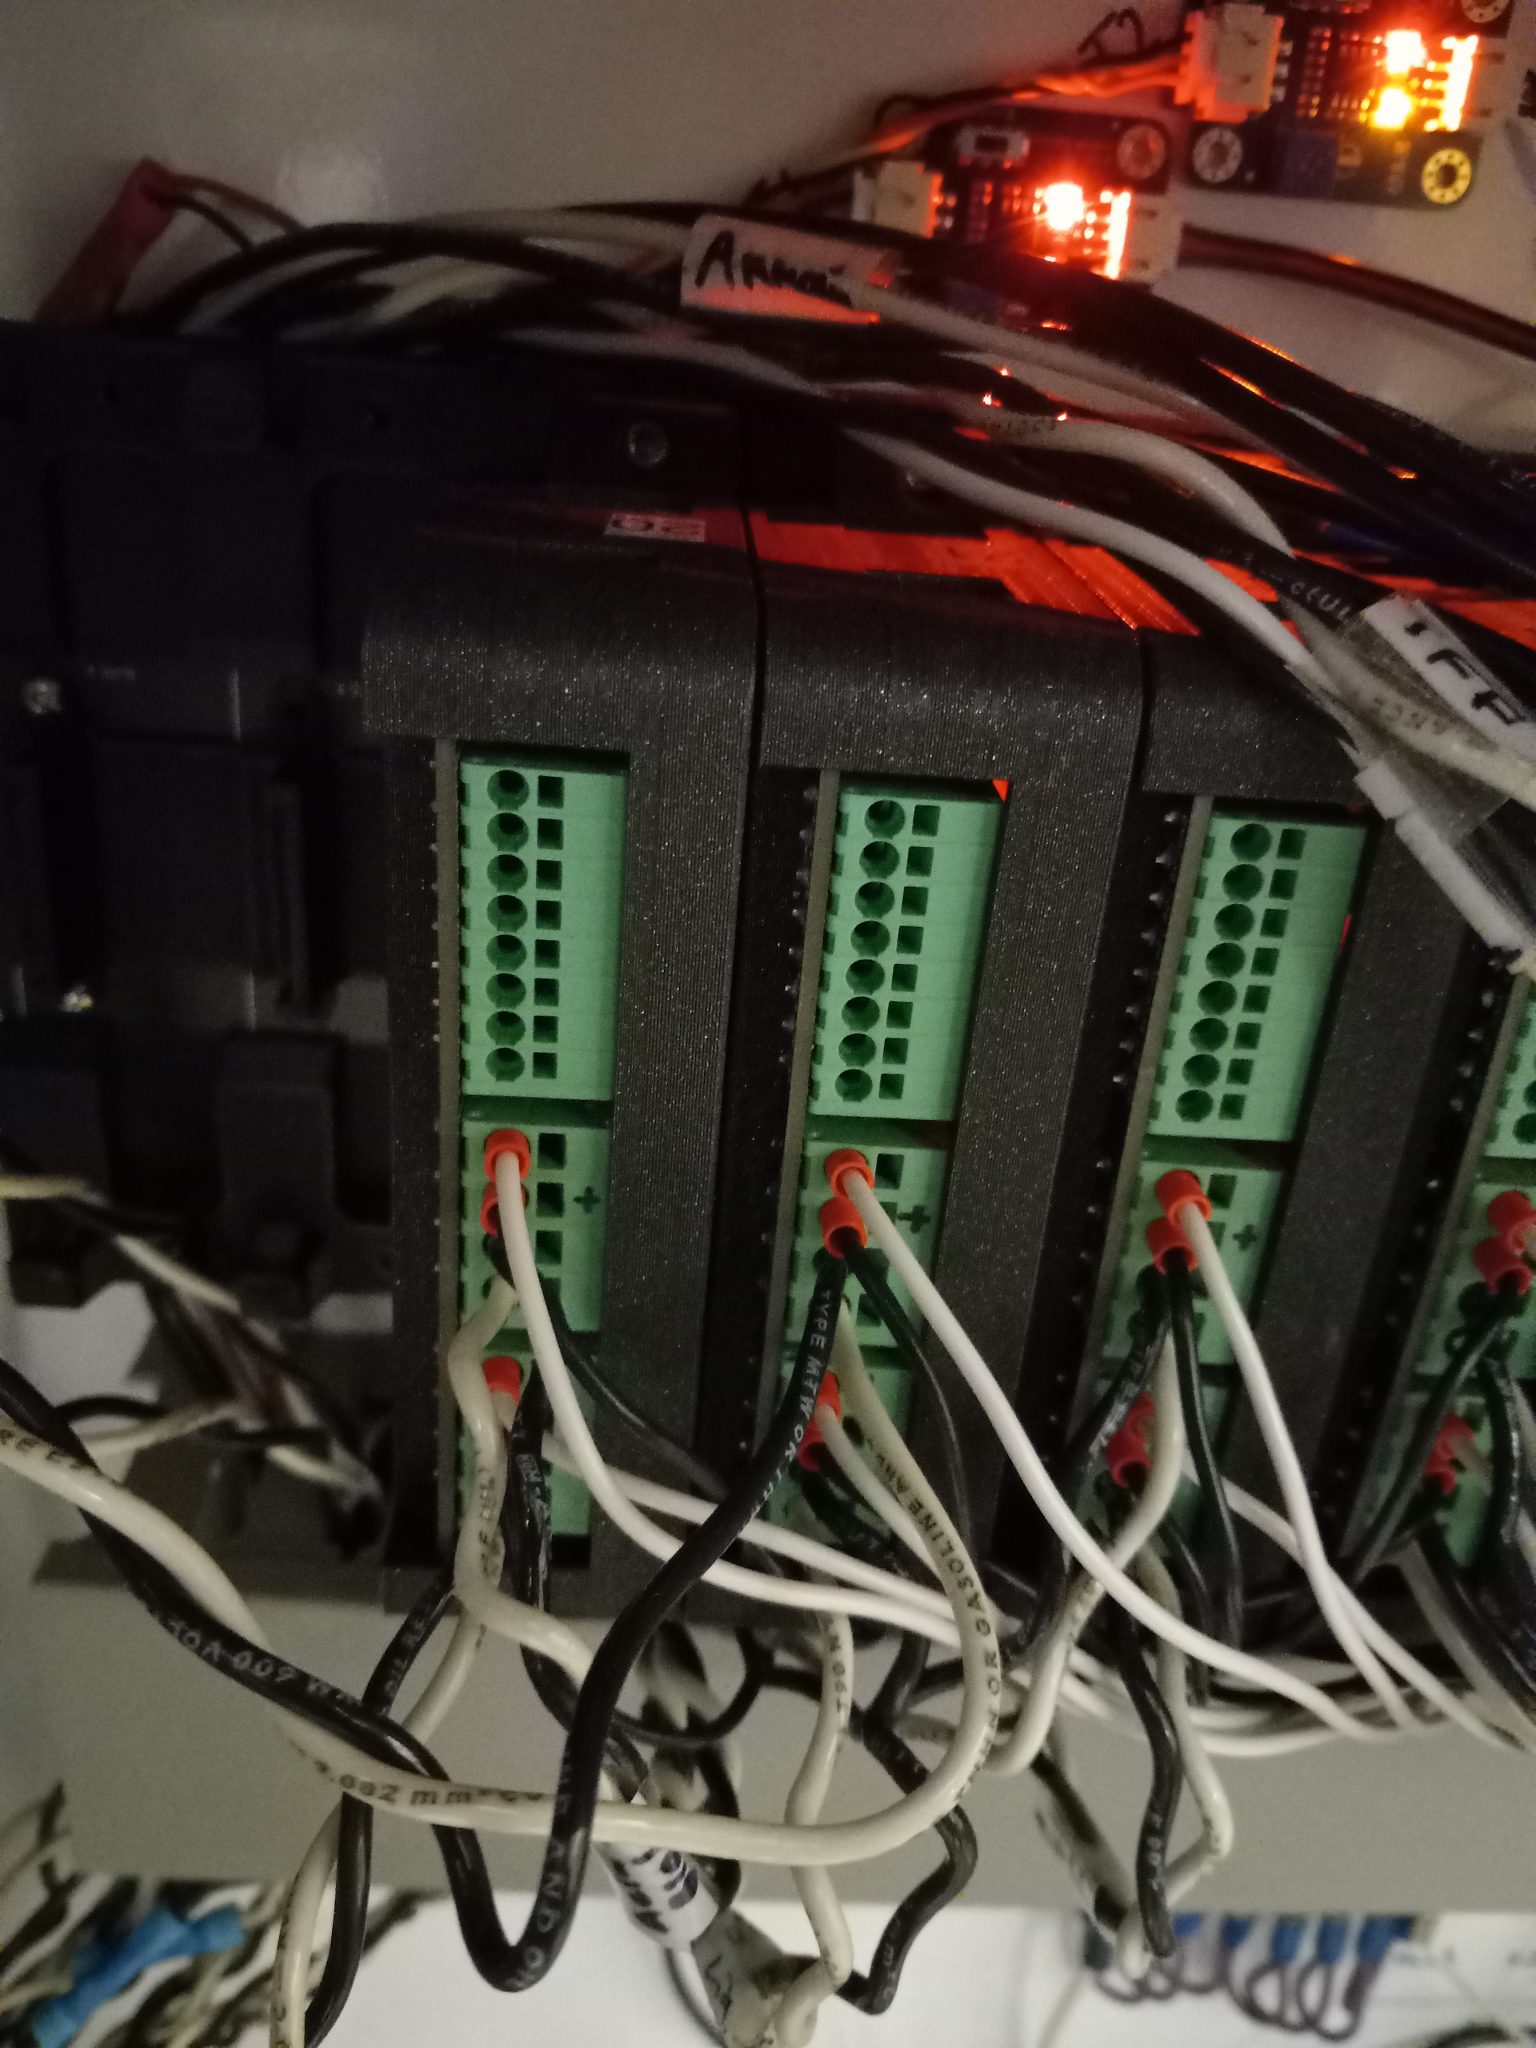
- Problem is possibly caused by a code issue instead of a hardware issue– each individual slice is being put into estop (as can be seen by the red LEDs turning on), but the ESP32 is not. I think the ESP32 is freaking out because it’s not getting any acknowledge bits back on the I2C bus
To-do for next week:
- Create project final report
Concerns:
- Couldn’t get the estop button working in time, sad